The dining room: before and (almost) after

The fixing and decorating continue to creep along here at the house.  While I’d certainly love for my fairy godmother to appear with a bag of money so we could finish it all at once, the slow pace means we’re appreciating each little improvement as it comes.  And finally, 6 months into living here, we have one room far enough along that we’re excited to show you guys what it looks like!  So we bring you: a blow-by-blow of the dining room!

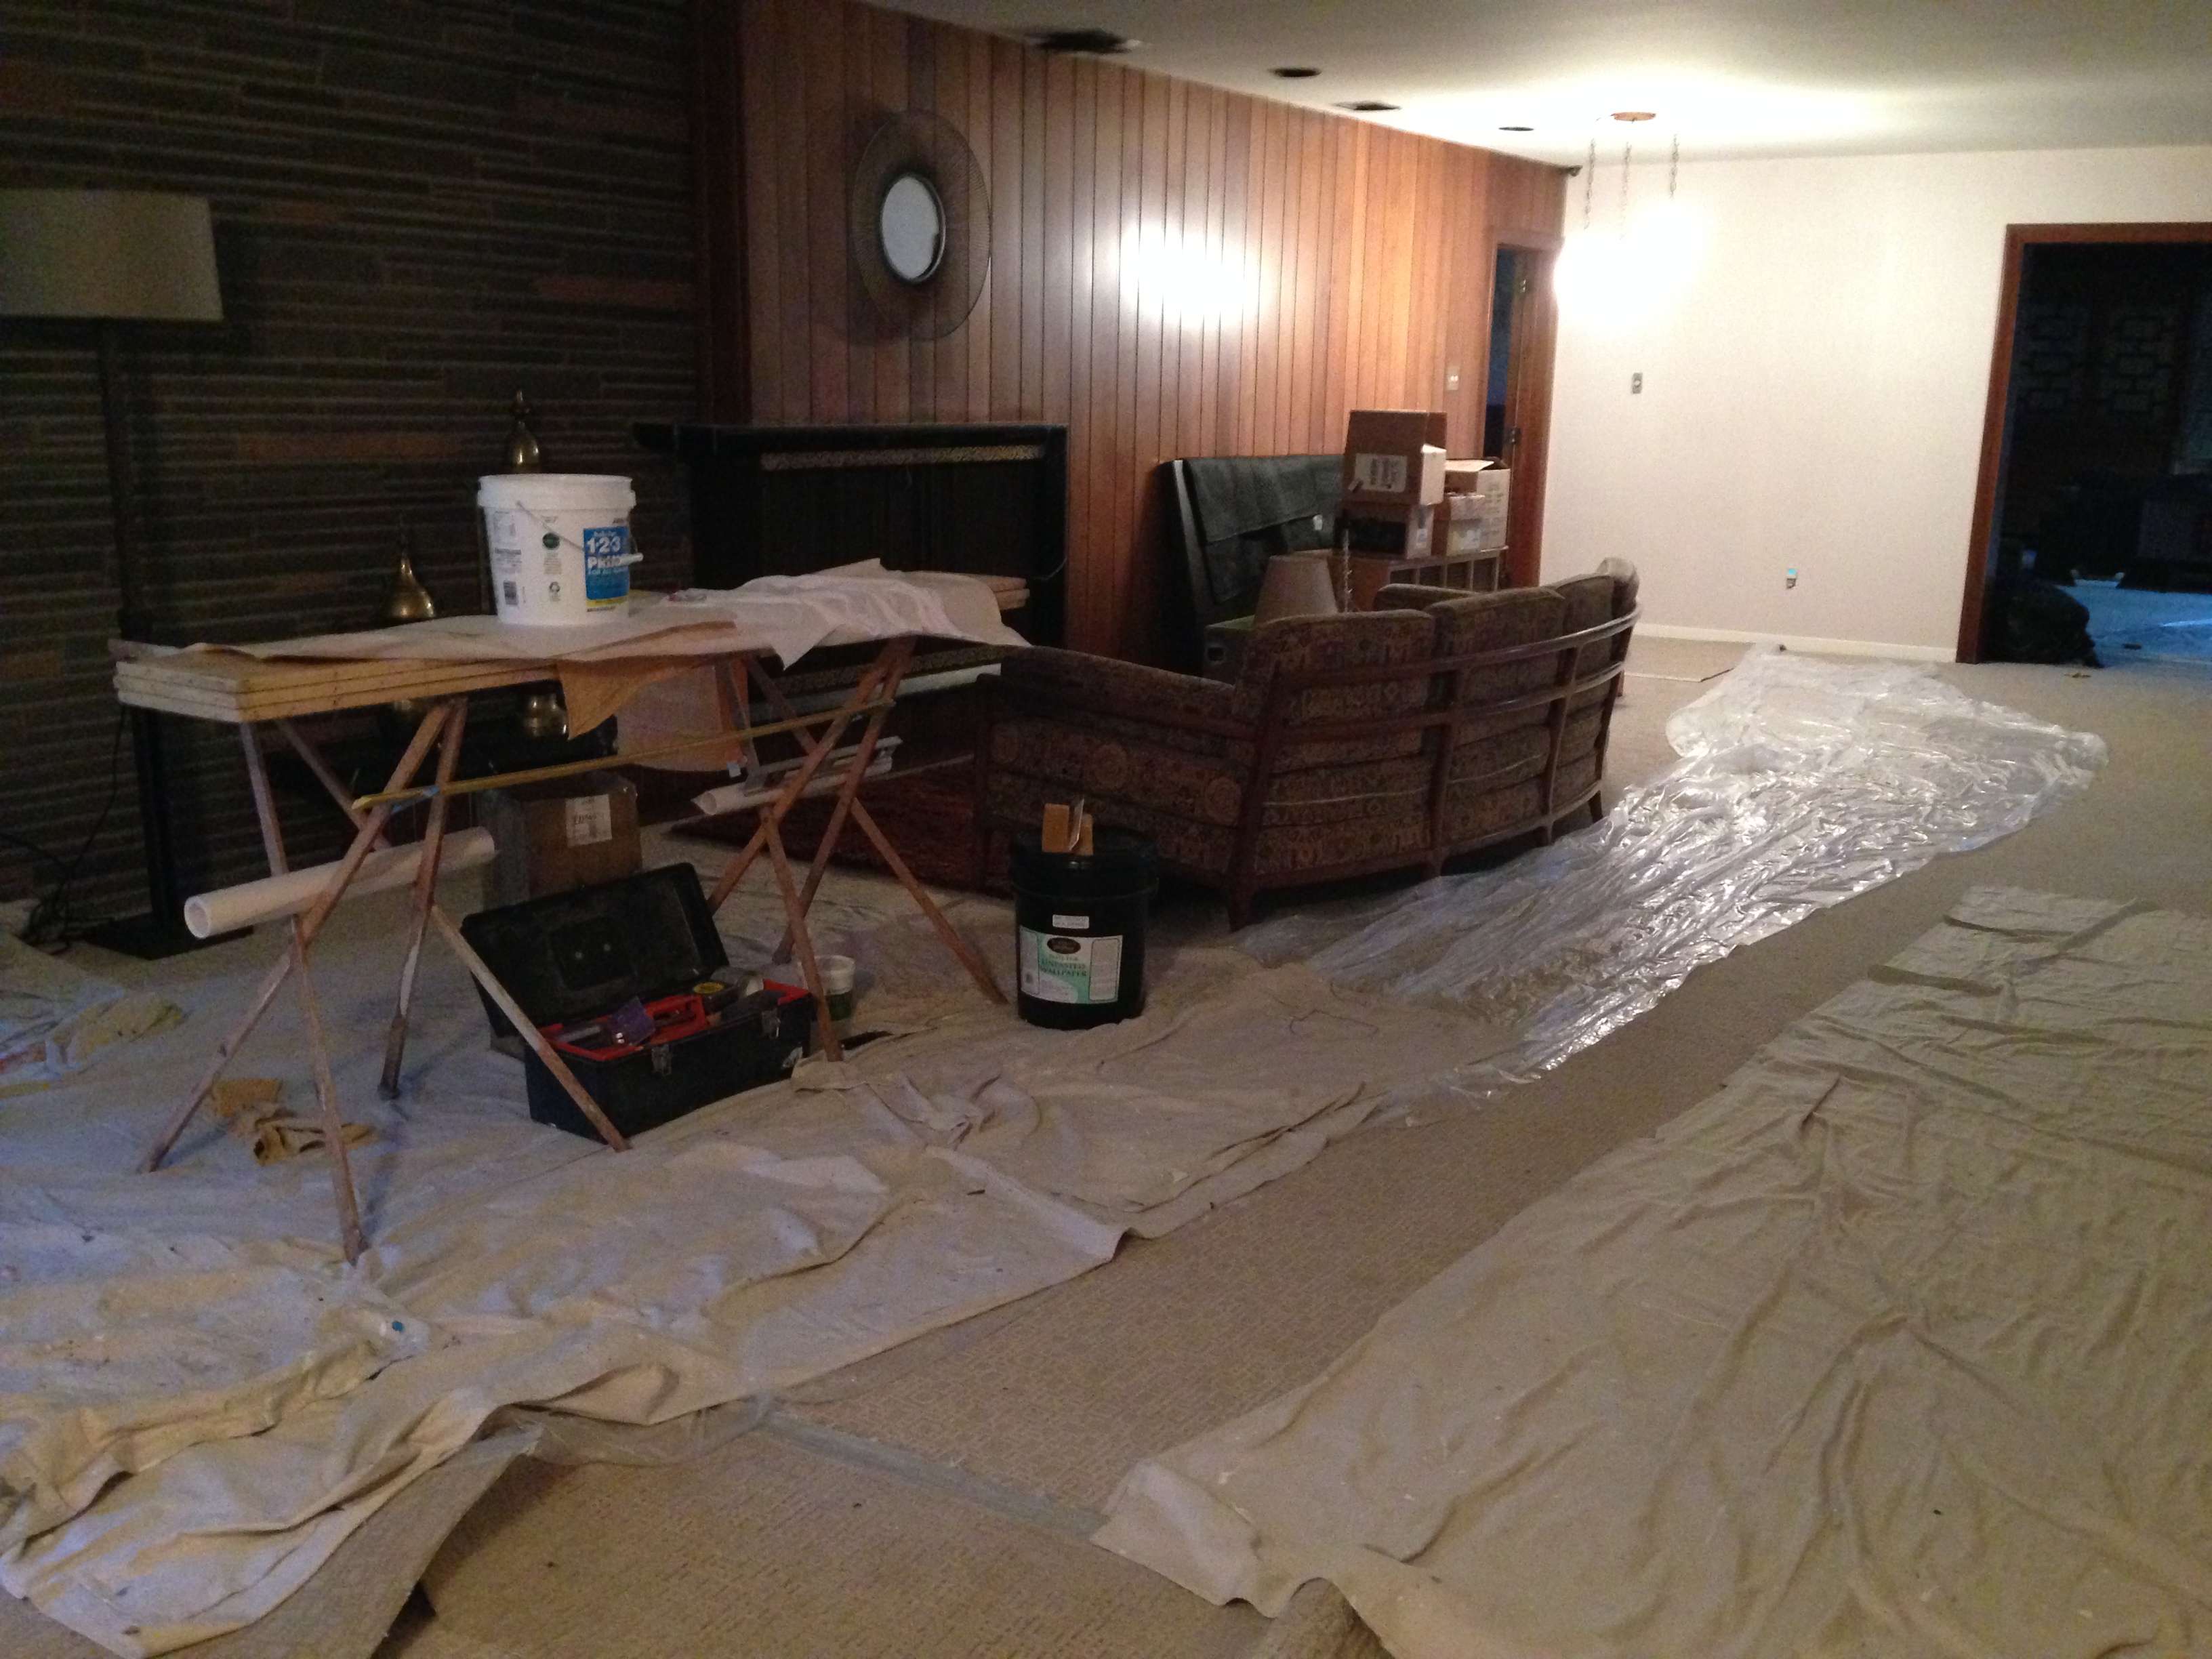
First, let’s go back to the way it was when we first looked at the house.  Here’s the official photo of the room from the real estate listing:

dining room before

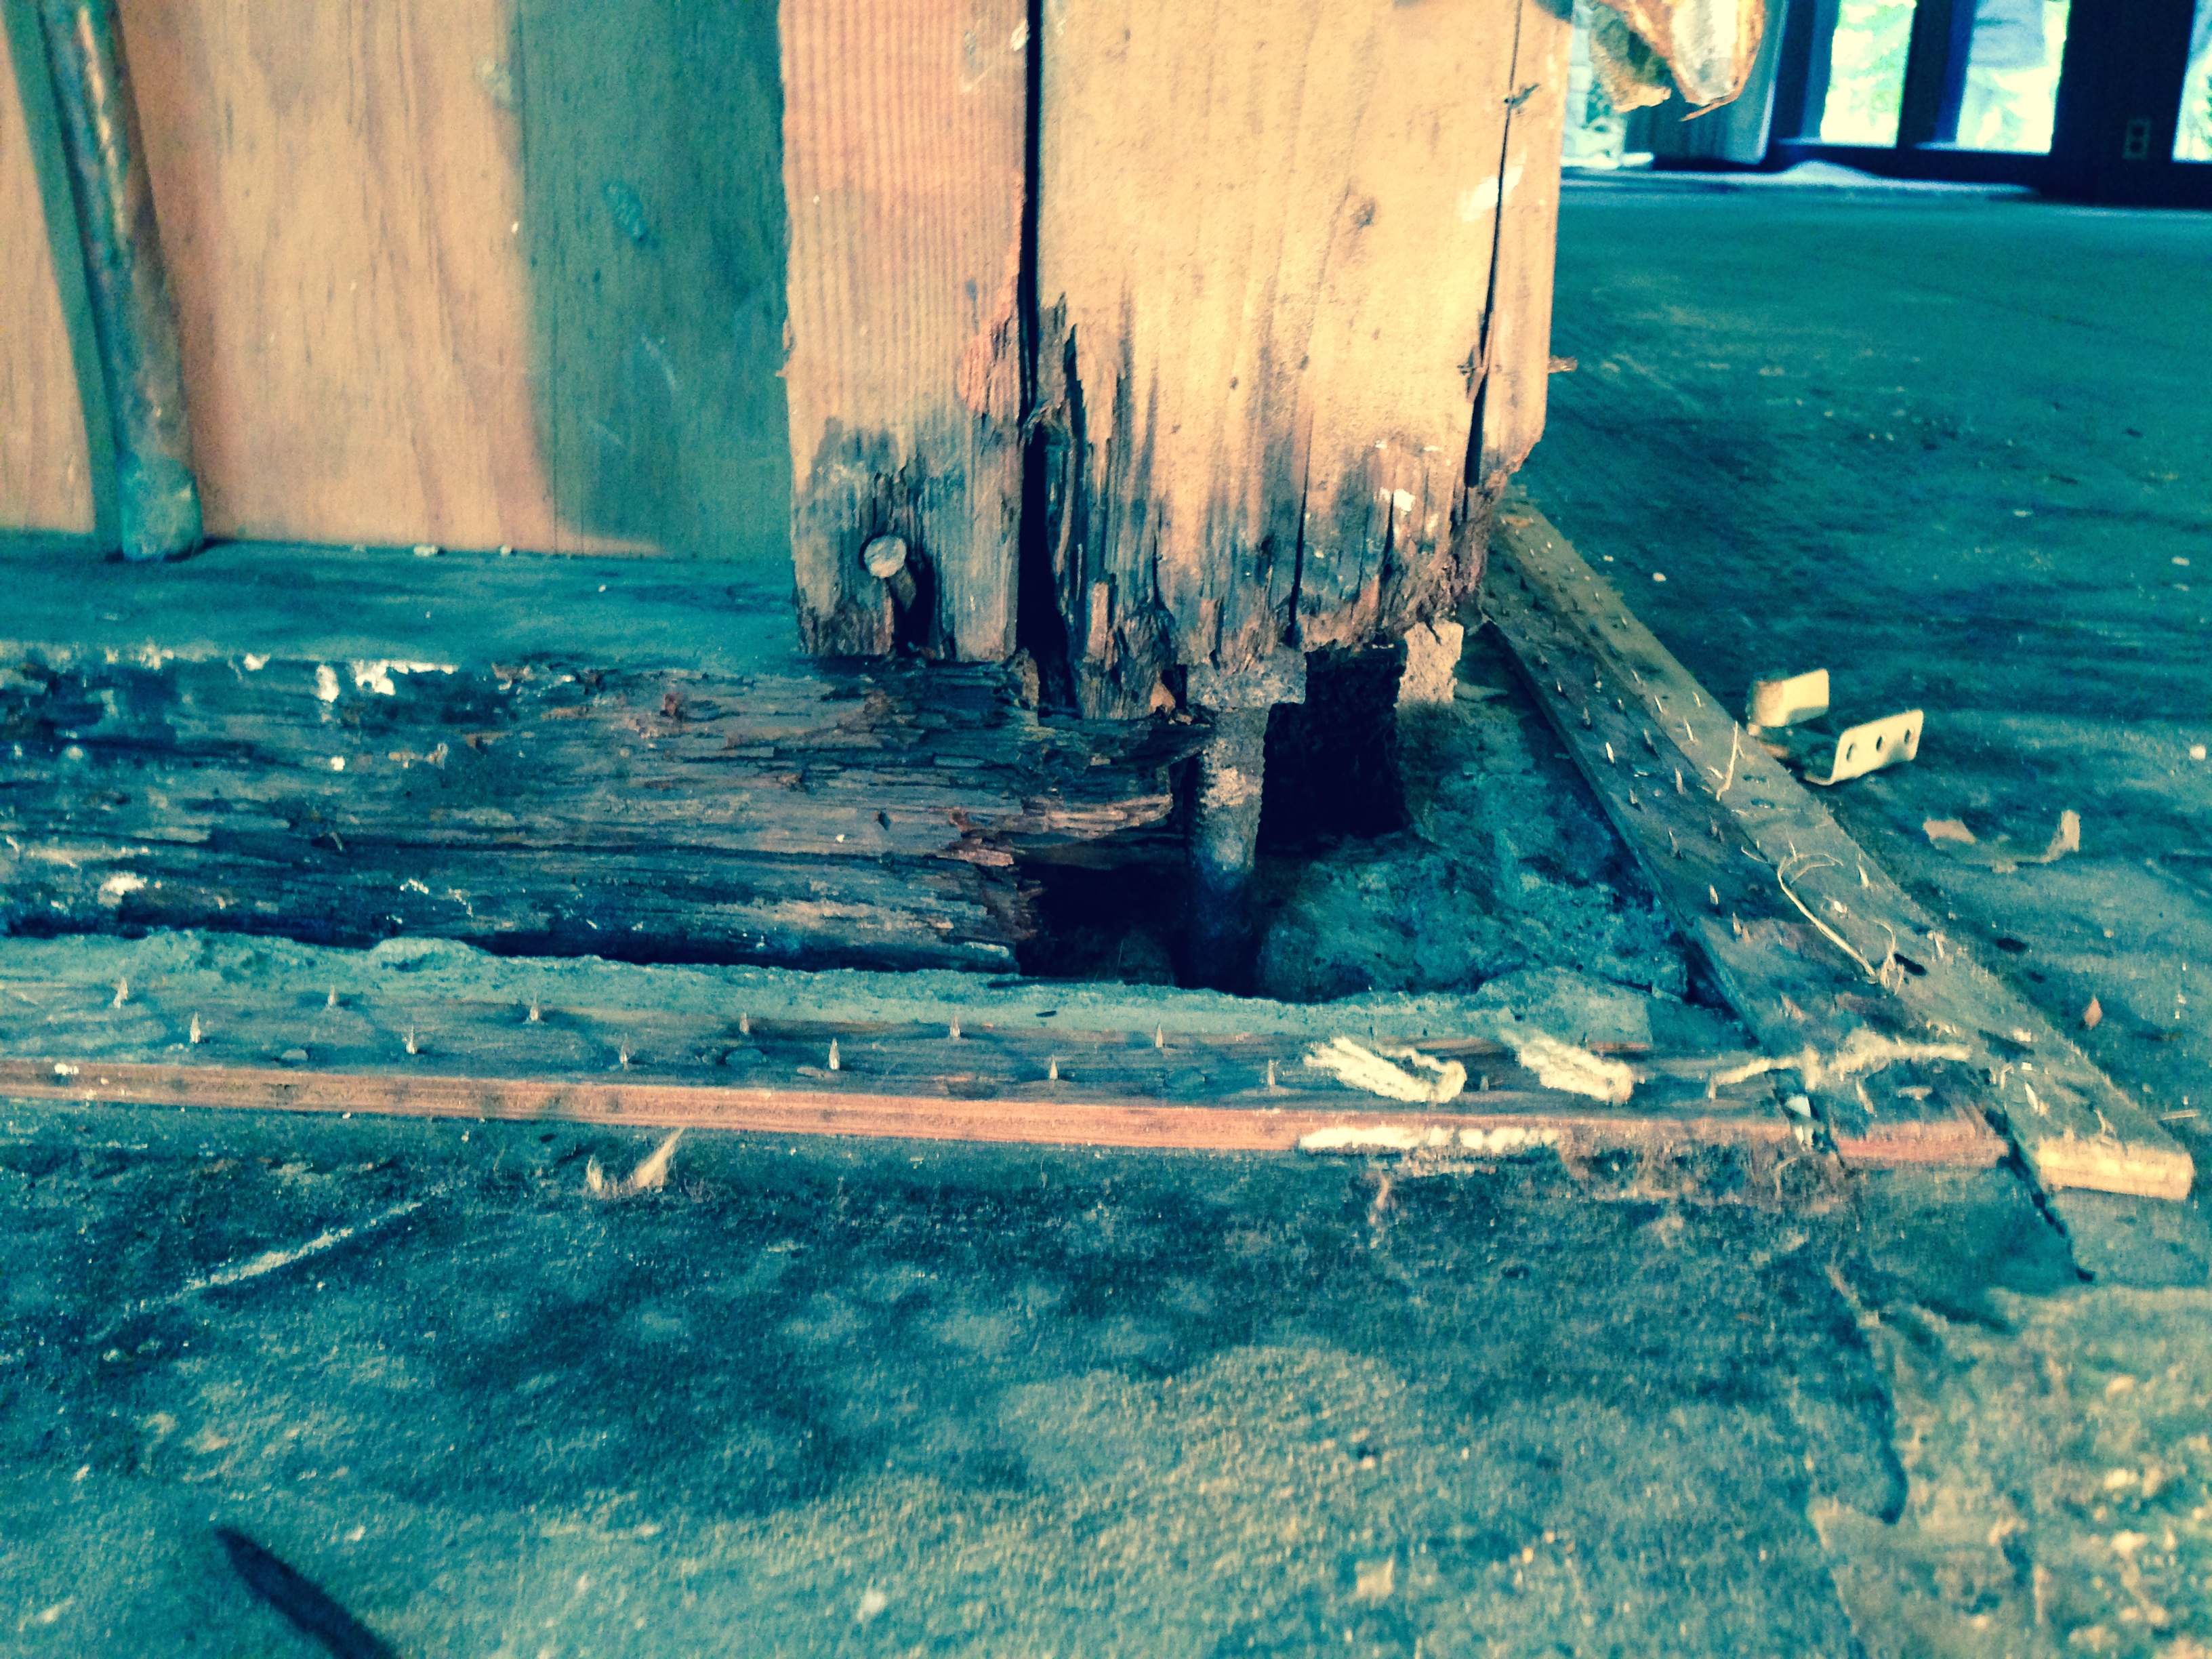
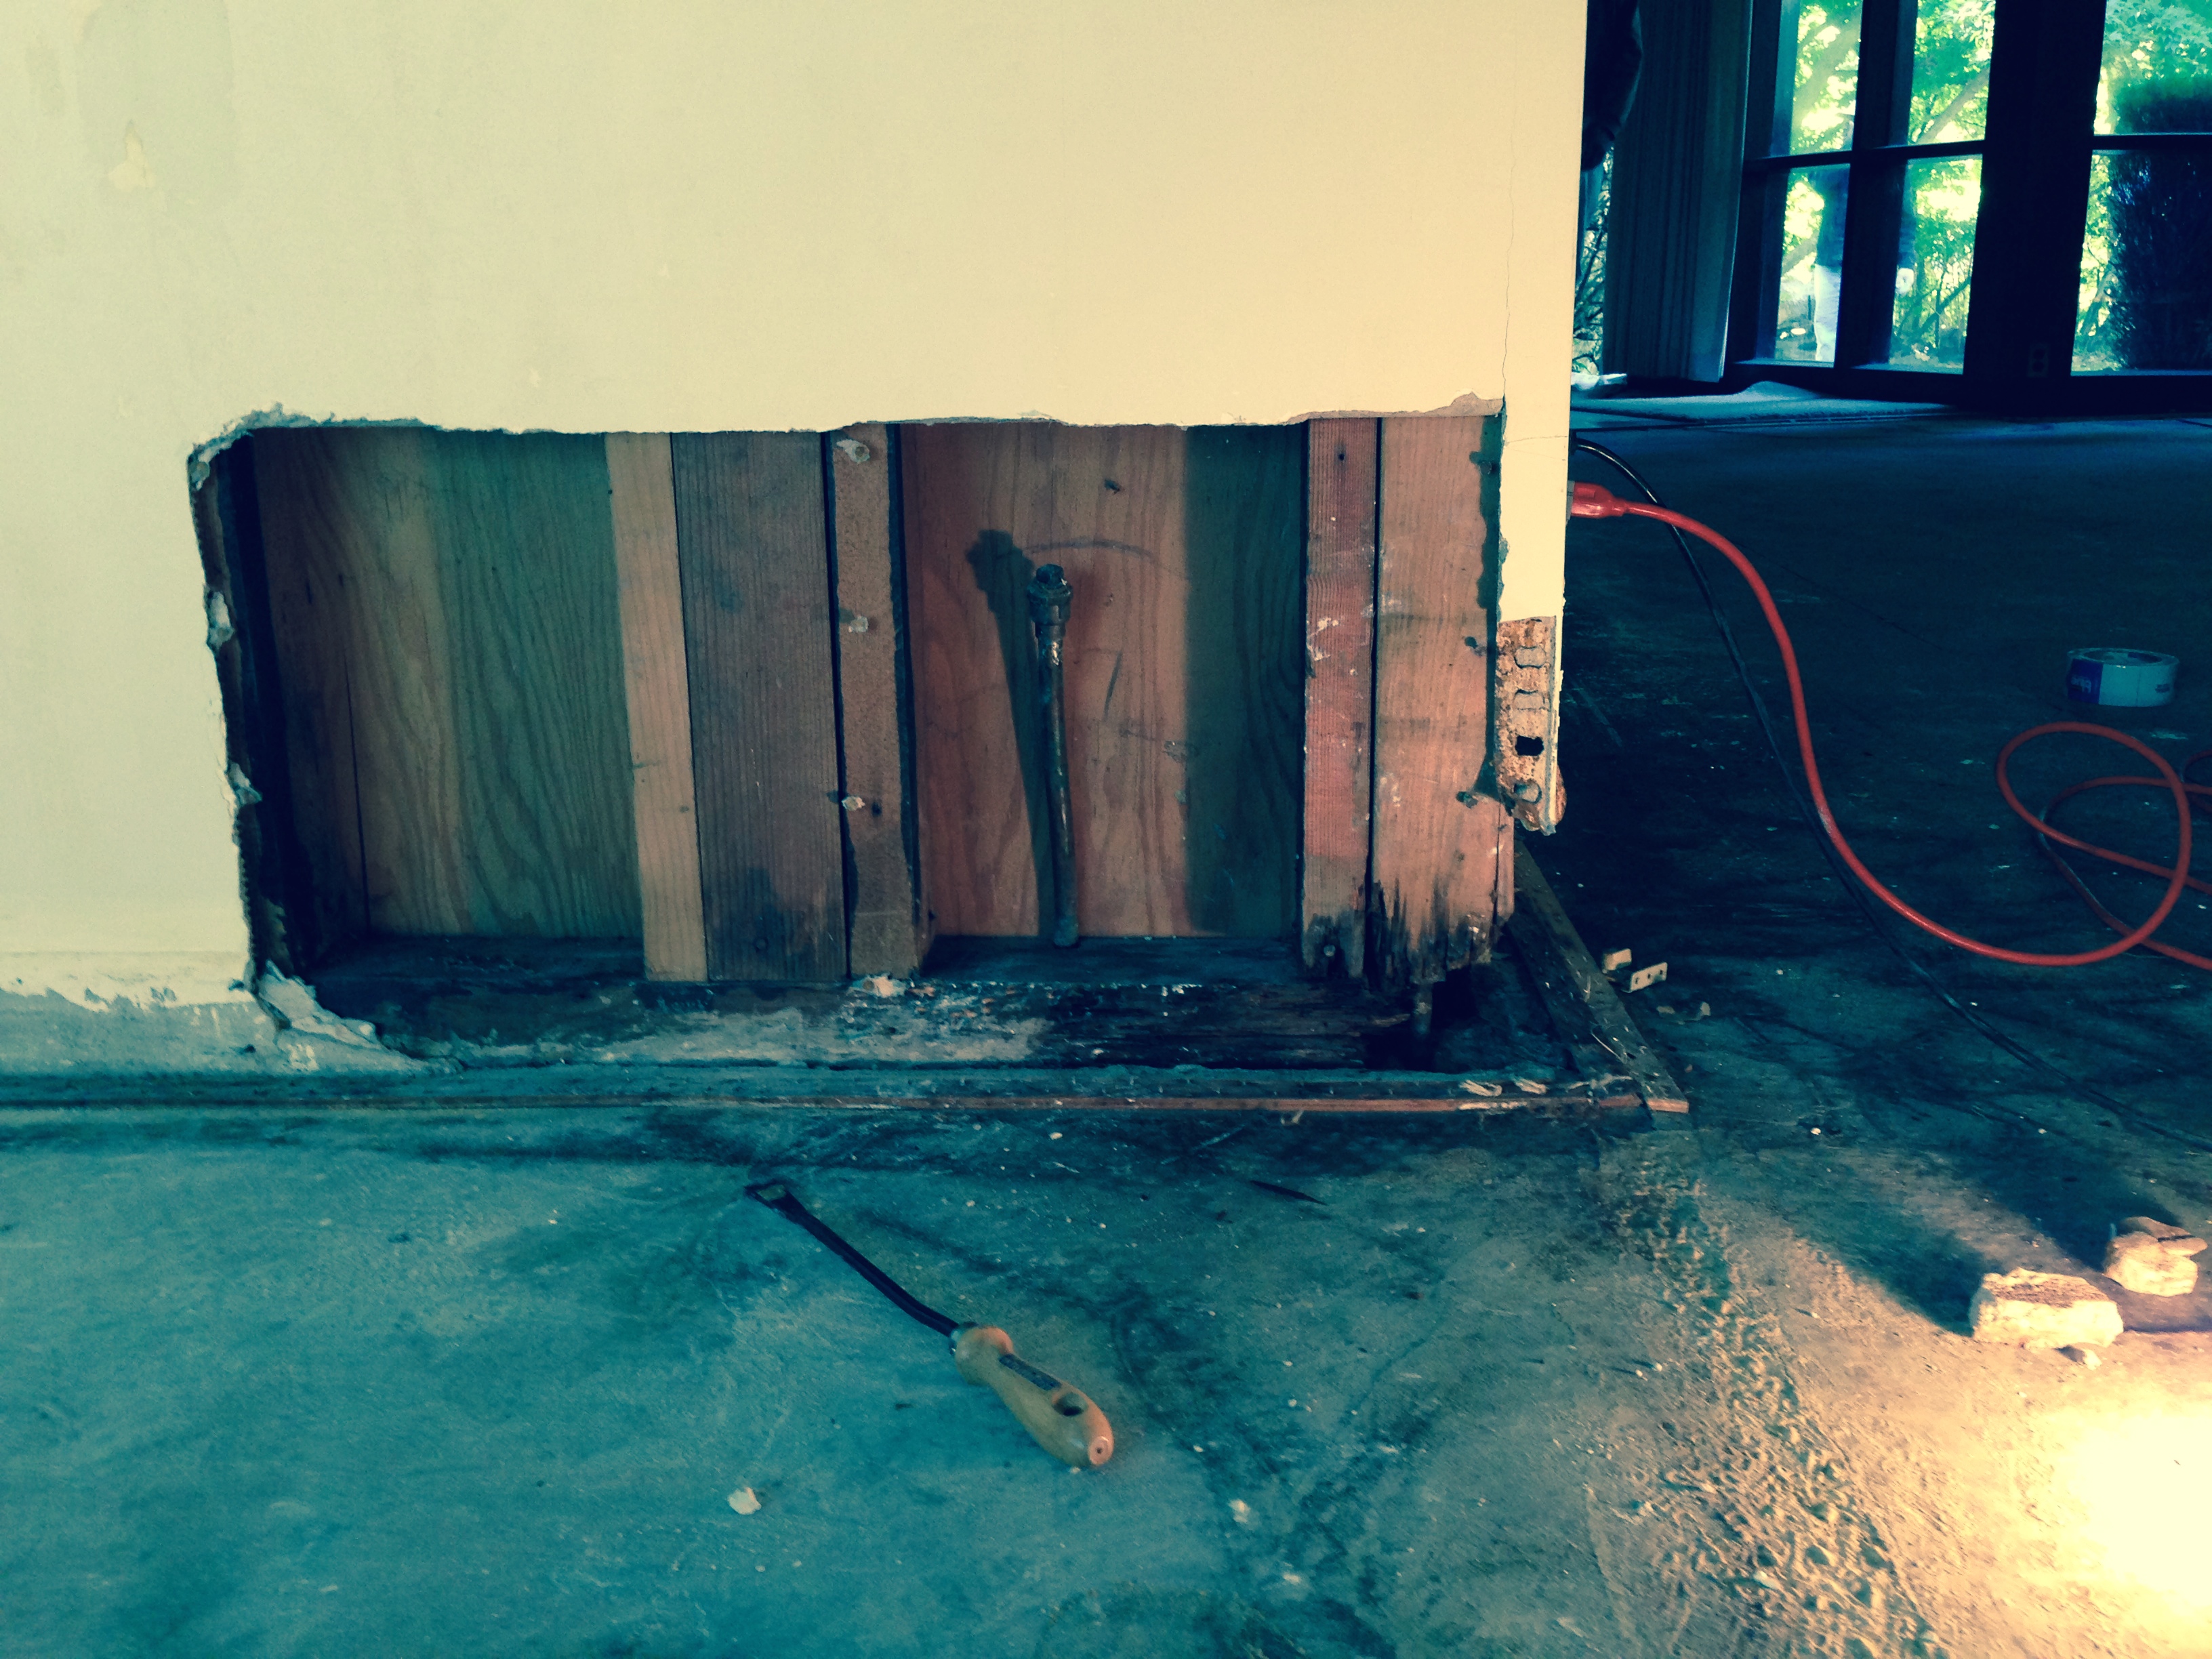
We had to re-do the room from top to bottom, not just decoratively but structurally as well.  You might recall one of our early posts when we discovered that the one wall (where the low side table is on the right in the above photo) had some major water damage inside and a section of it had to be rebuilt:

IMG_0751

IMG_0752

Ahhhhhh, much better.

IMG_1520

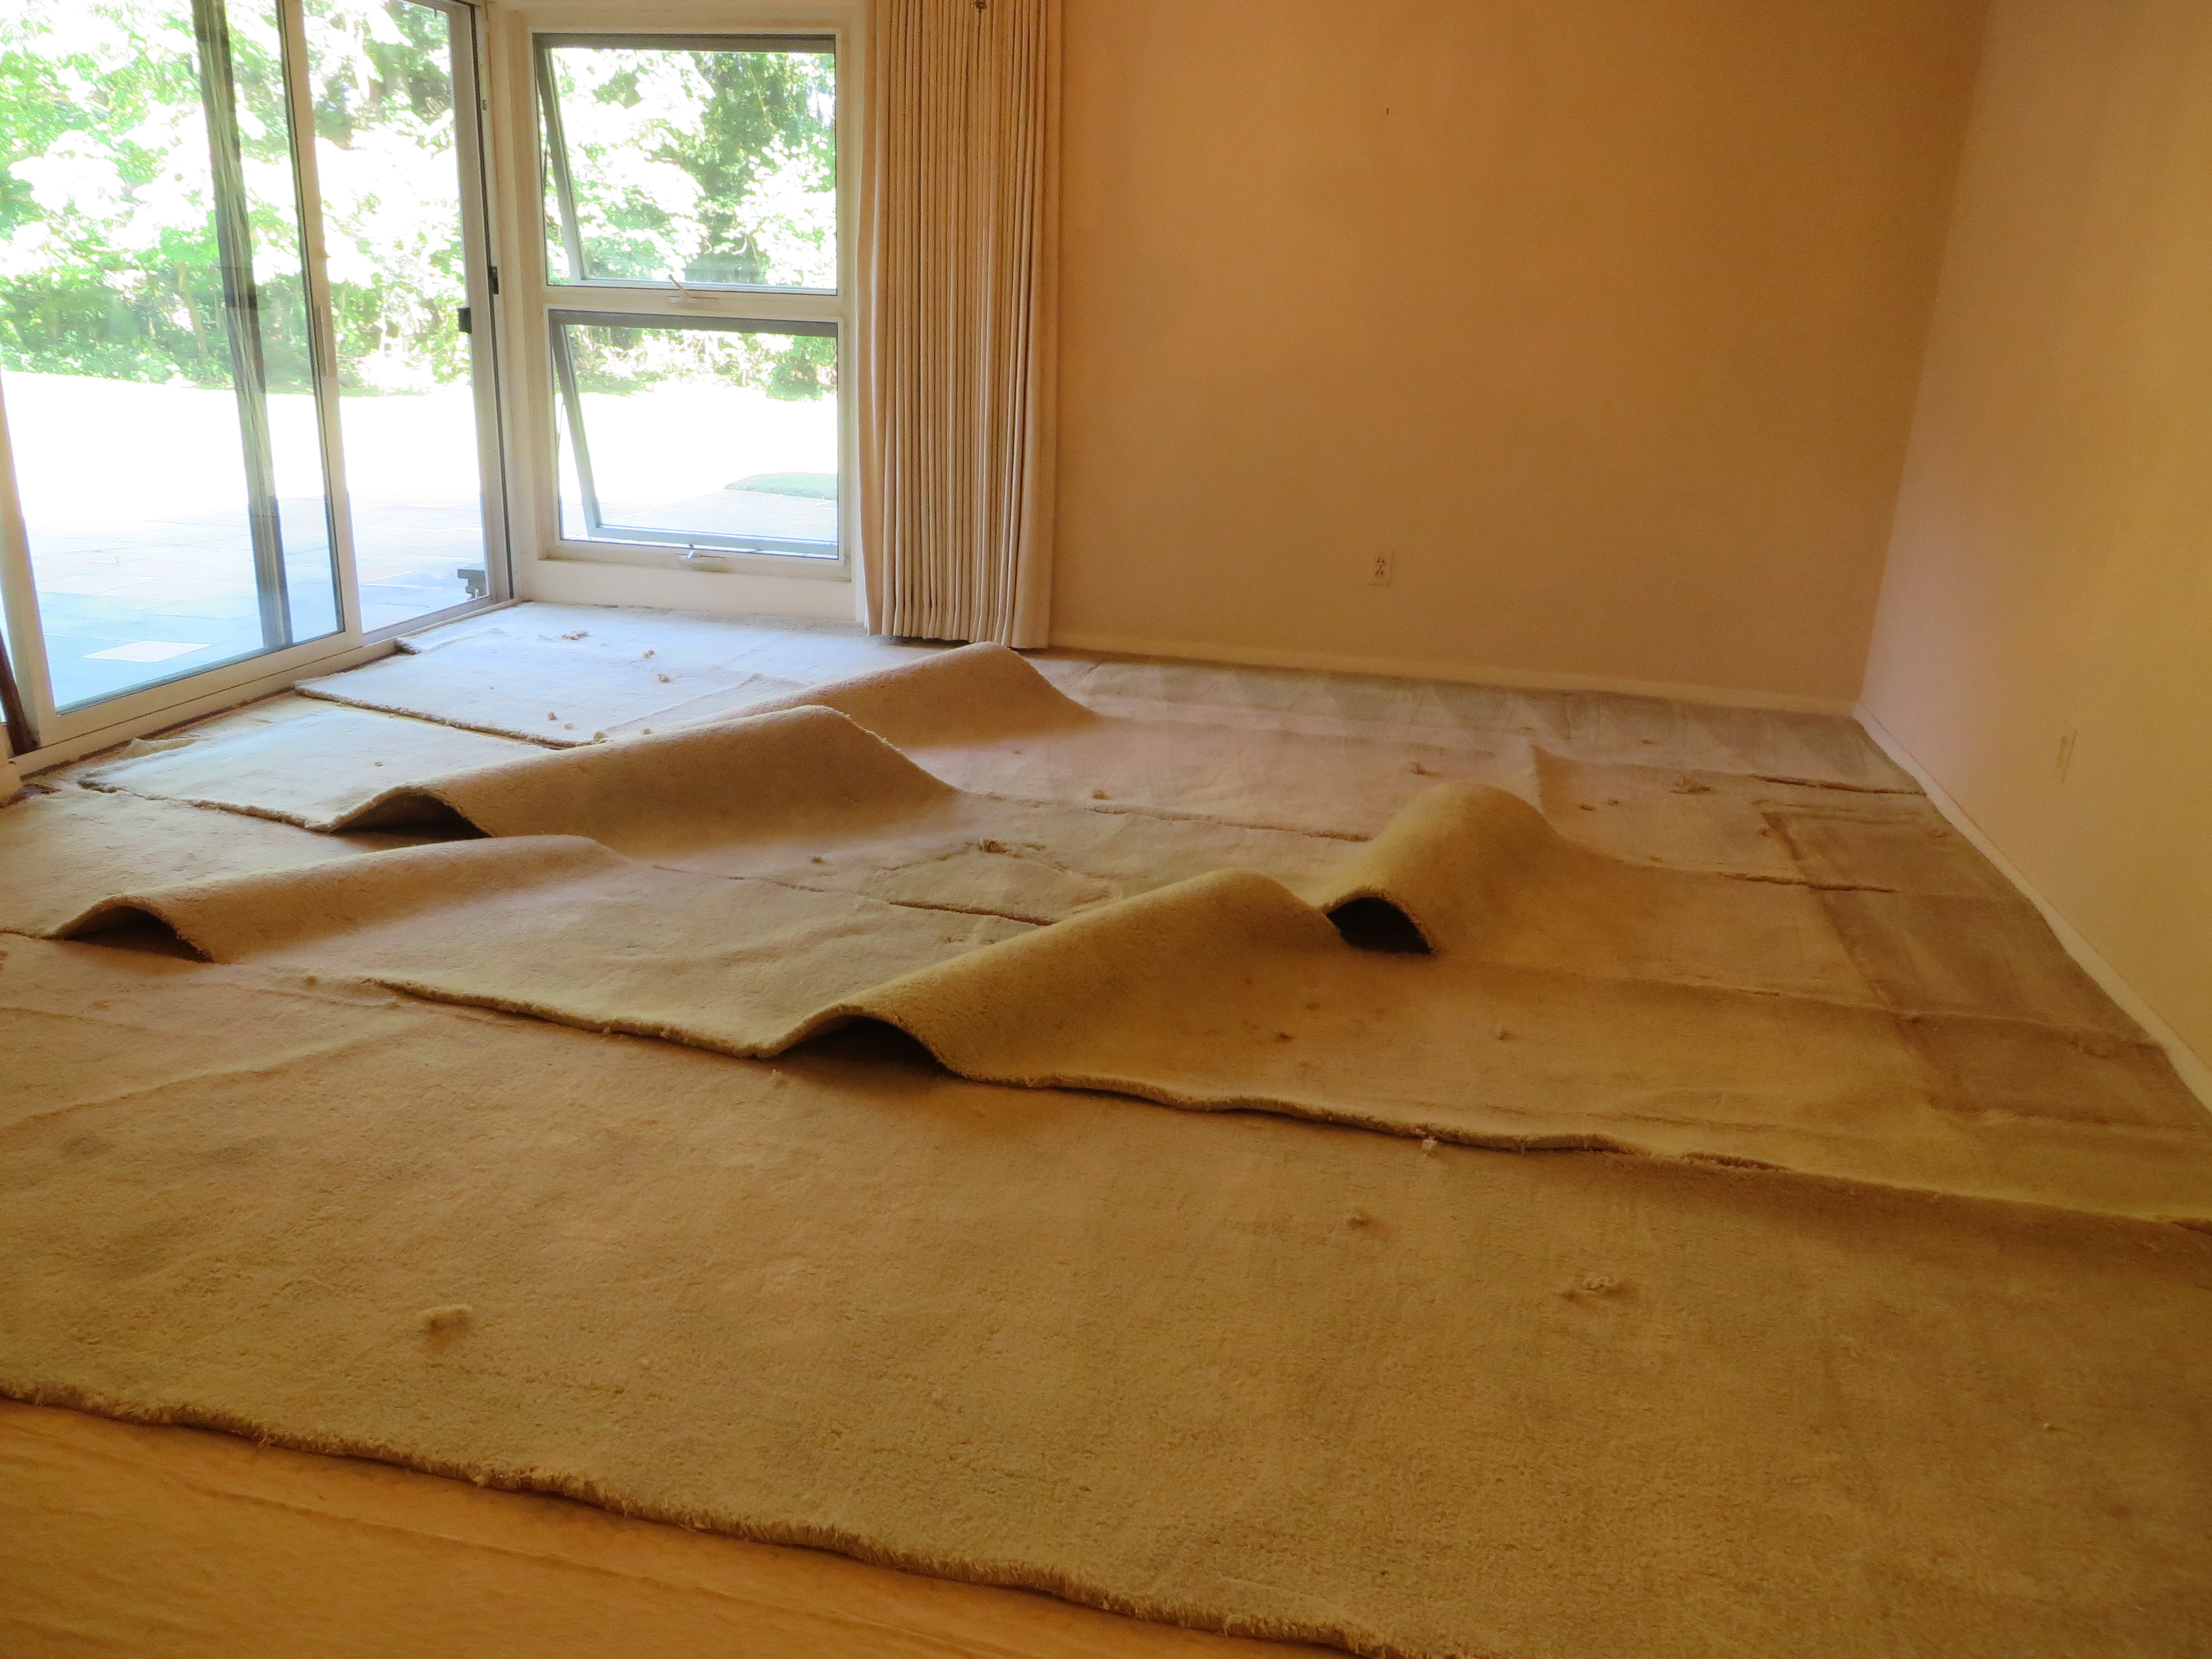
Then there was the old, wrinkled, rotten carpet.  That was one of the first things to go.

All sliced up and ready for the dumpster!

IMG_0956

And a section of the ceiling had to be replaced as well — again, water damage that hadn’t been addressed by the previous owners.

IMG_0705

Once the wall and ceiling were fixed and the carpet replaced, we could focus on the actual look of the room.

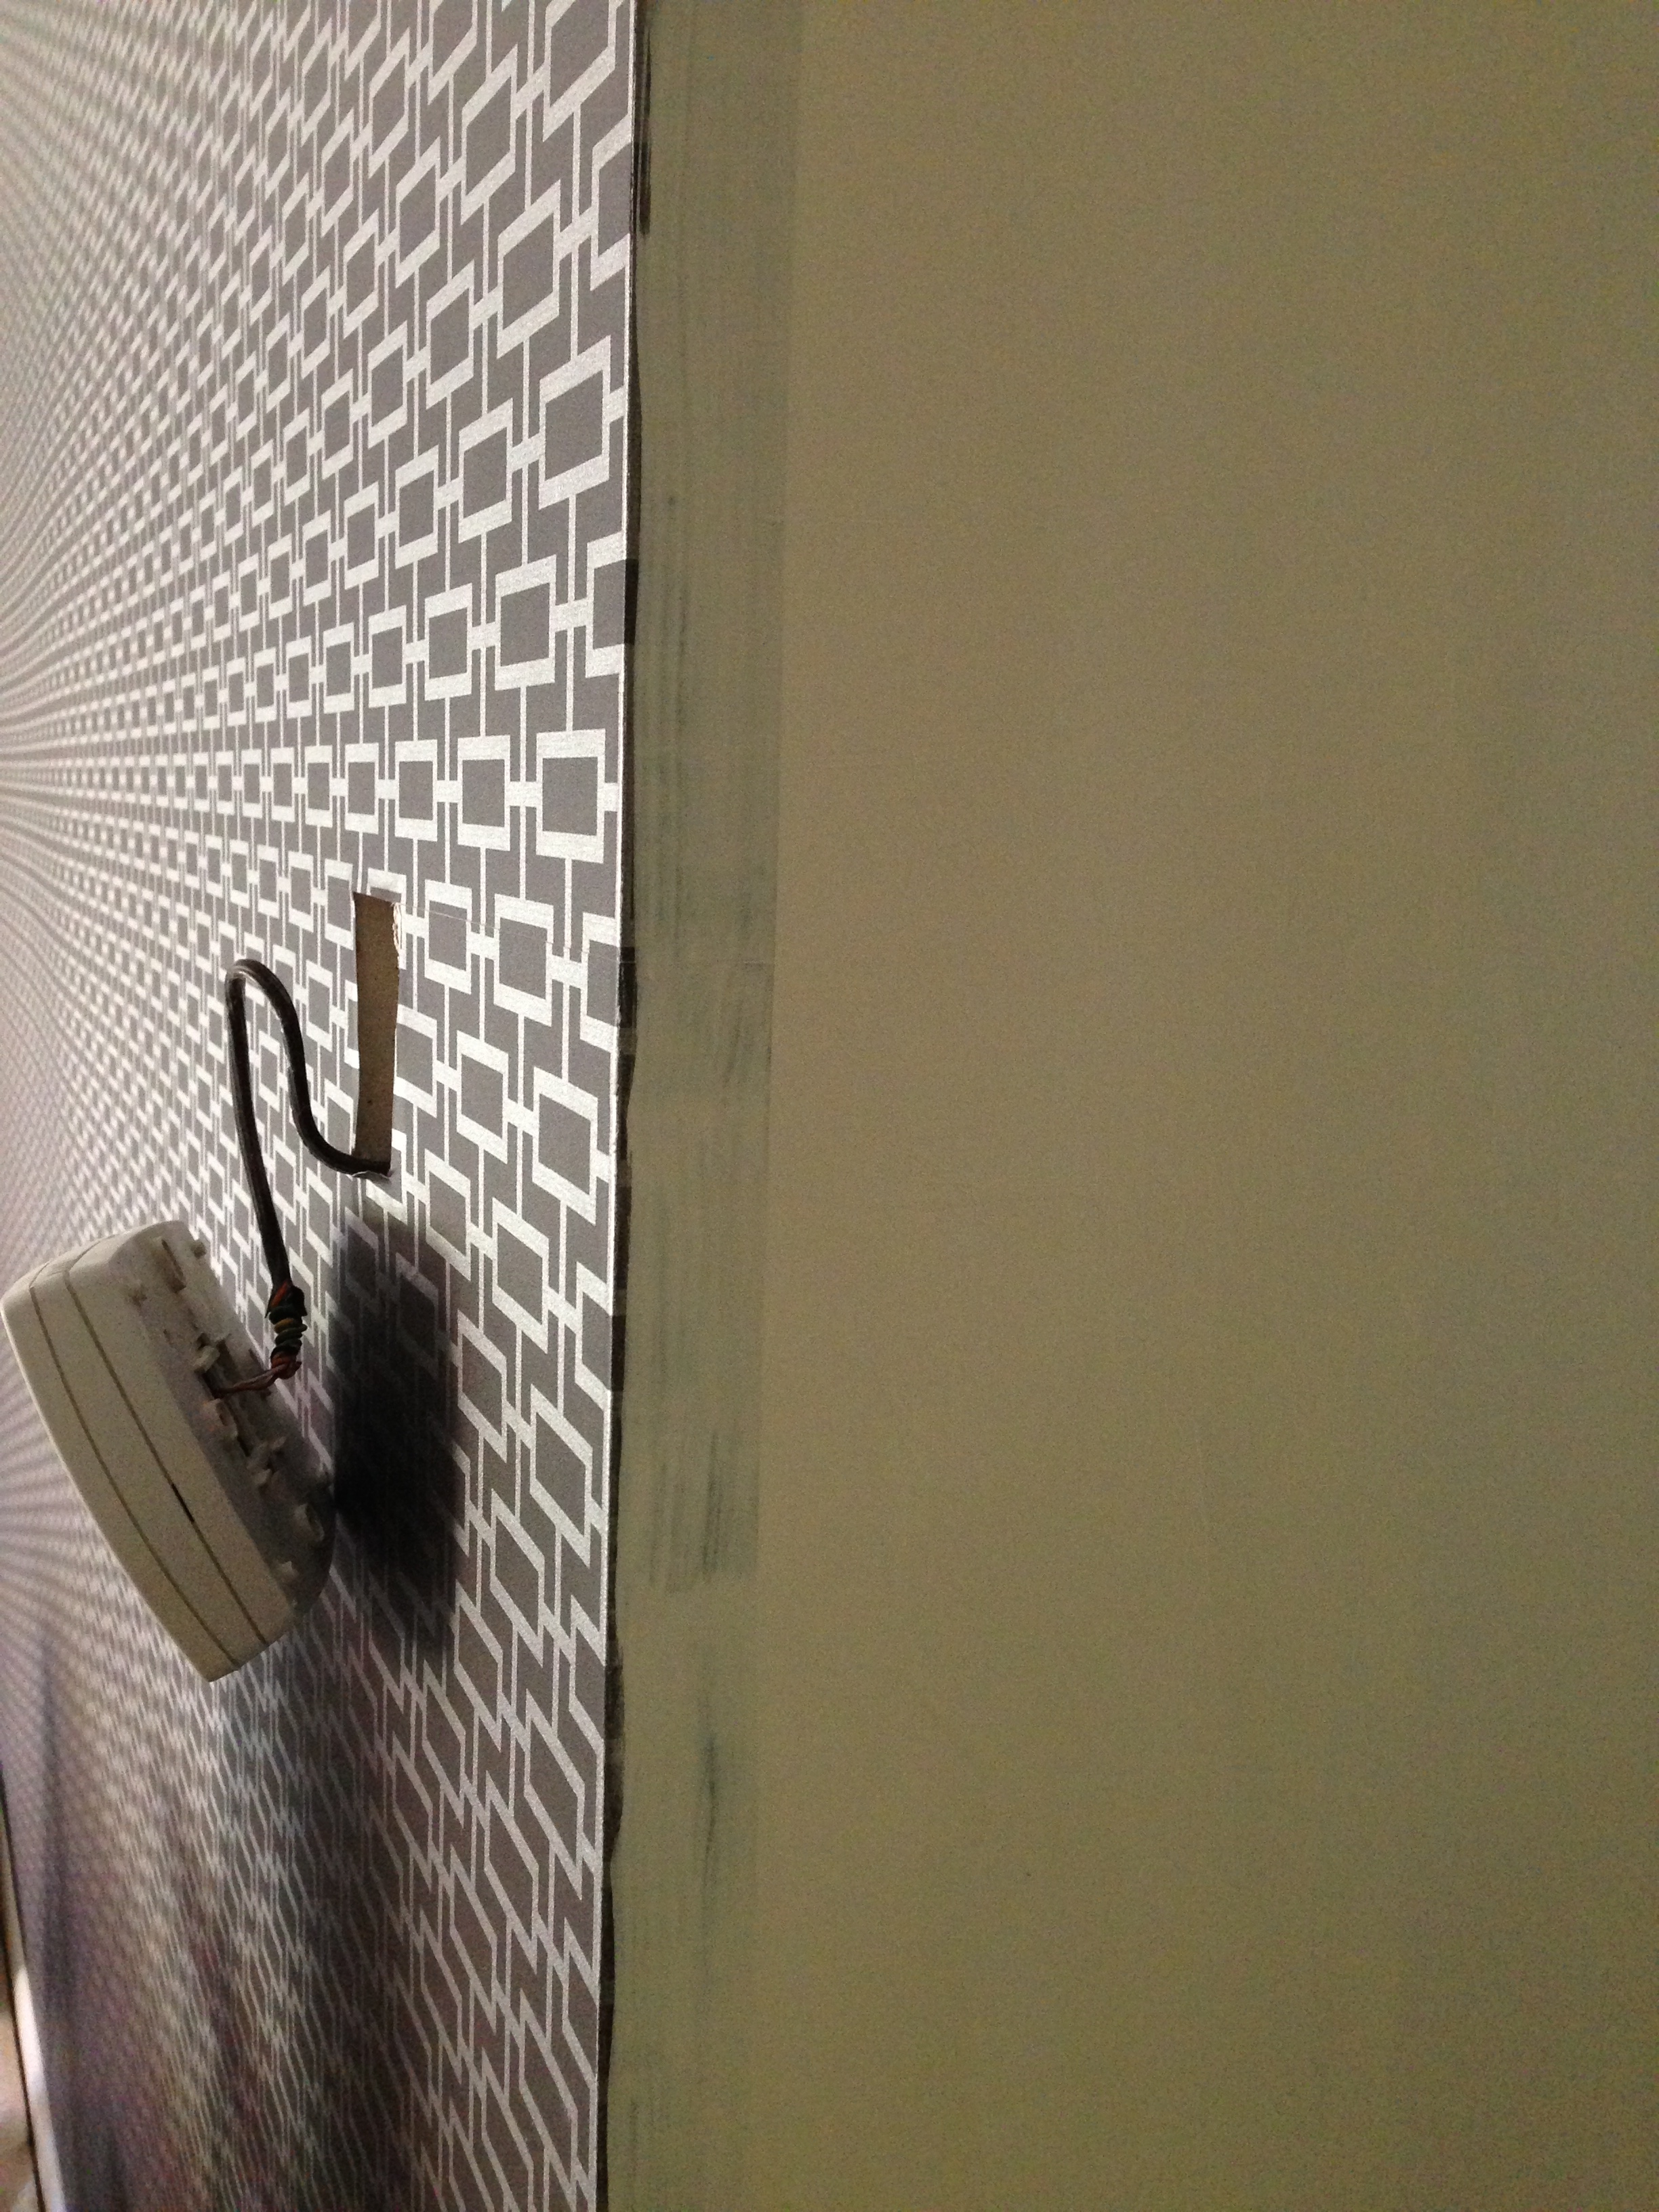
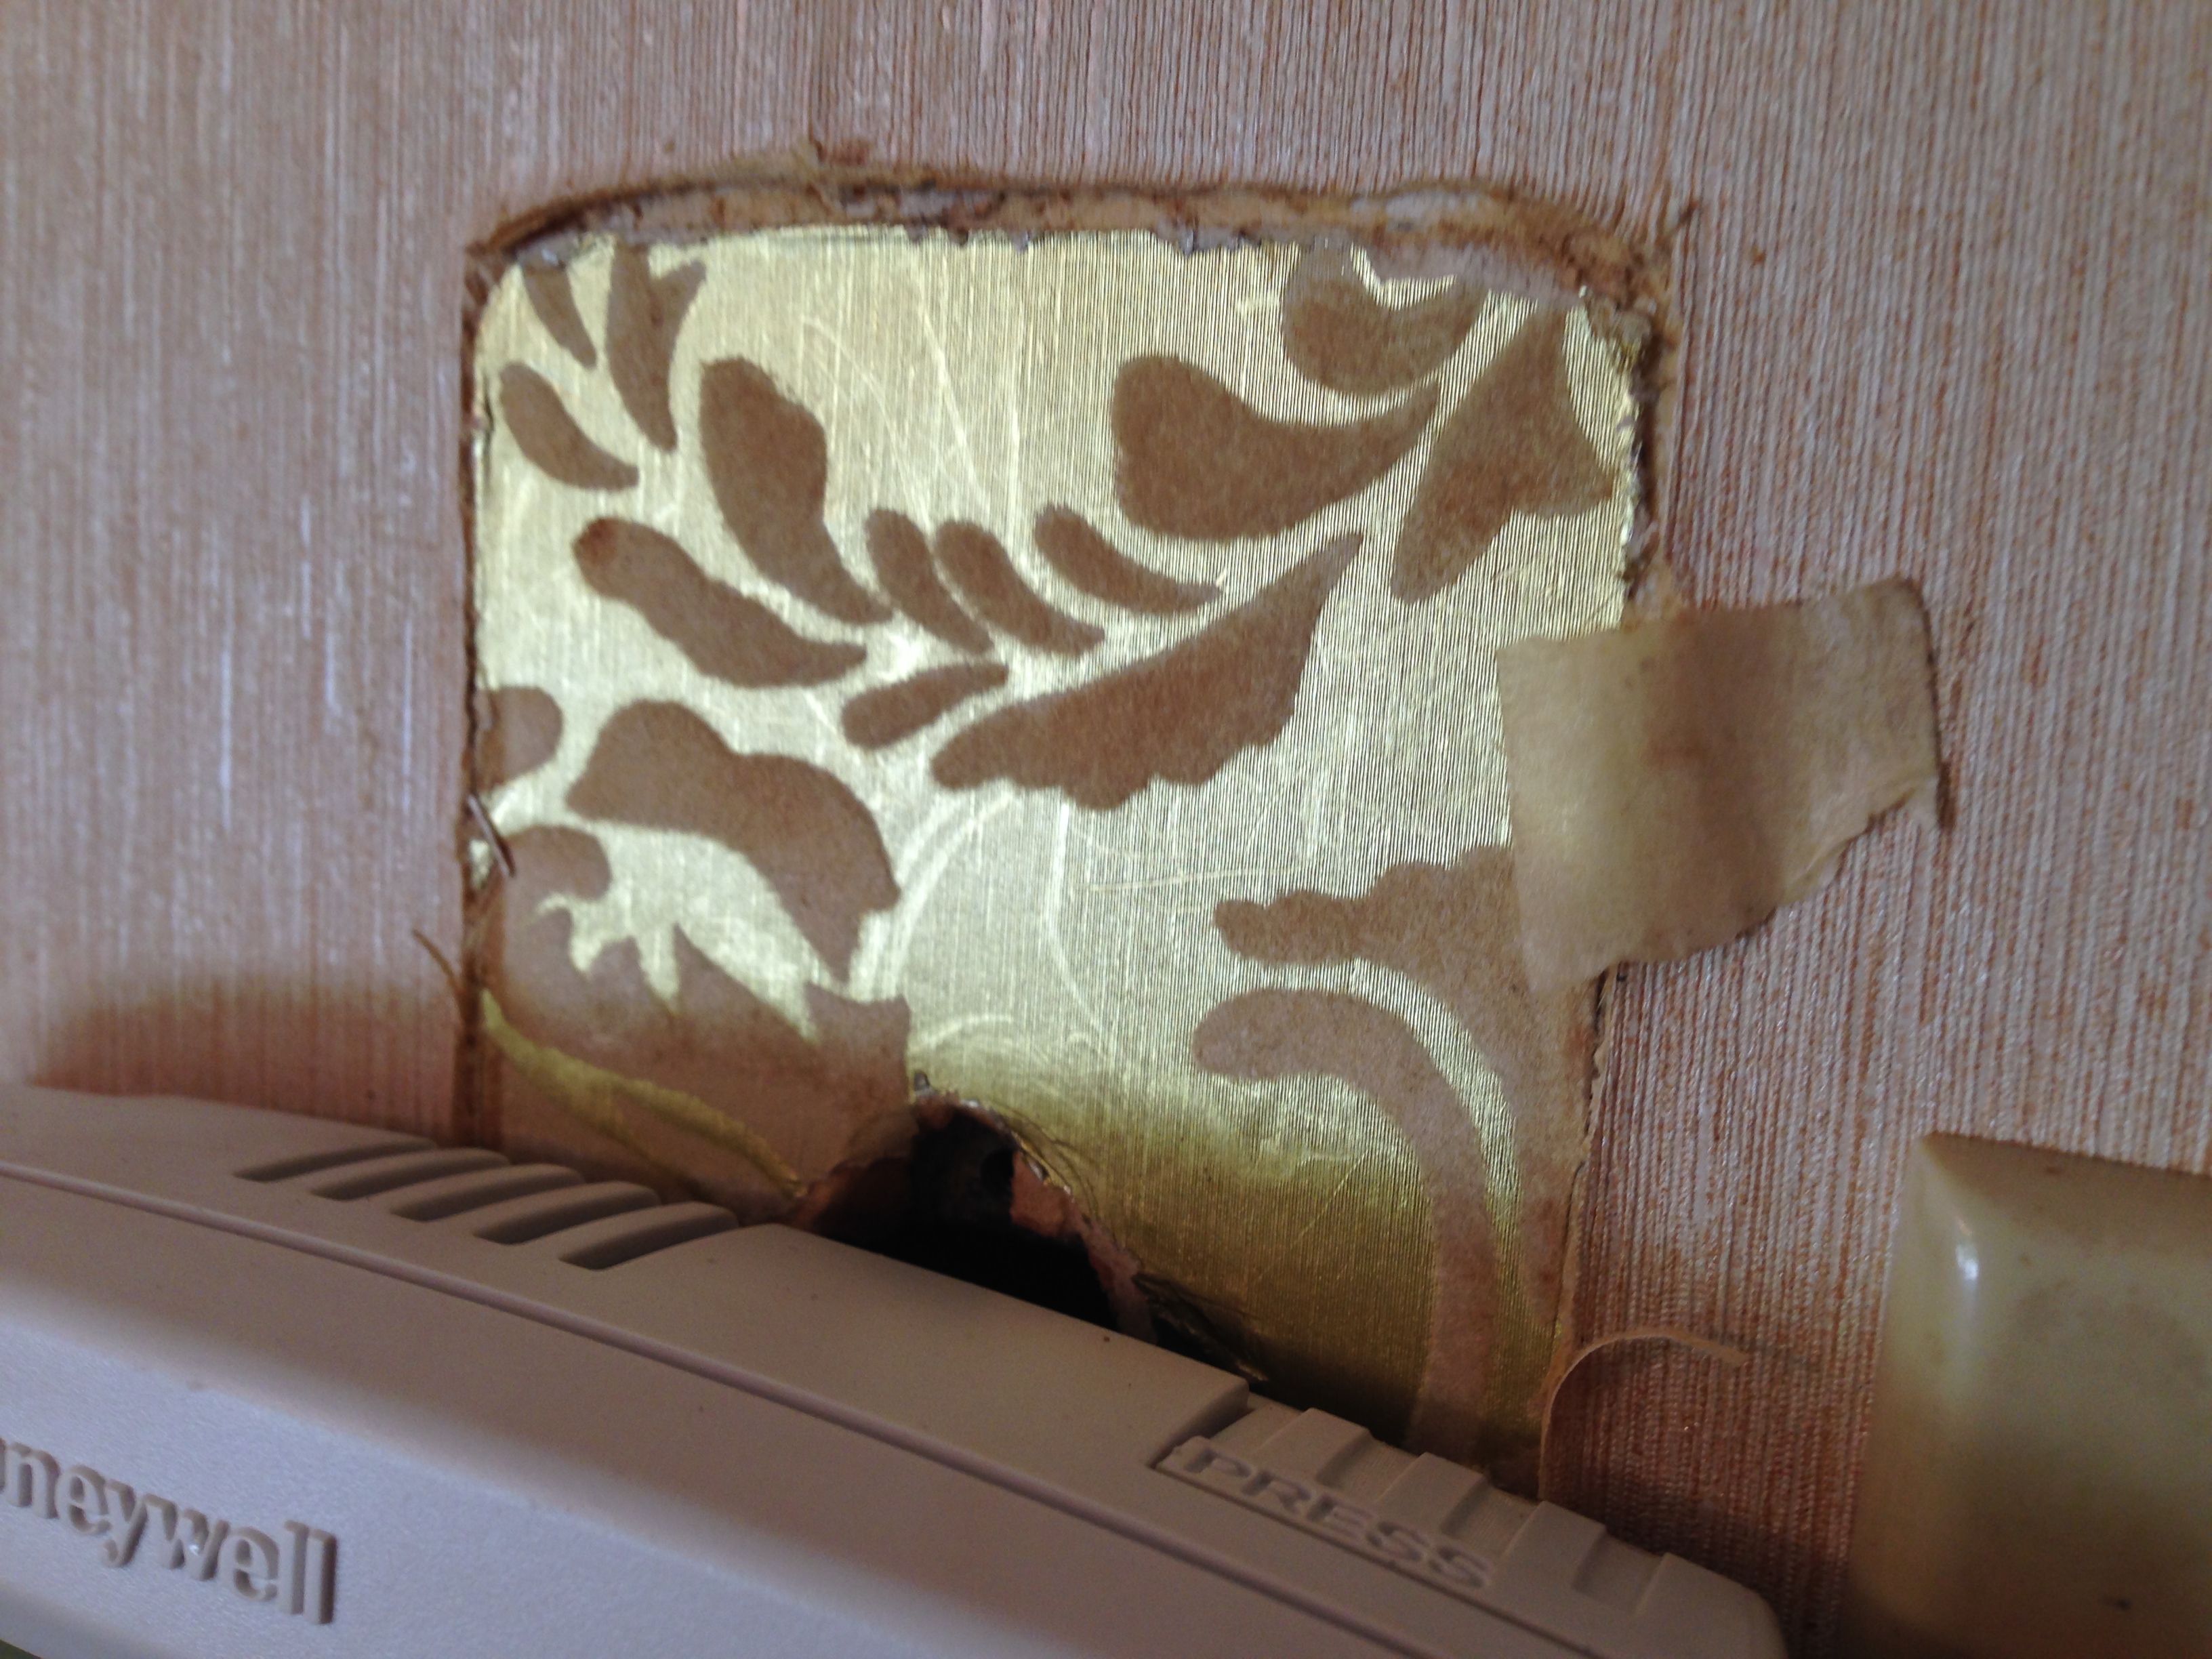
You might recall from a post a few months ago, that we decided to go with a metallic wallpaper for the walls.  When we were fixing the wall with the water damage, we discovered a little patch of the original wallpaper under the thermostat…  and given that it was a wacky gold metallic flocked pattern, we wanted to make a nod to the original without being *quite* so wacky.

The original swatch:

IMG_1444

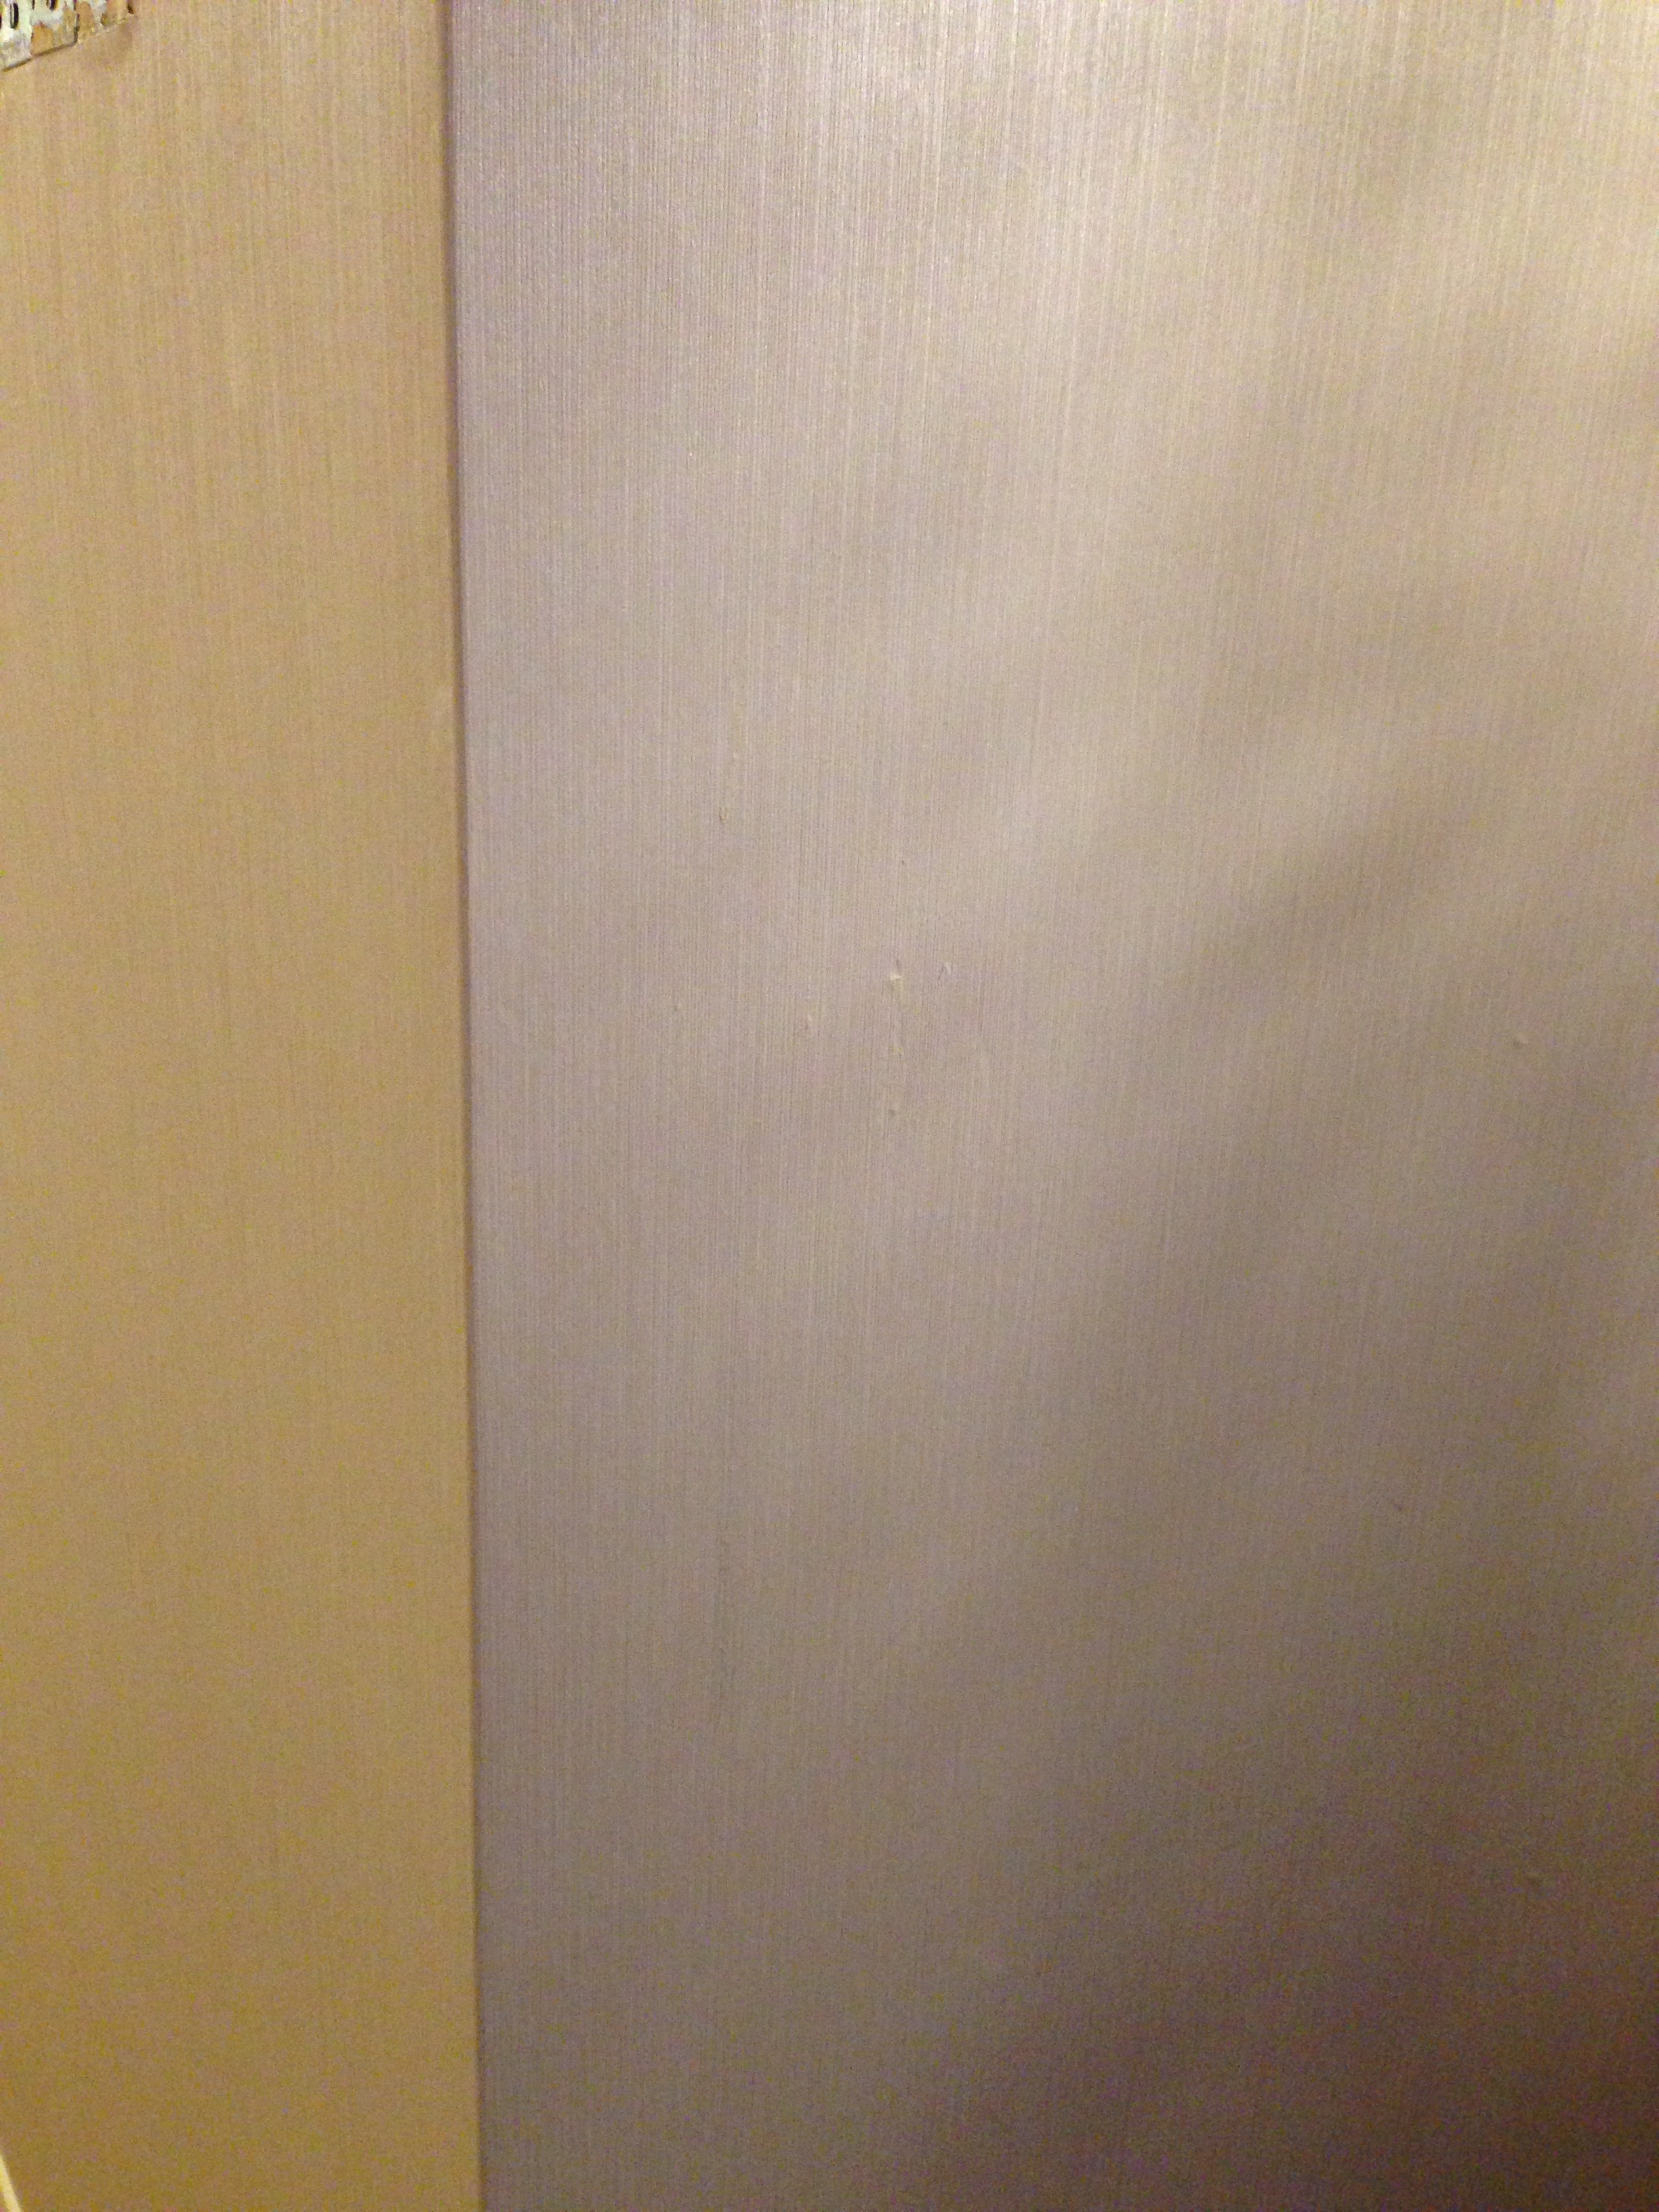
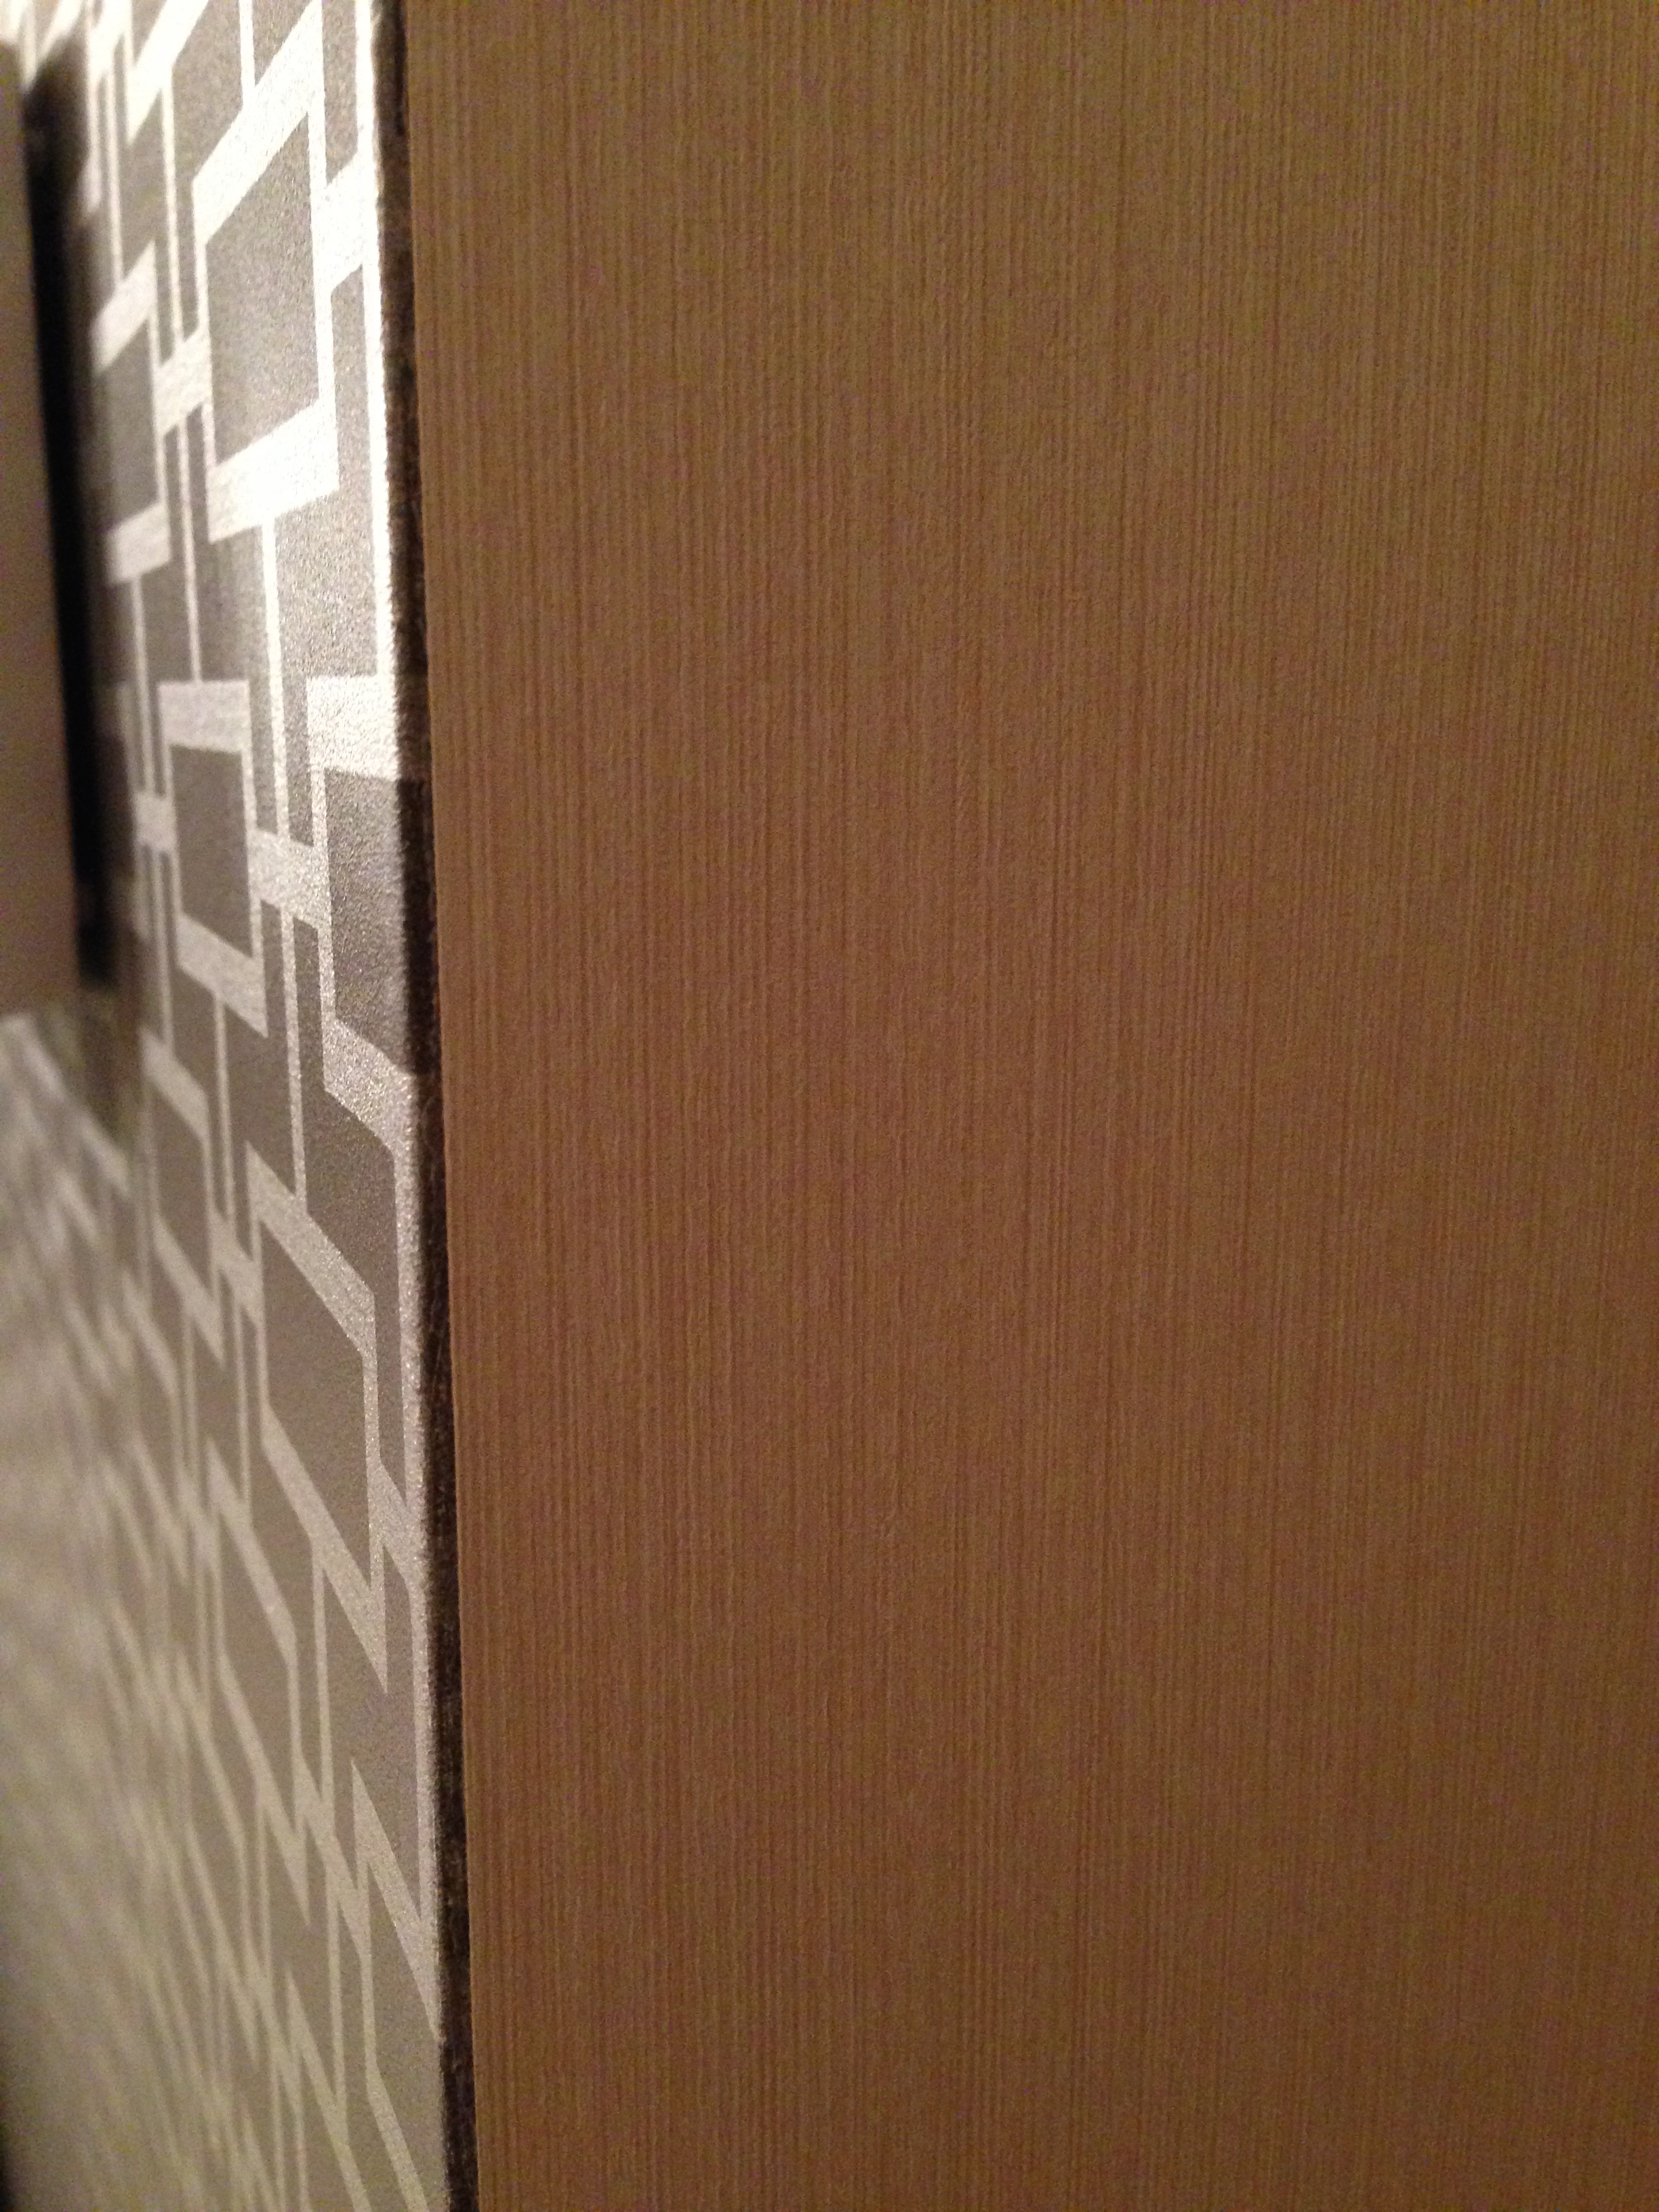
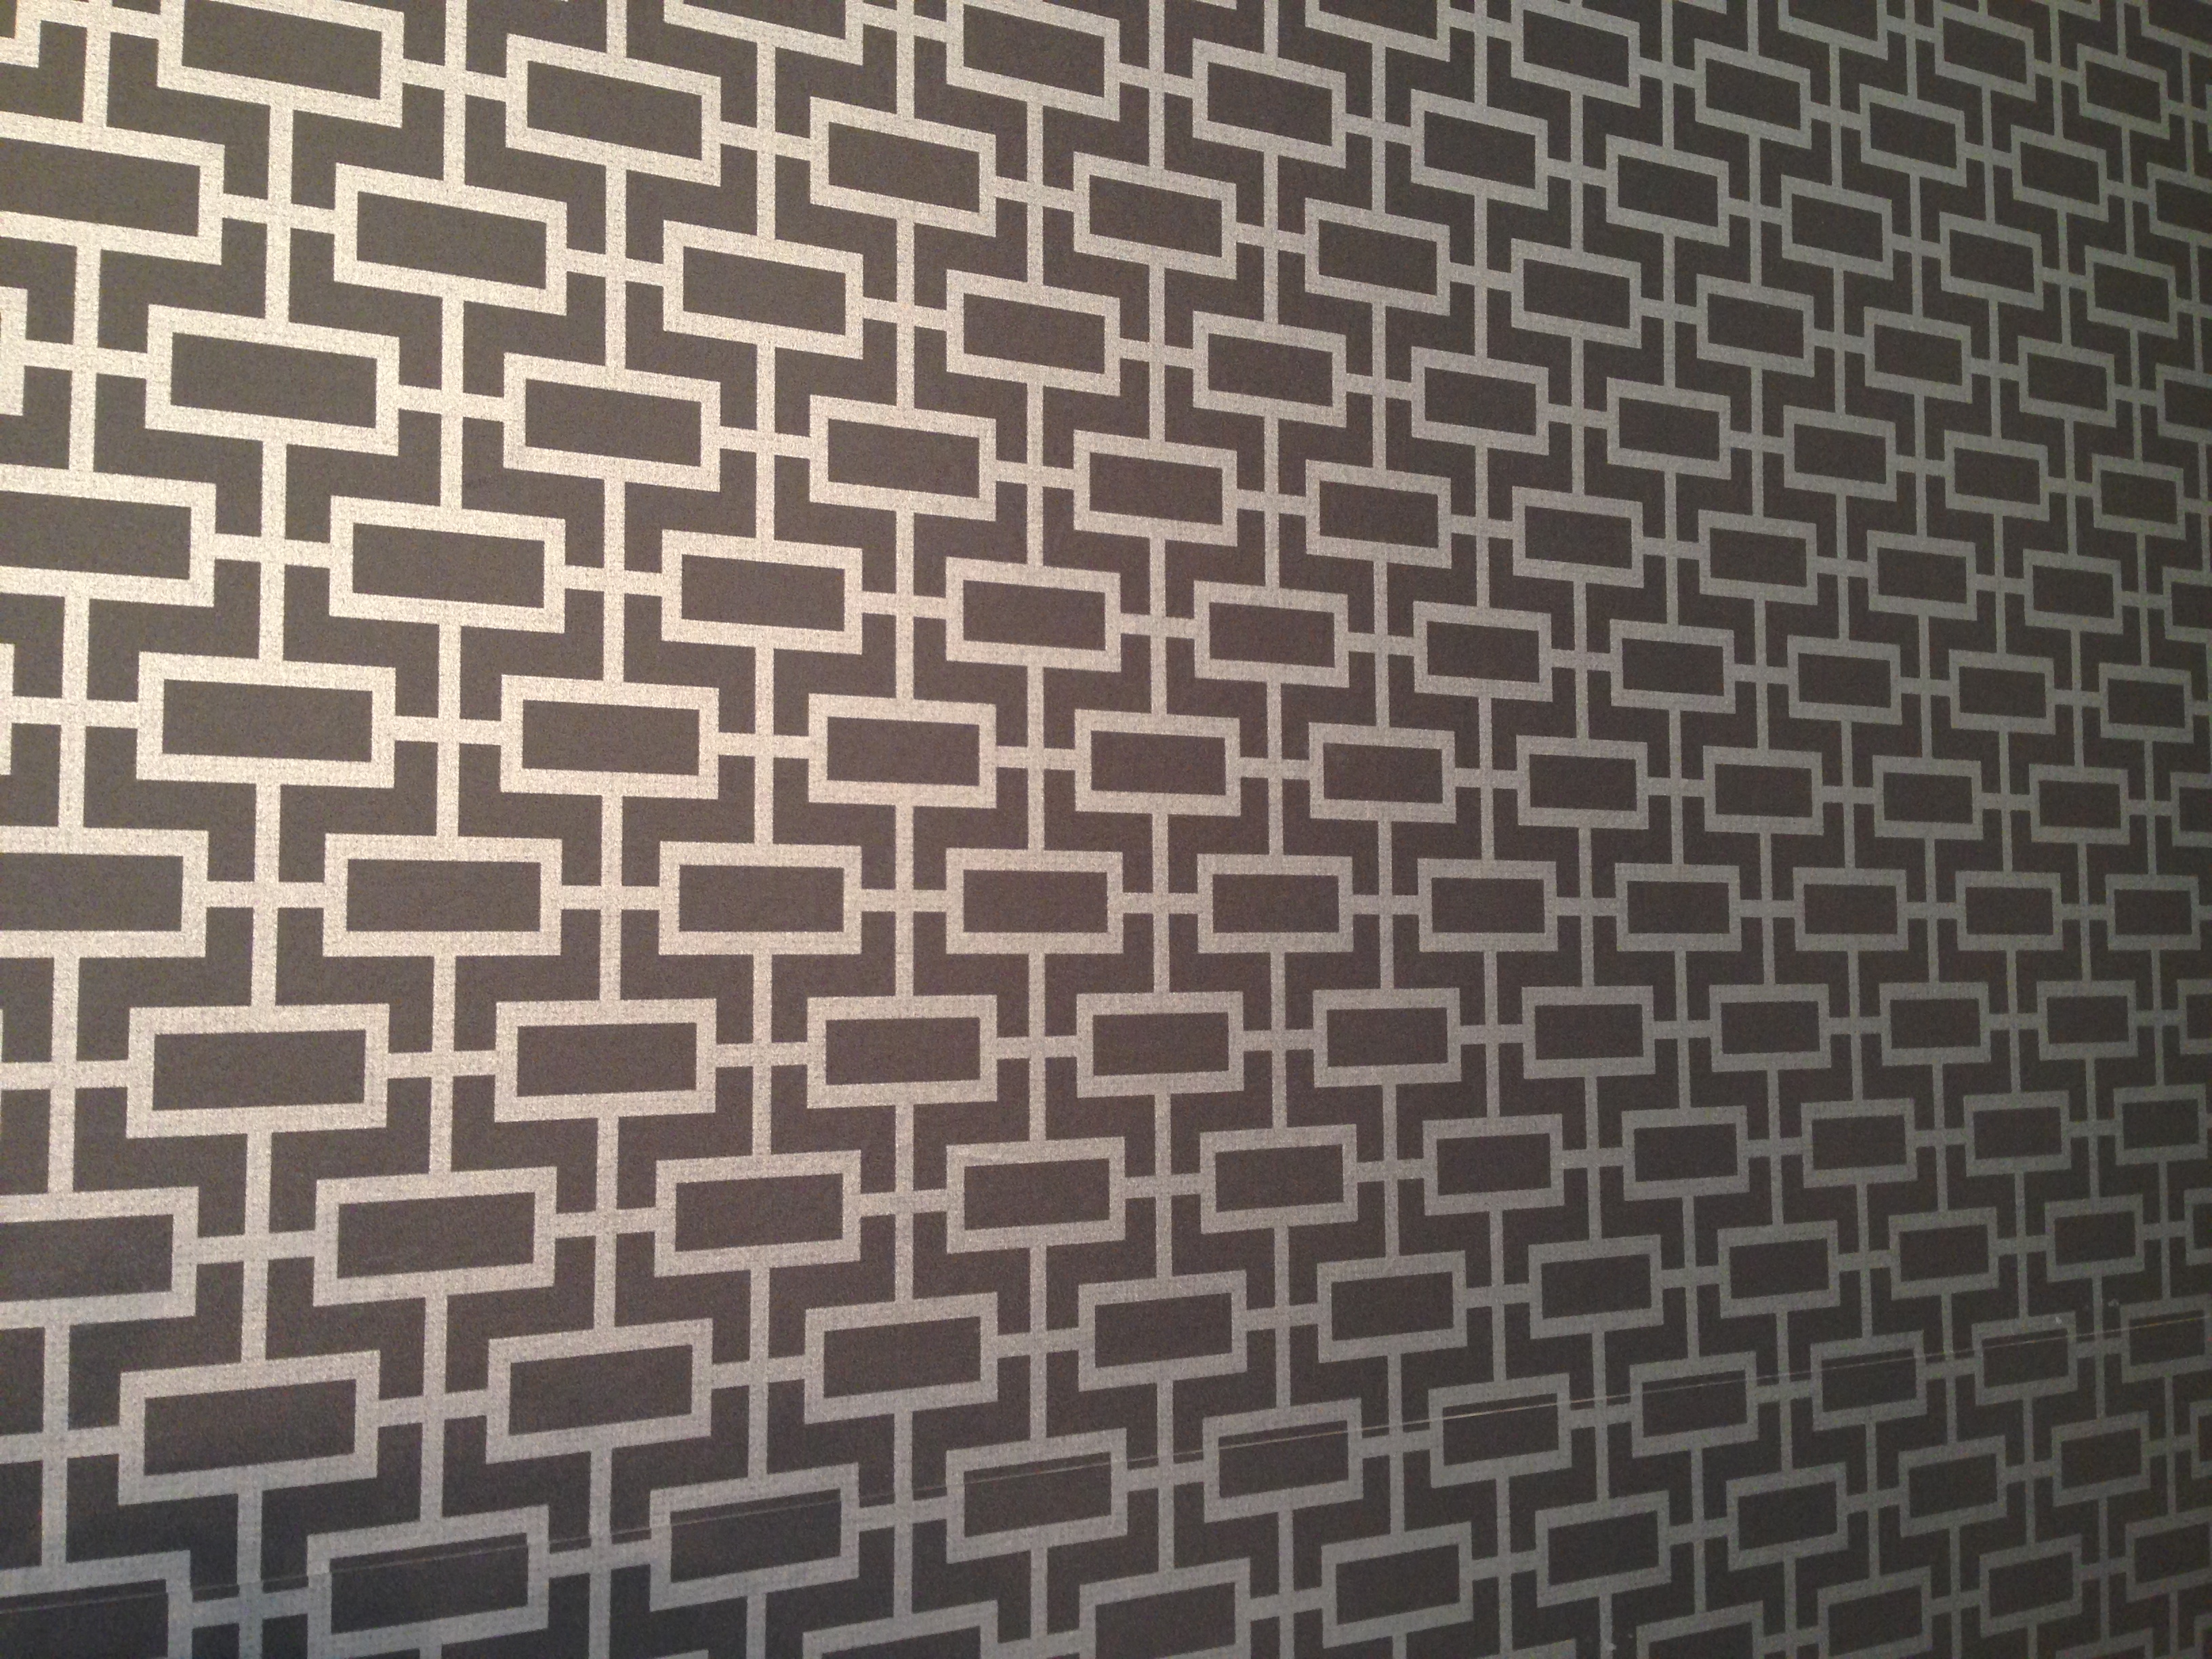
So, we found a lovely gray and pewter pattern that was a bit shiny, but also more modern and elegant.  And we had our paper hanger friend put it up sideways, so that the pattern in the paper matched the shoji pattern in some of the woodwork throughout the house.

A close-up of the paper…

IMG_1595

…and just after it was put up.  Yay!

IMG_1594

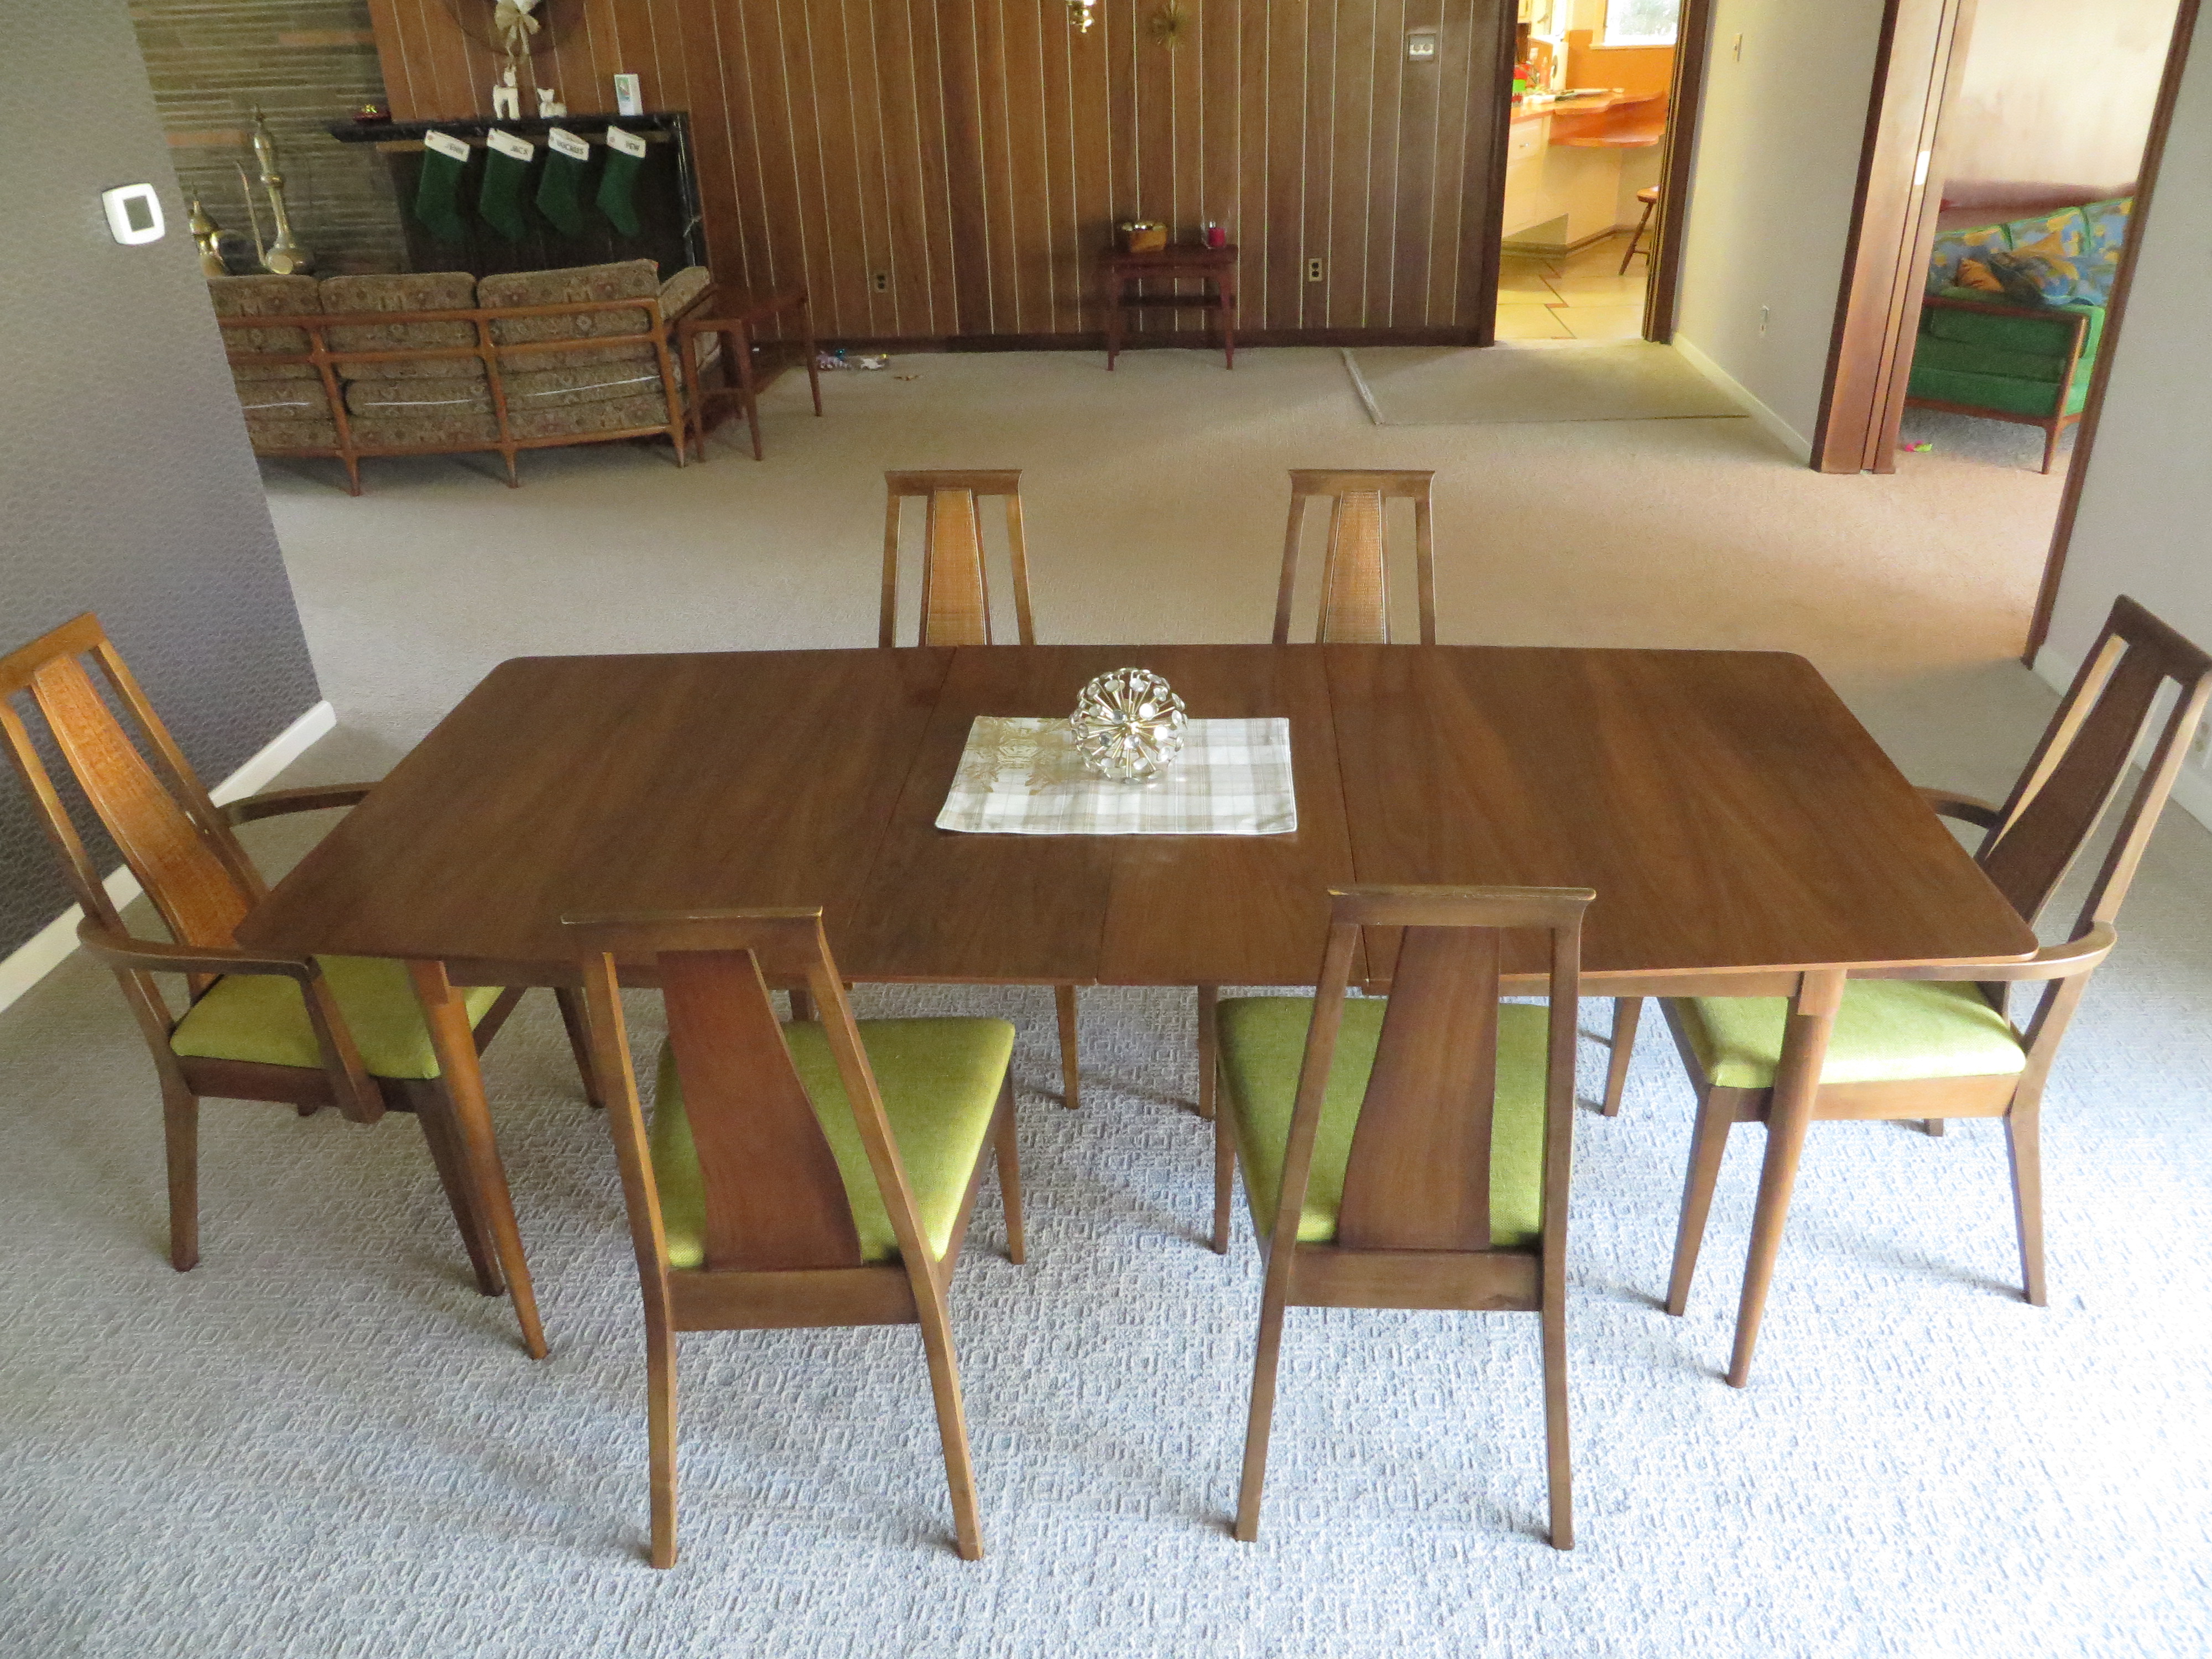
Furniture-wise, we had no dining room furniture or other decor to put in the room.  But we were lucky enough to find what we needed over time, with the help of auctions, furniture sales, and friends.

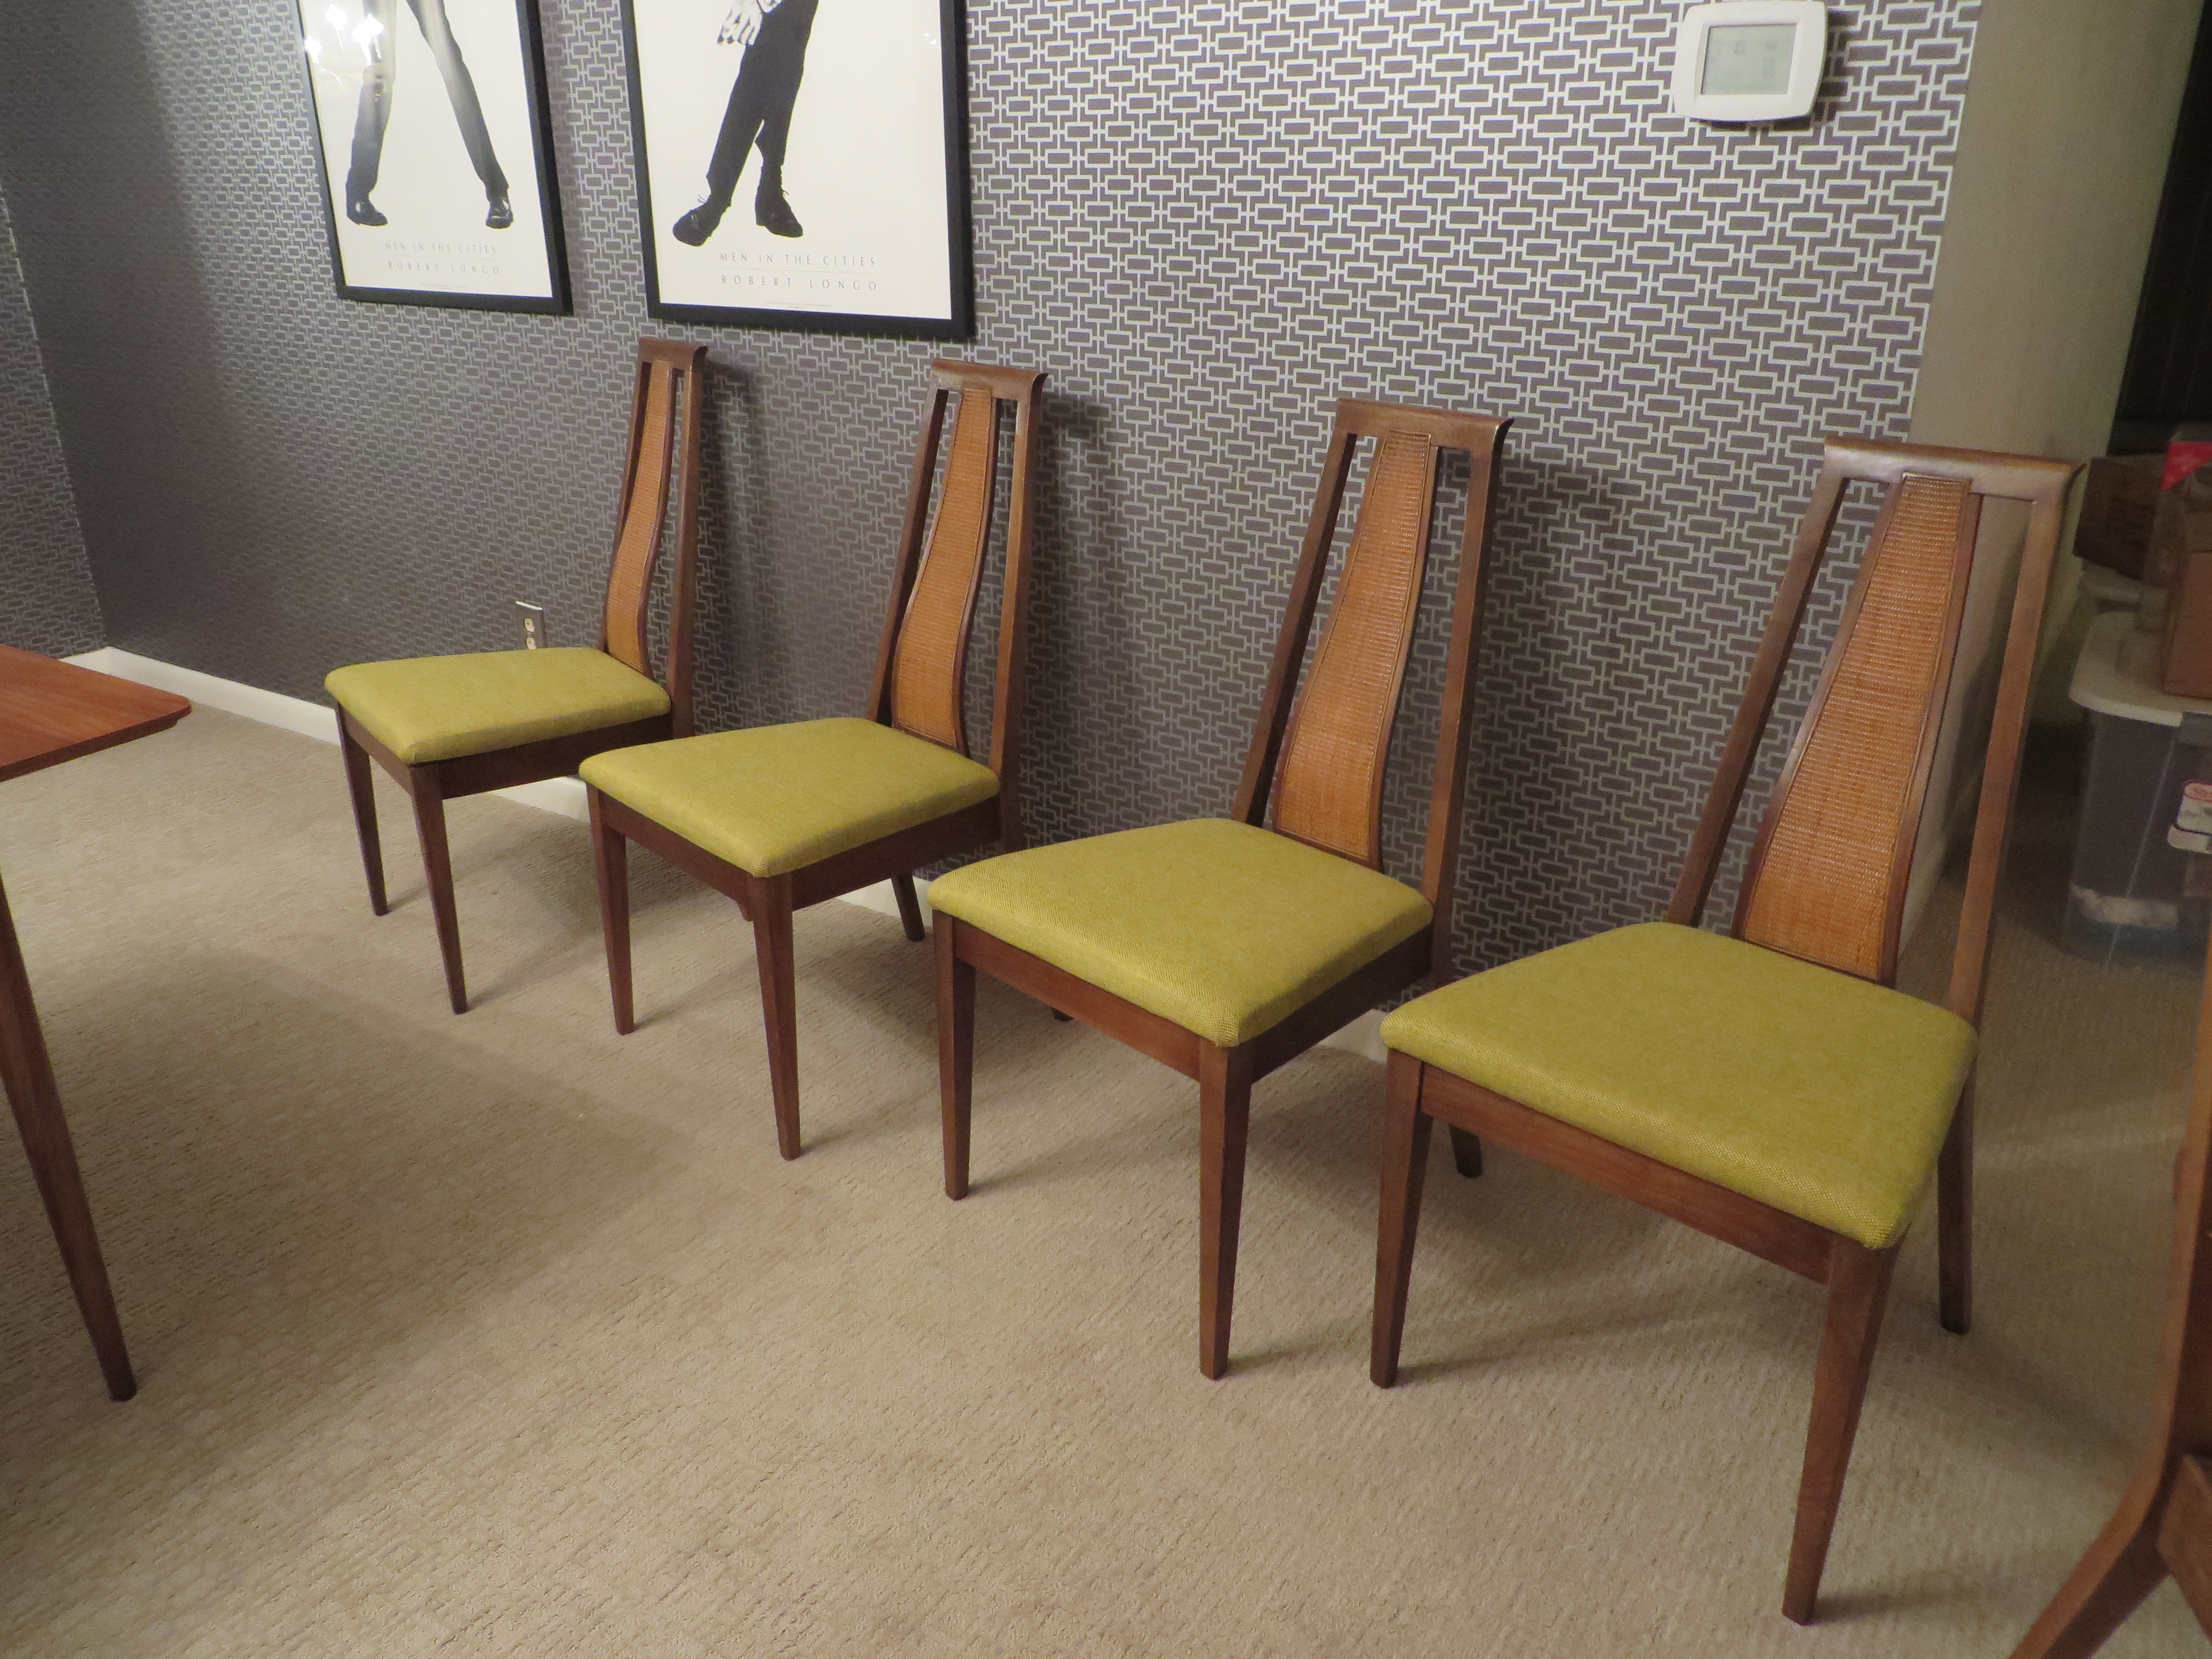
We found the table and chairs set first, so at least we had a place to eat.  😛  And we were so in love with the acid yellow/green fabric on the chairs, because it really stands out against the gray wallpaper.

IMG_1202

IMG_1225

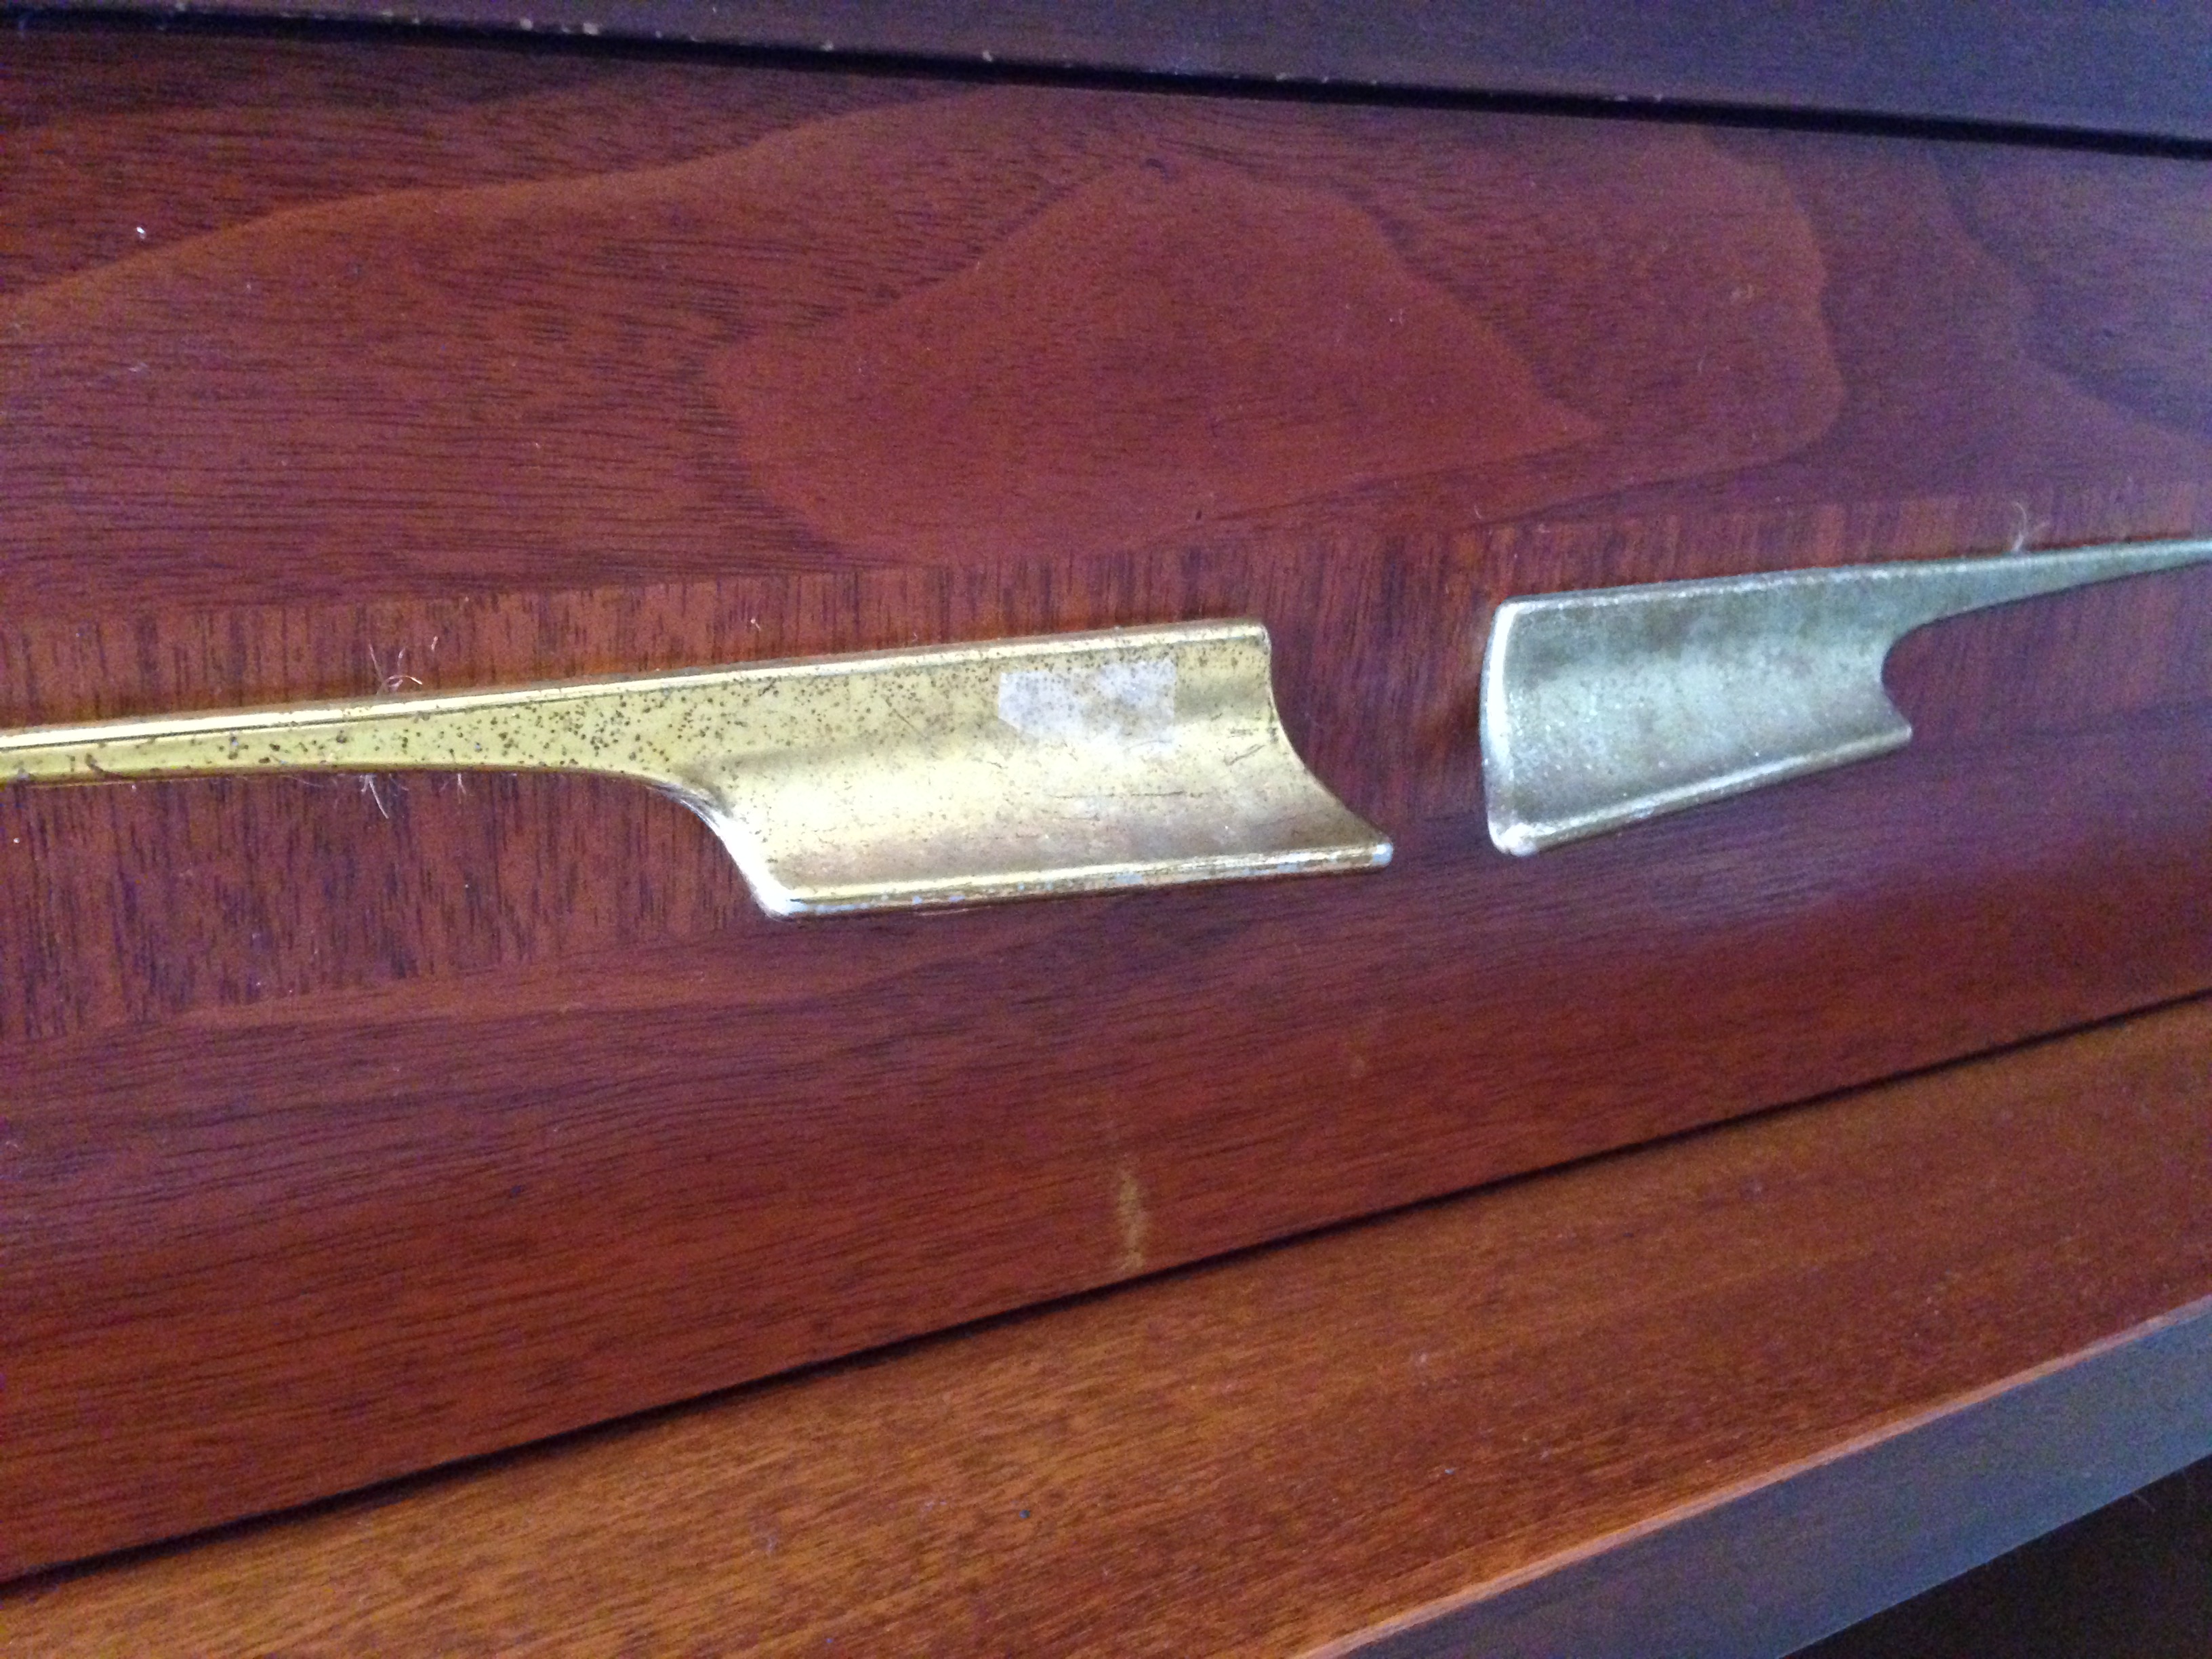
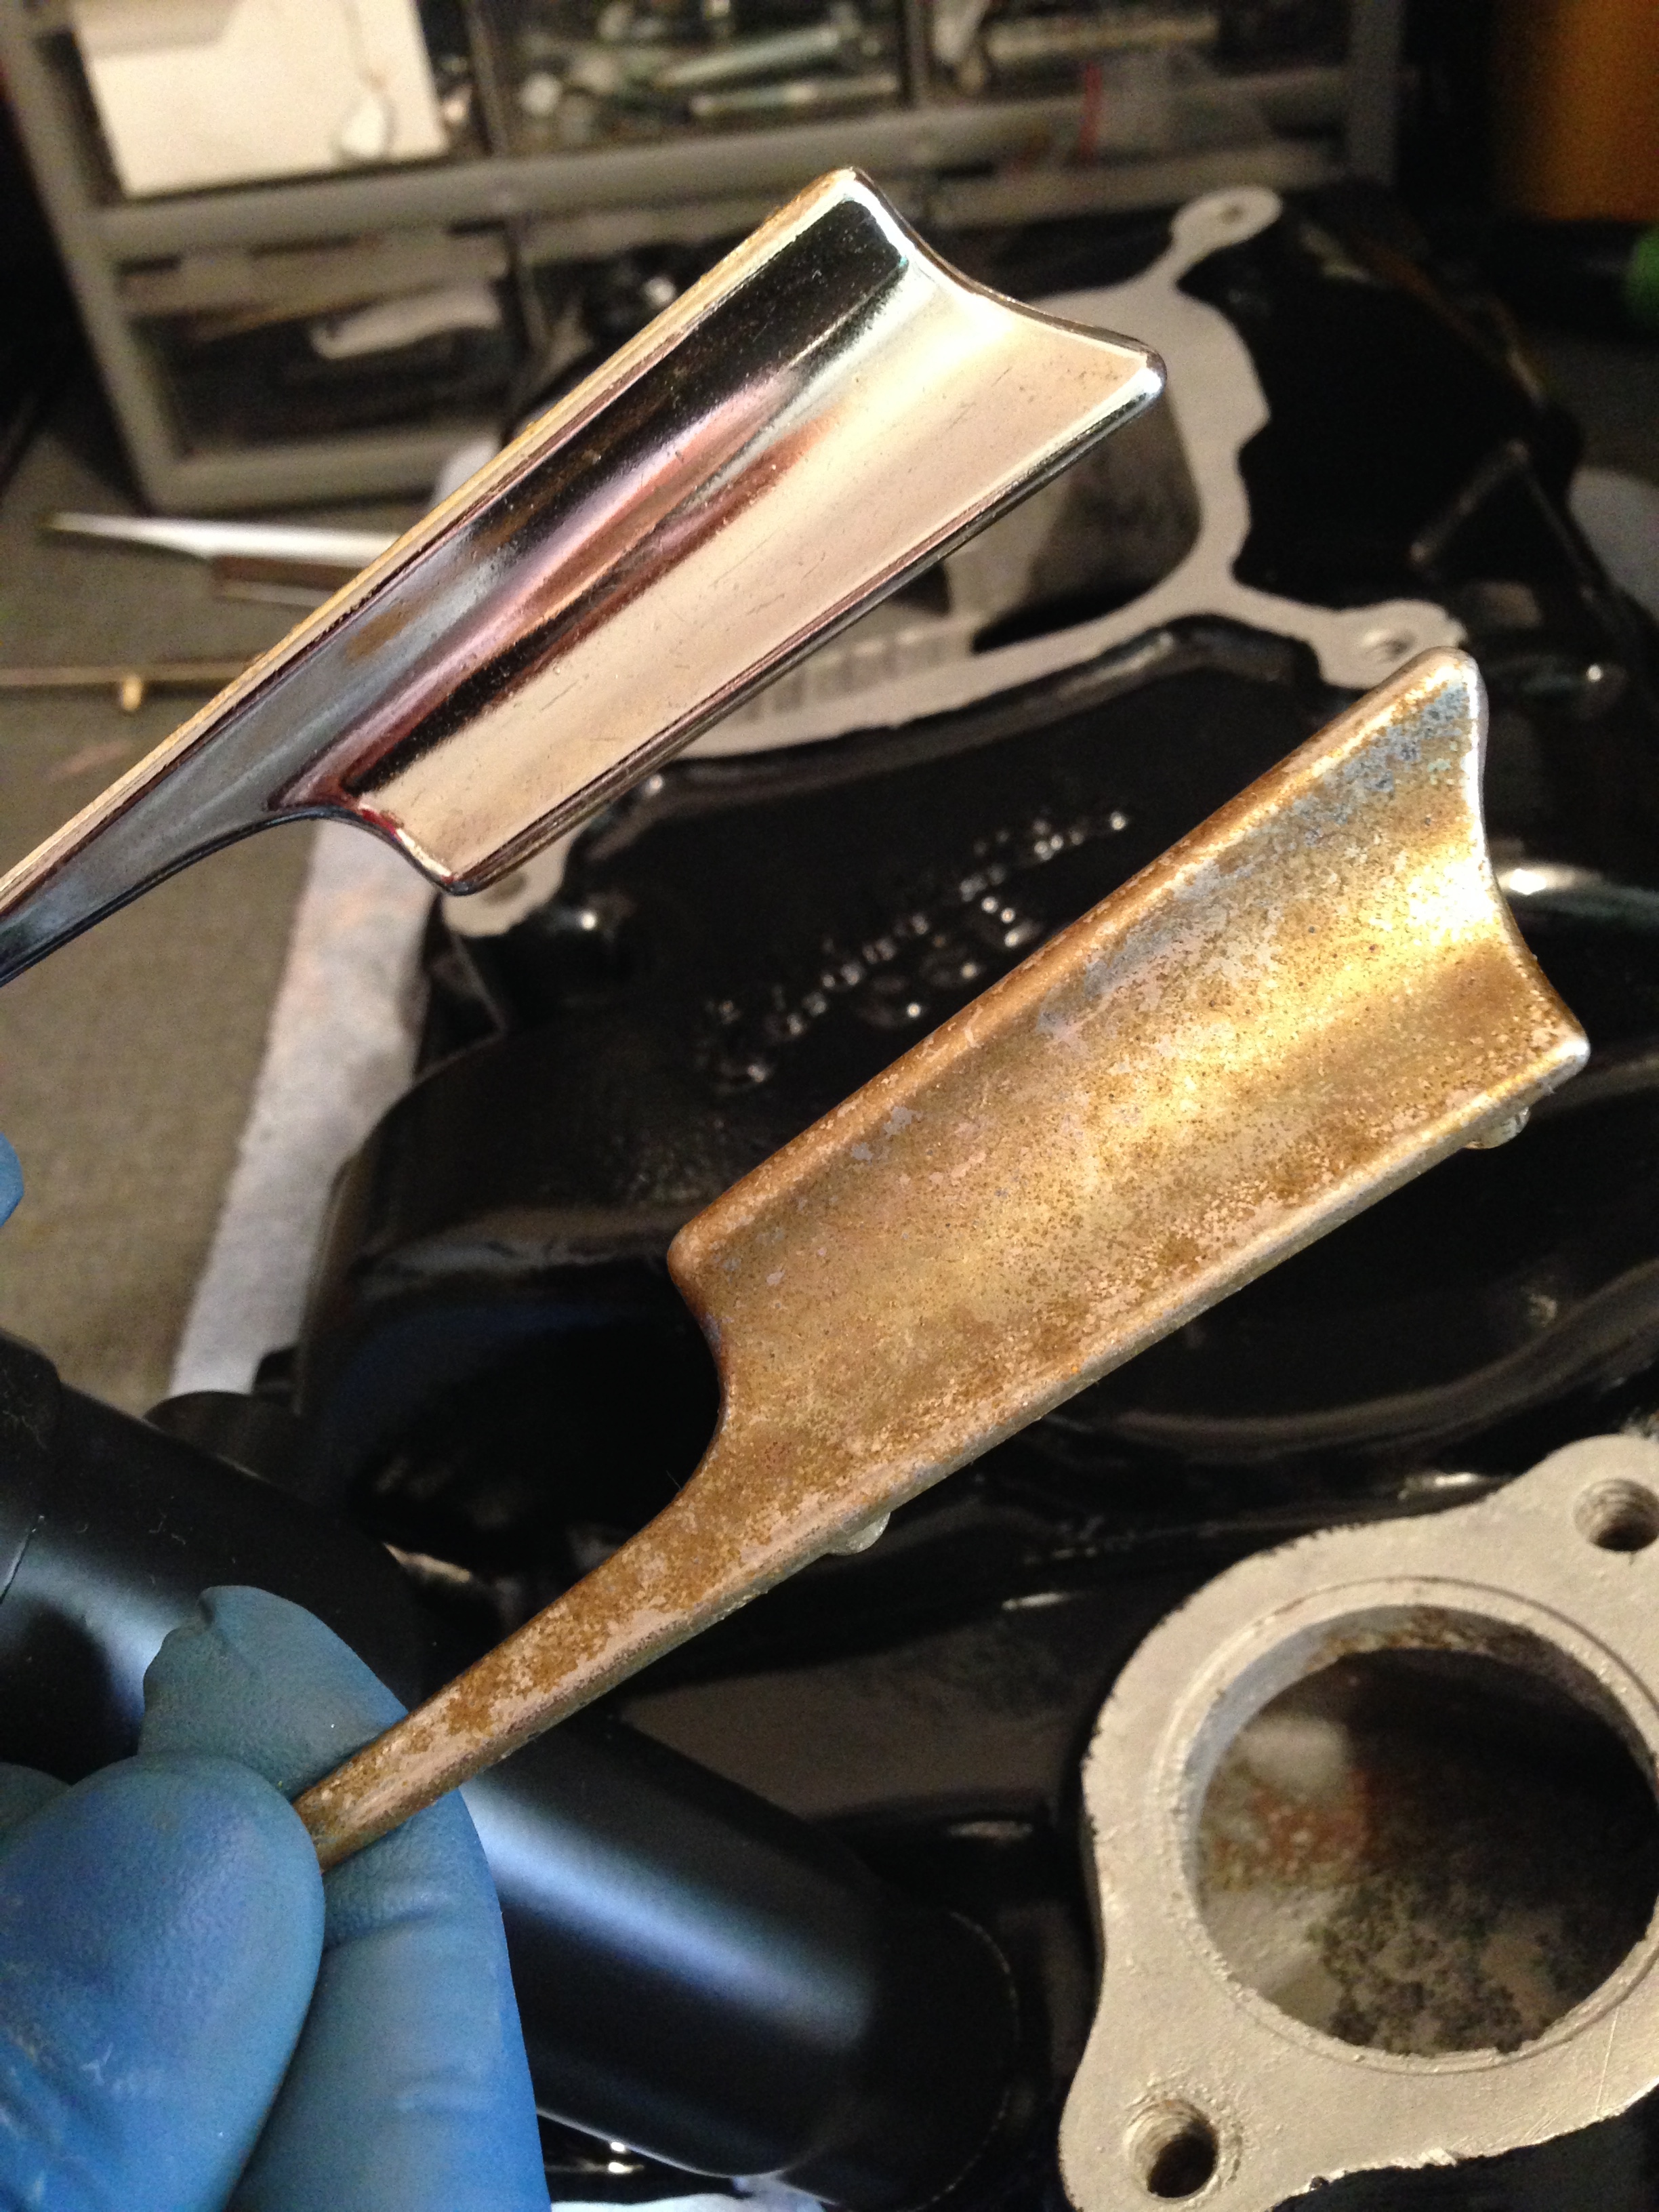
Then a couple of weekends ago, our awesome friend Maureen gave us a deal on a vintage credenza she was looking to get rid of.  It needed some sprucing up, but of course that meant that Jack got to go nuts with some Simichrome and tinted furniture oil, so he was a happy camper!

Oiling up the dings and scratches in the wood…

IMG_2107

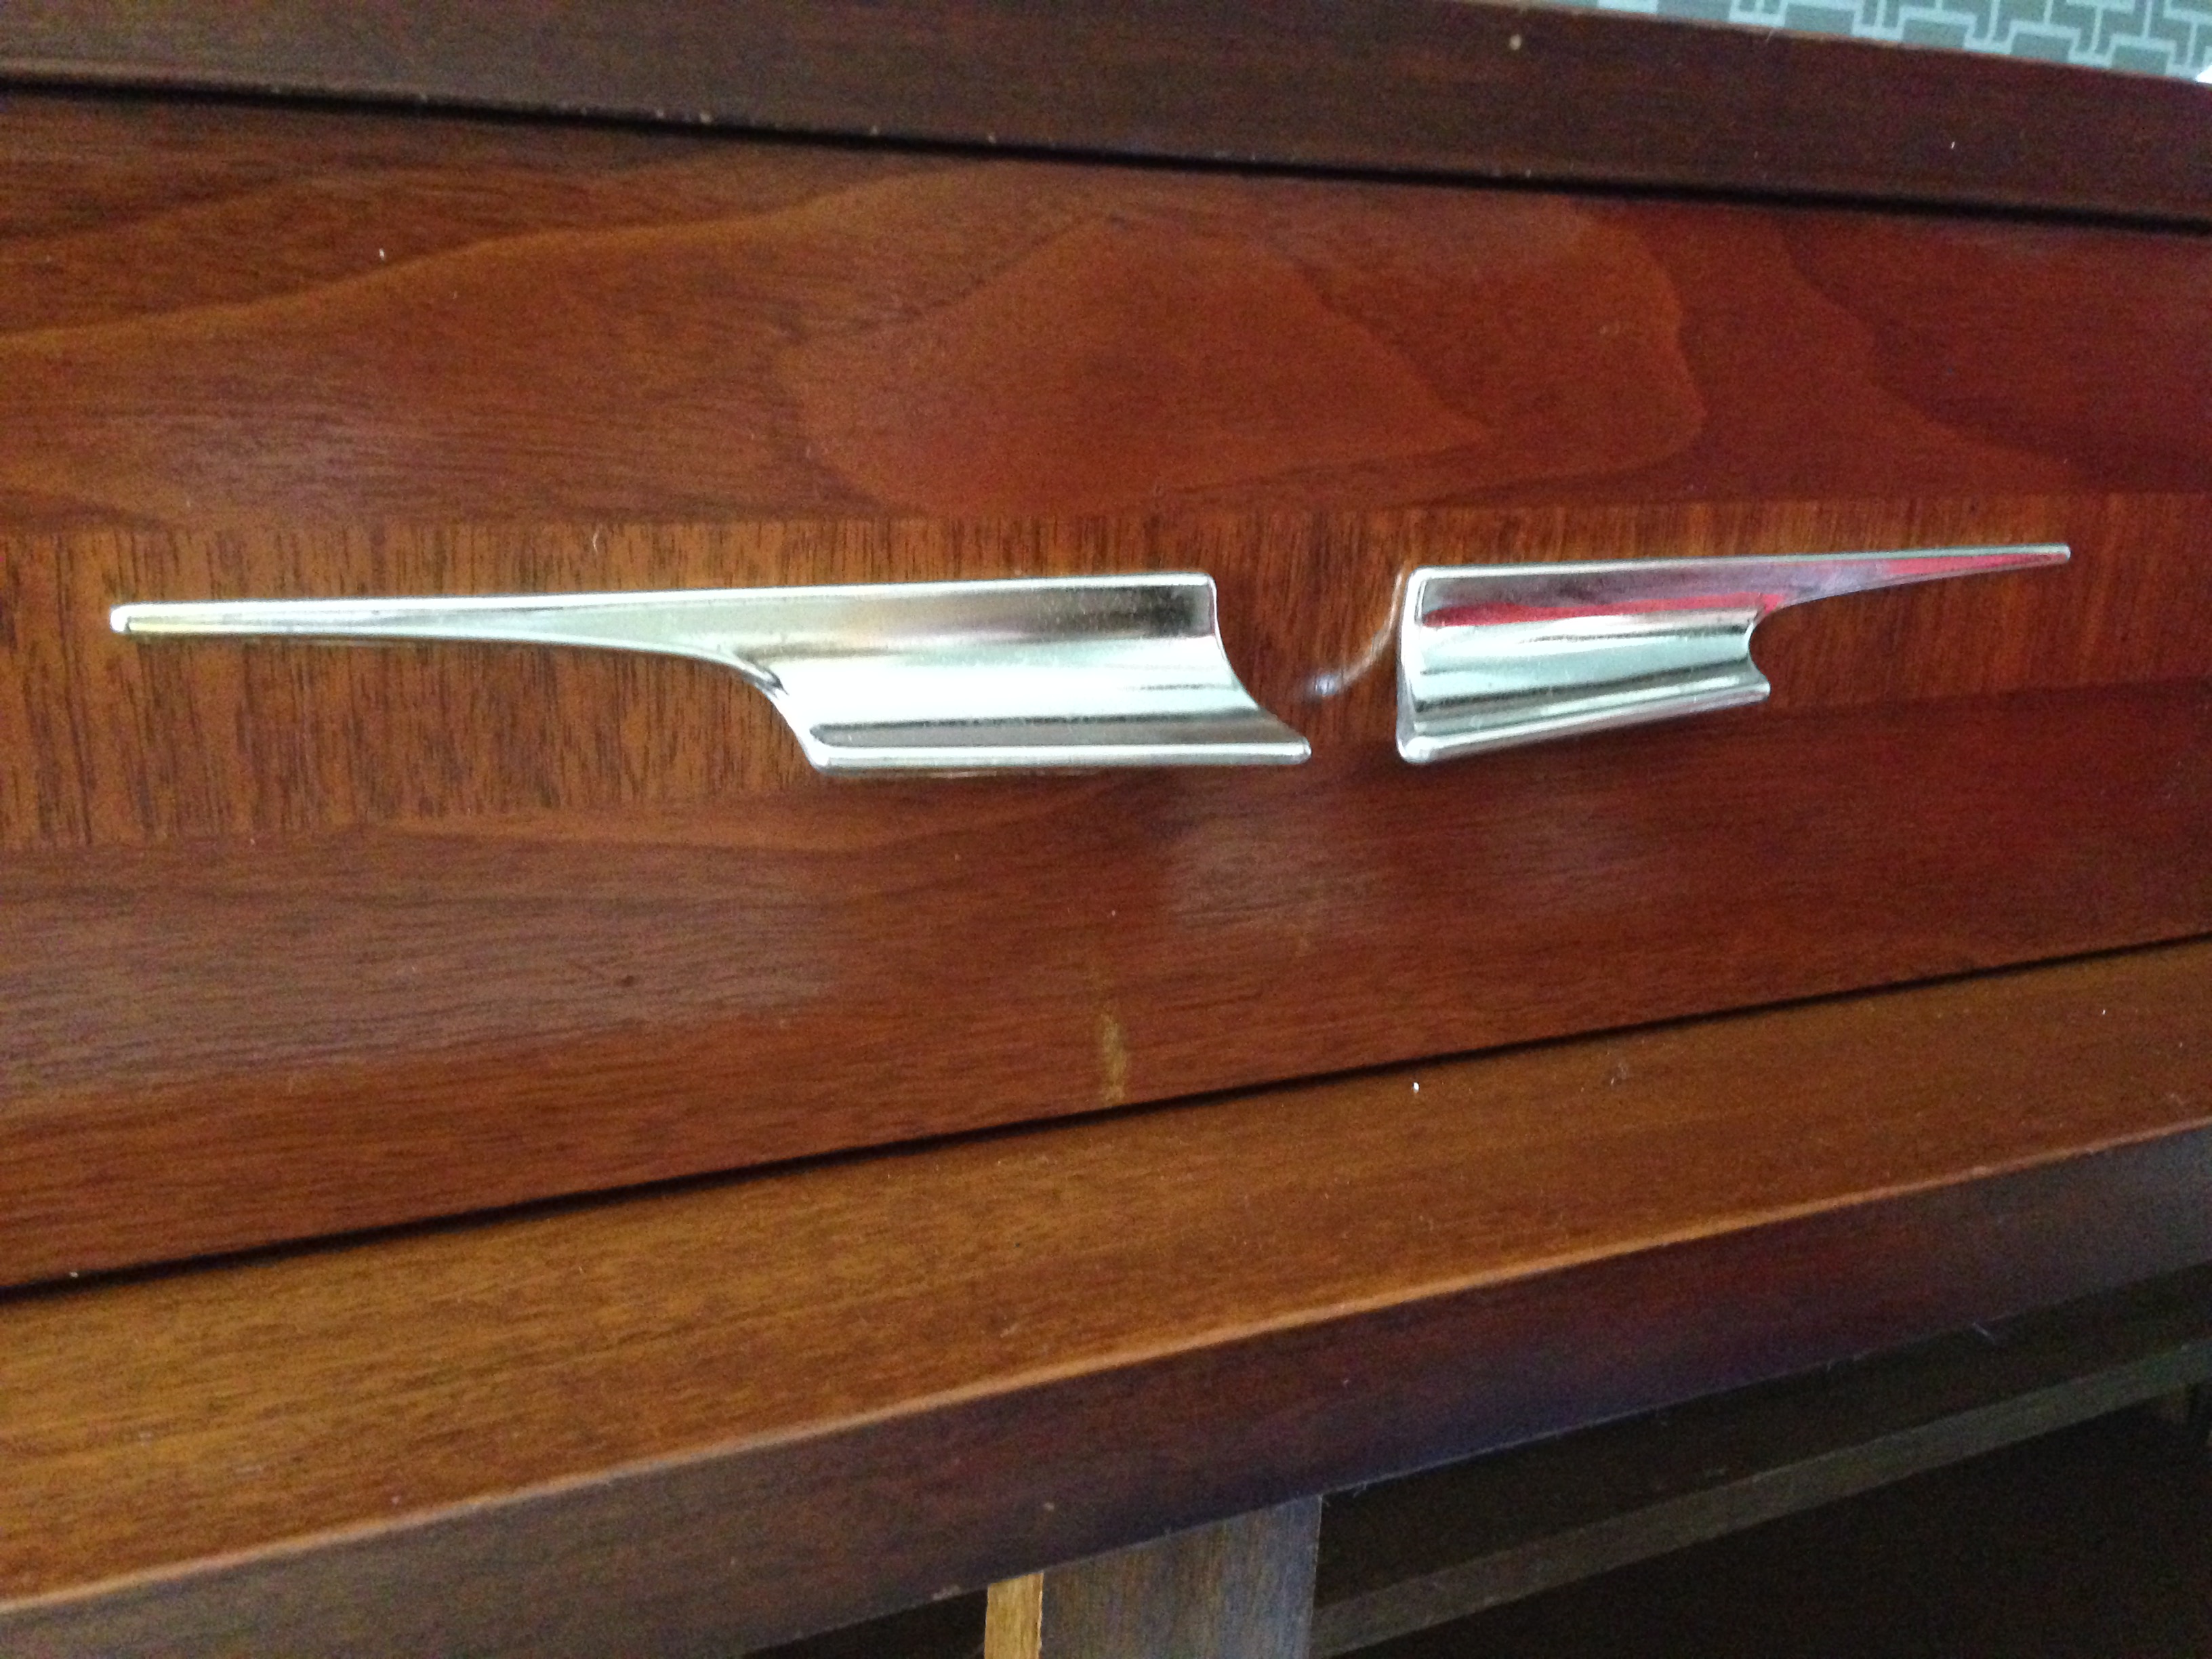
The drawer handles before — tarnished up from years of love and use…

IMG_2112The handles removed for easy polishing…

IMG_2114

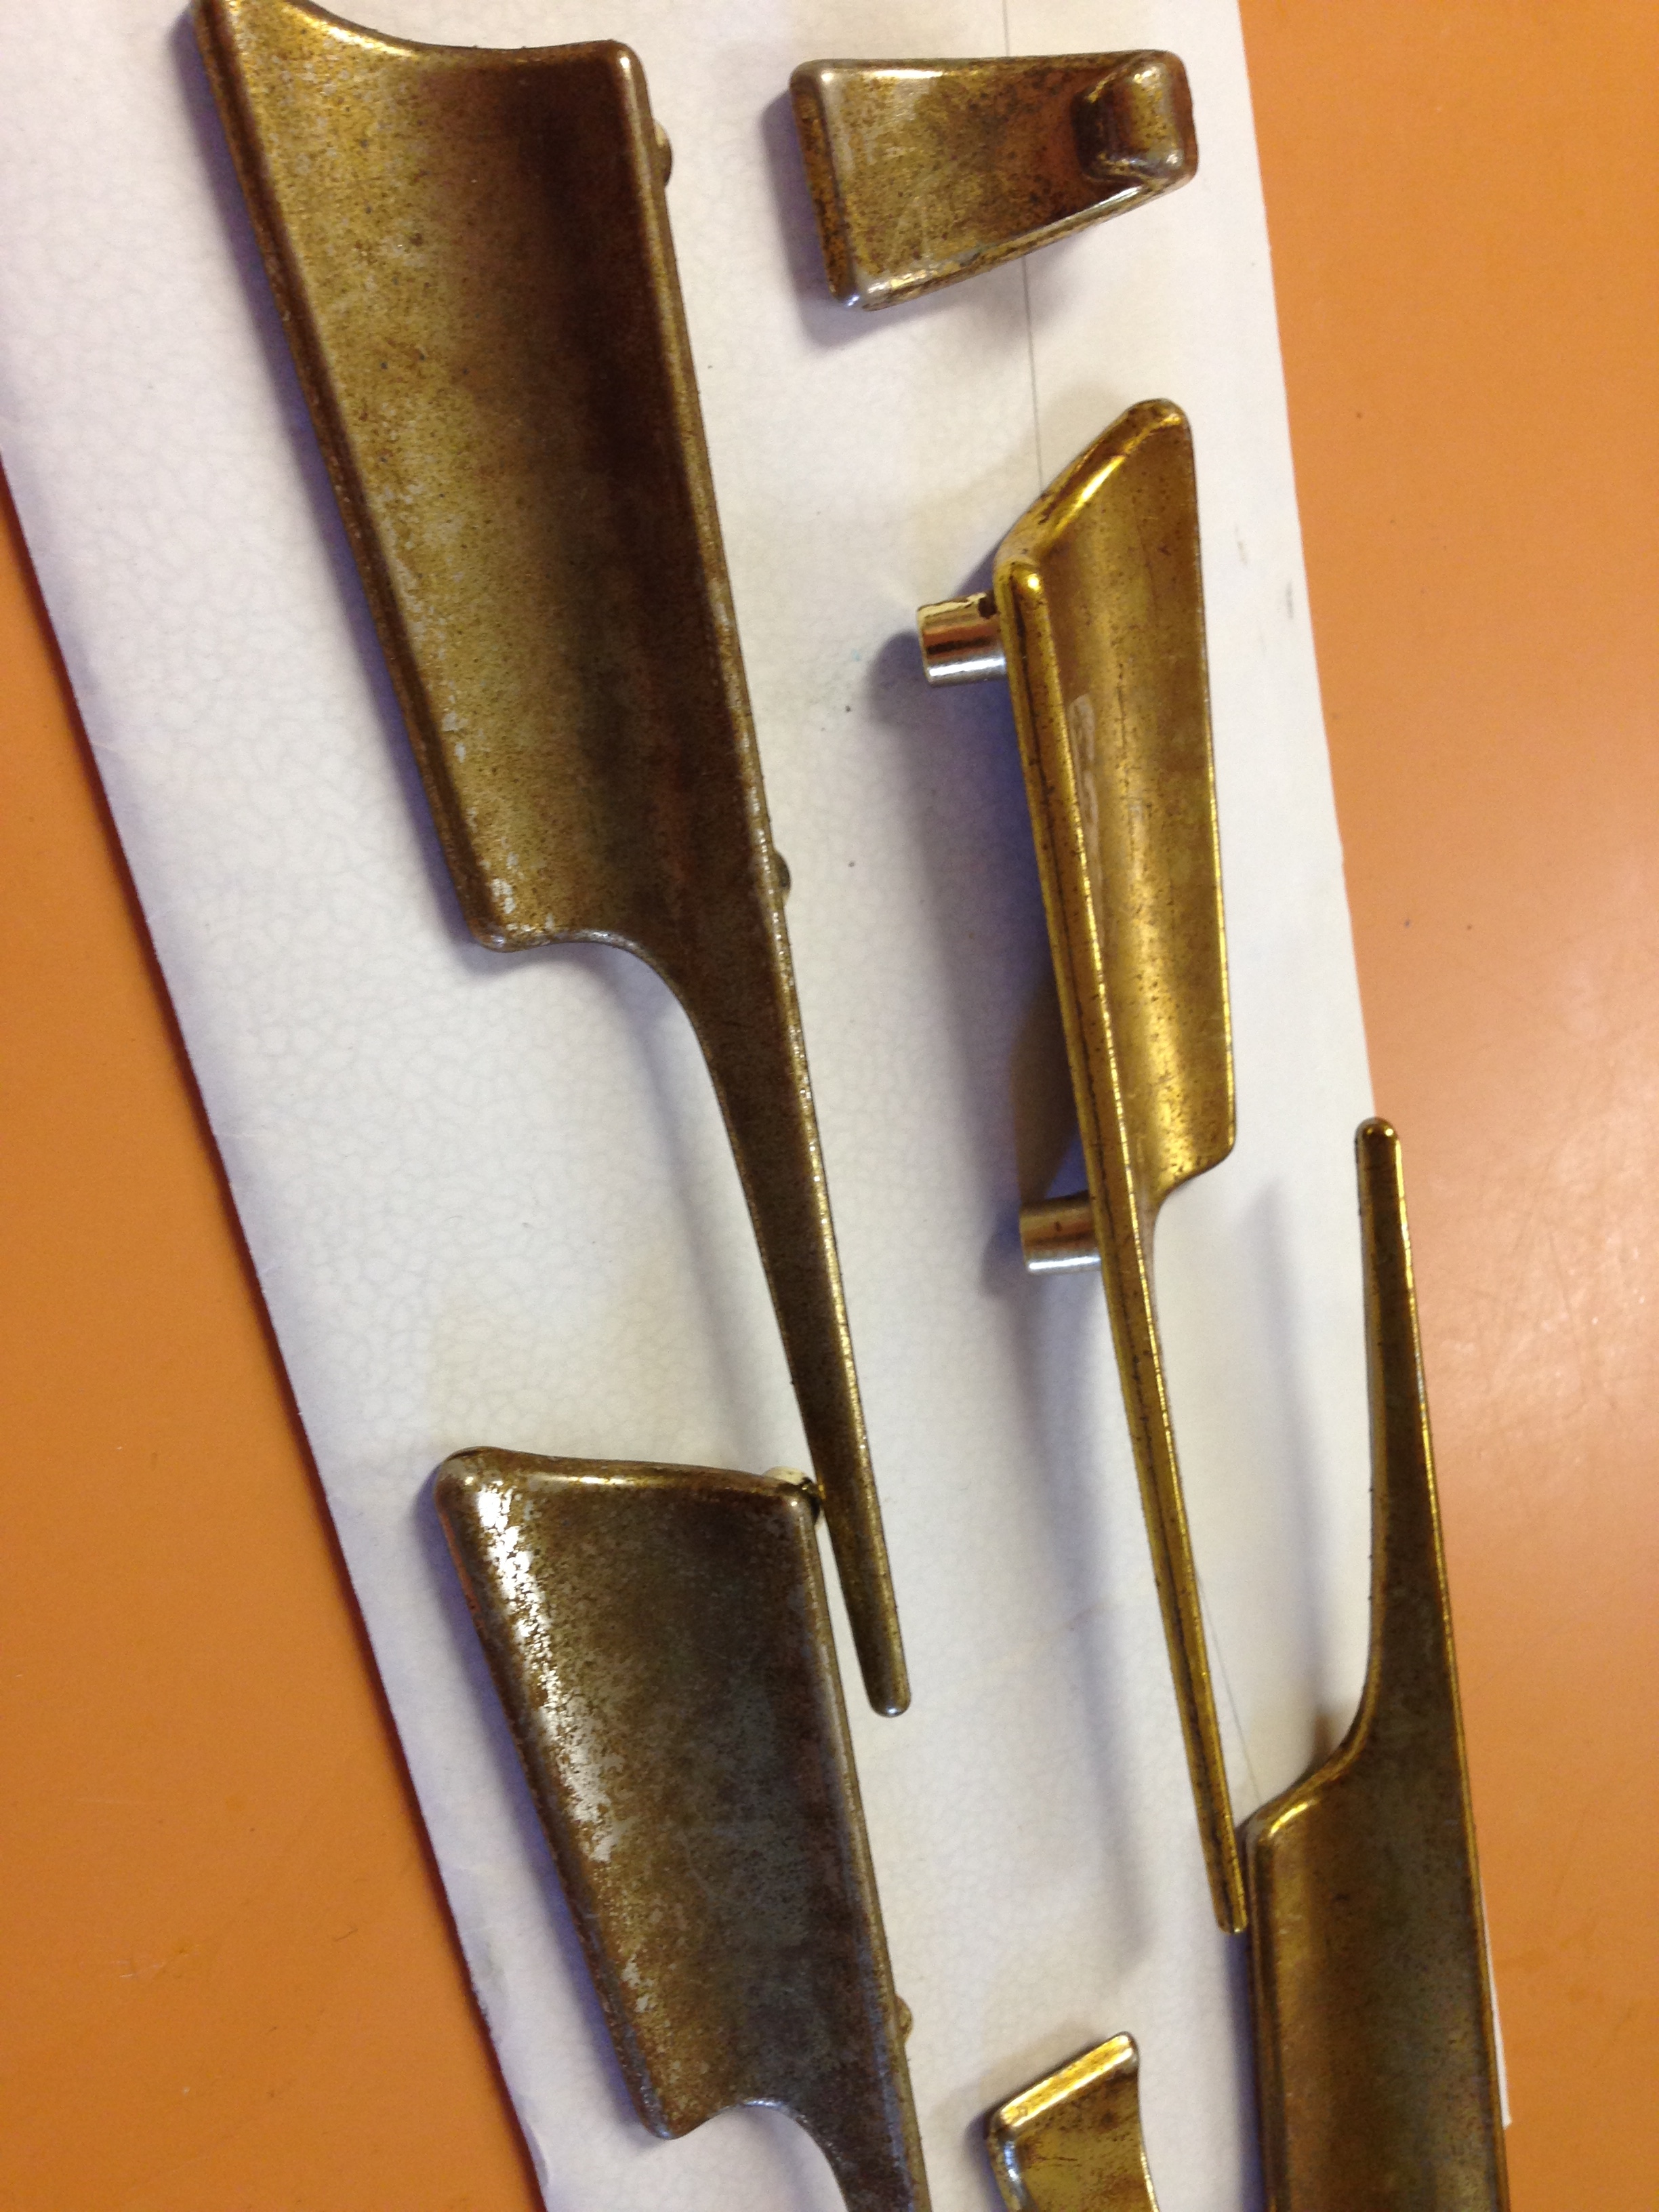
And now we play “guess which one has just been polished”!  🙂

IMG_2115

Back on the credenza, good as (almost) new!

IMG_2119

The credenza was the last big piece we needed to make the room feel like a dining room.  It gave us space to store our table linens, as well as some of our little tabletop decor…  and so with a big mirror and a few other touches, we’re just about finished!

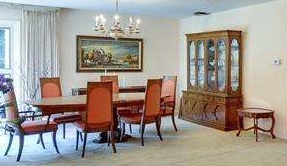
*drumroll*  and…  voilá!

IMG_2156

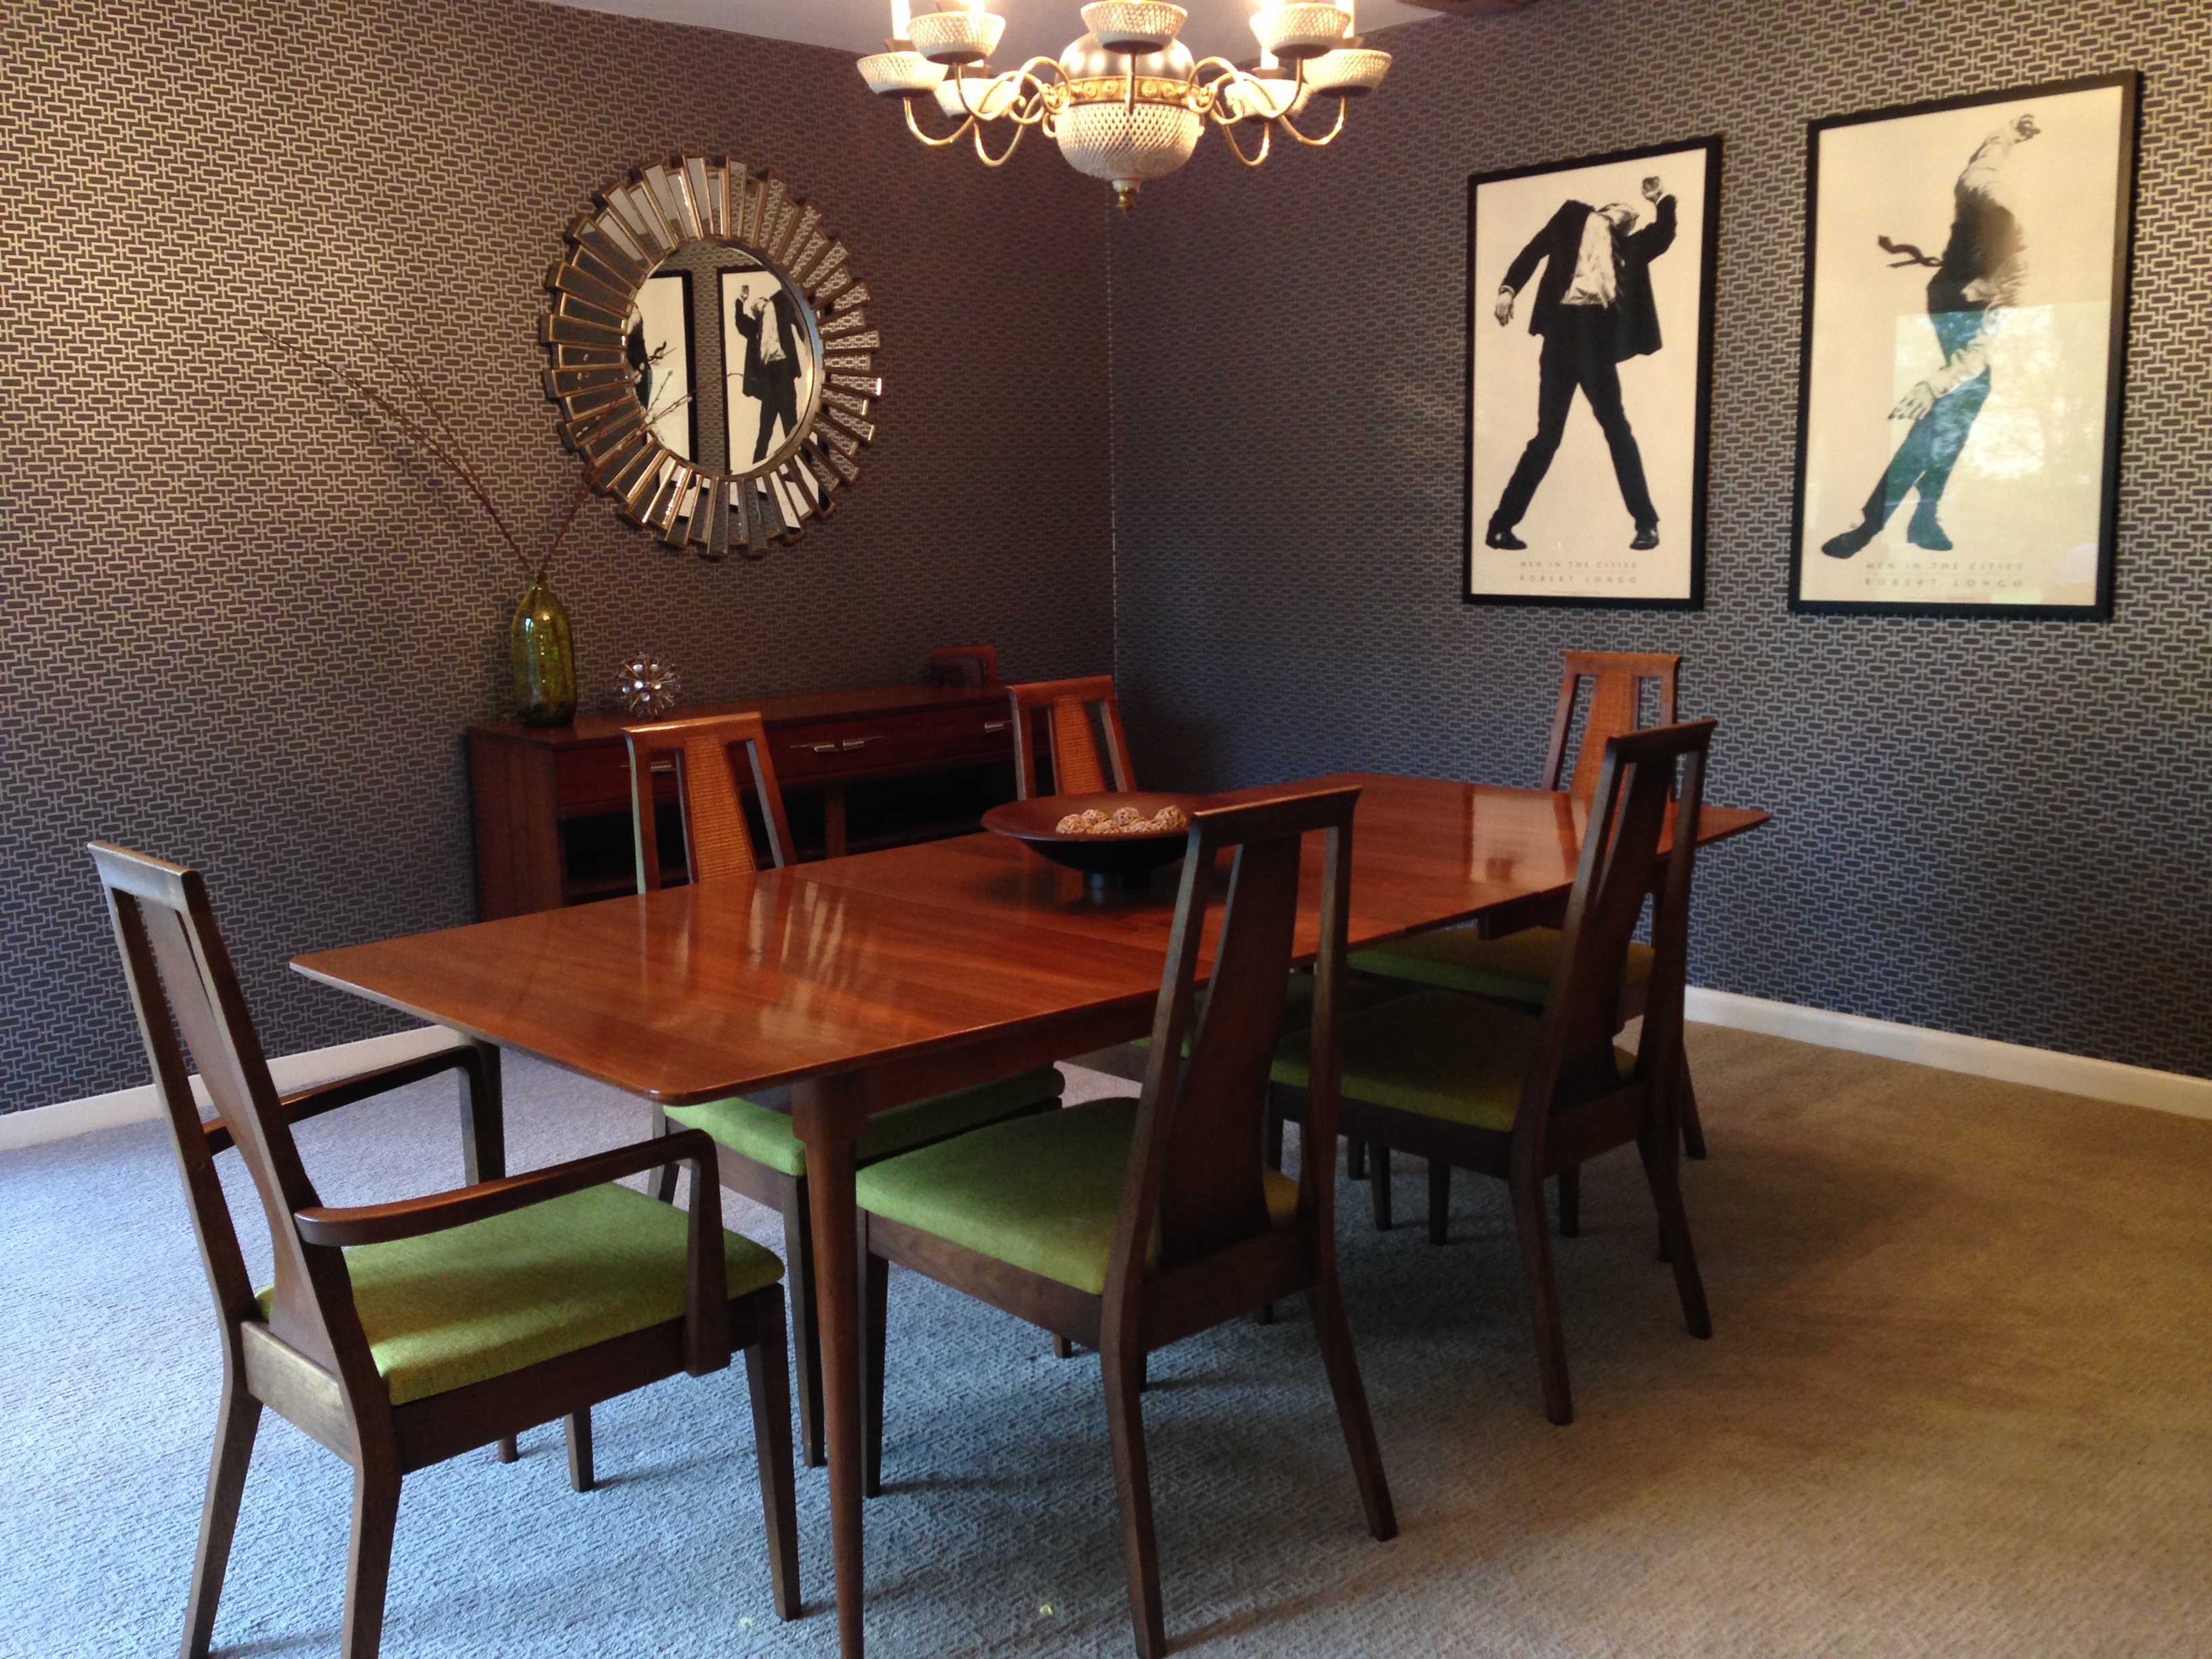
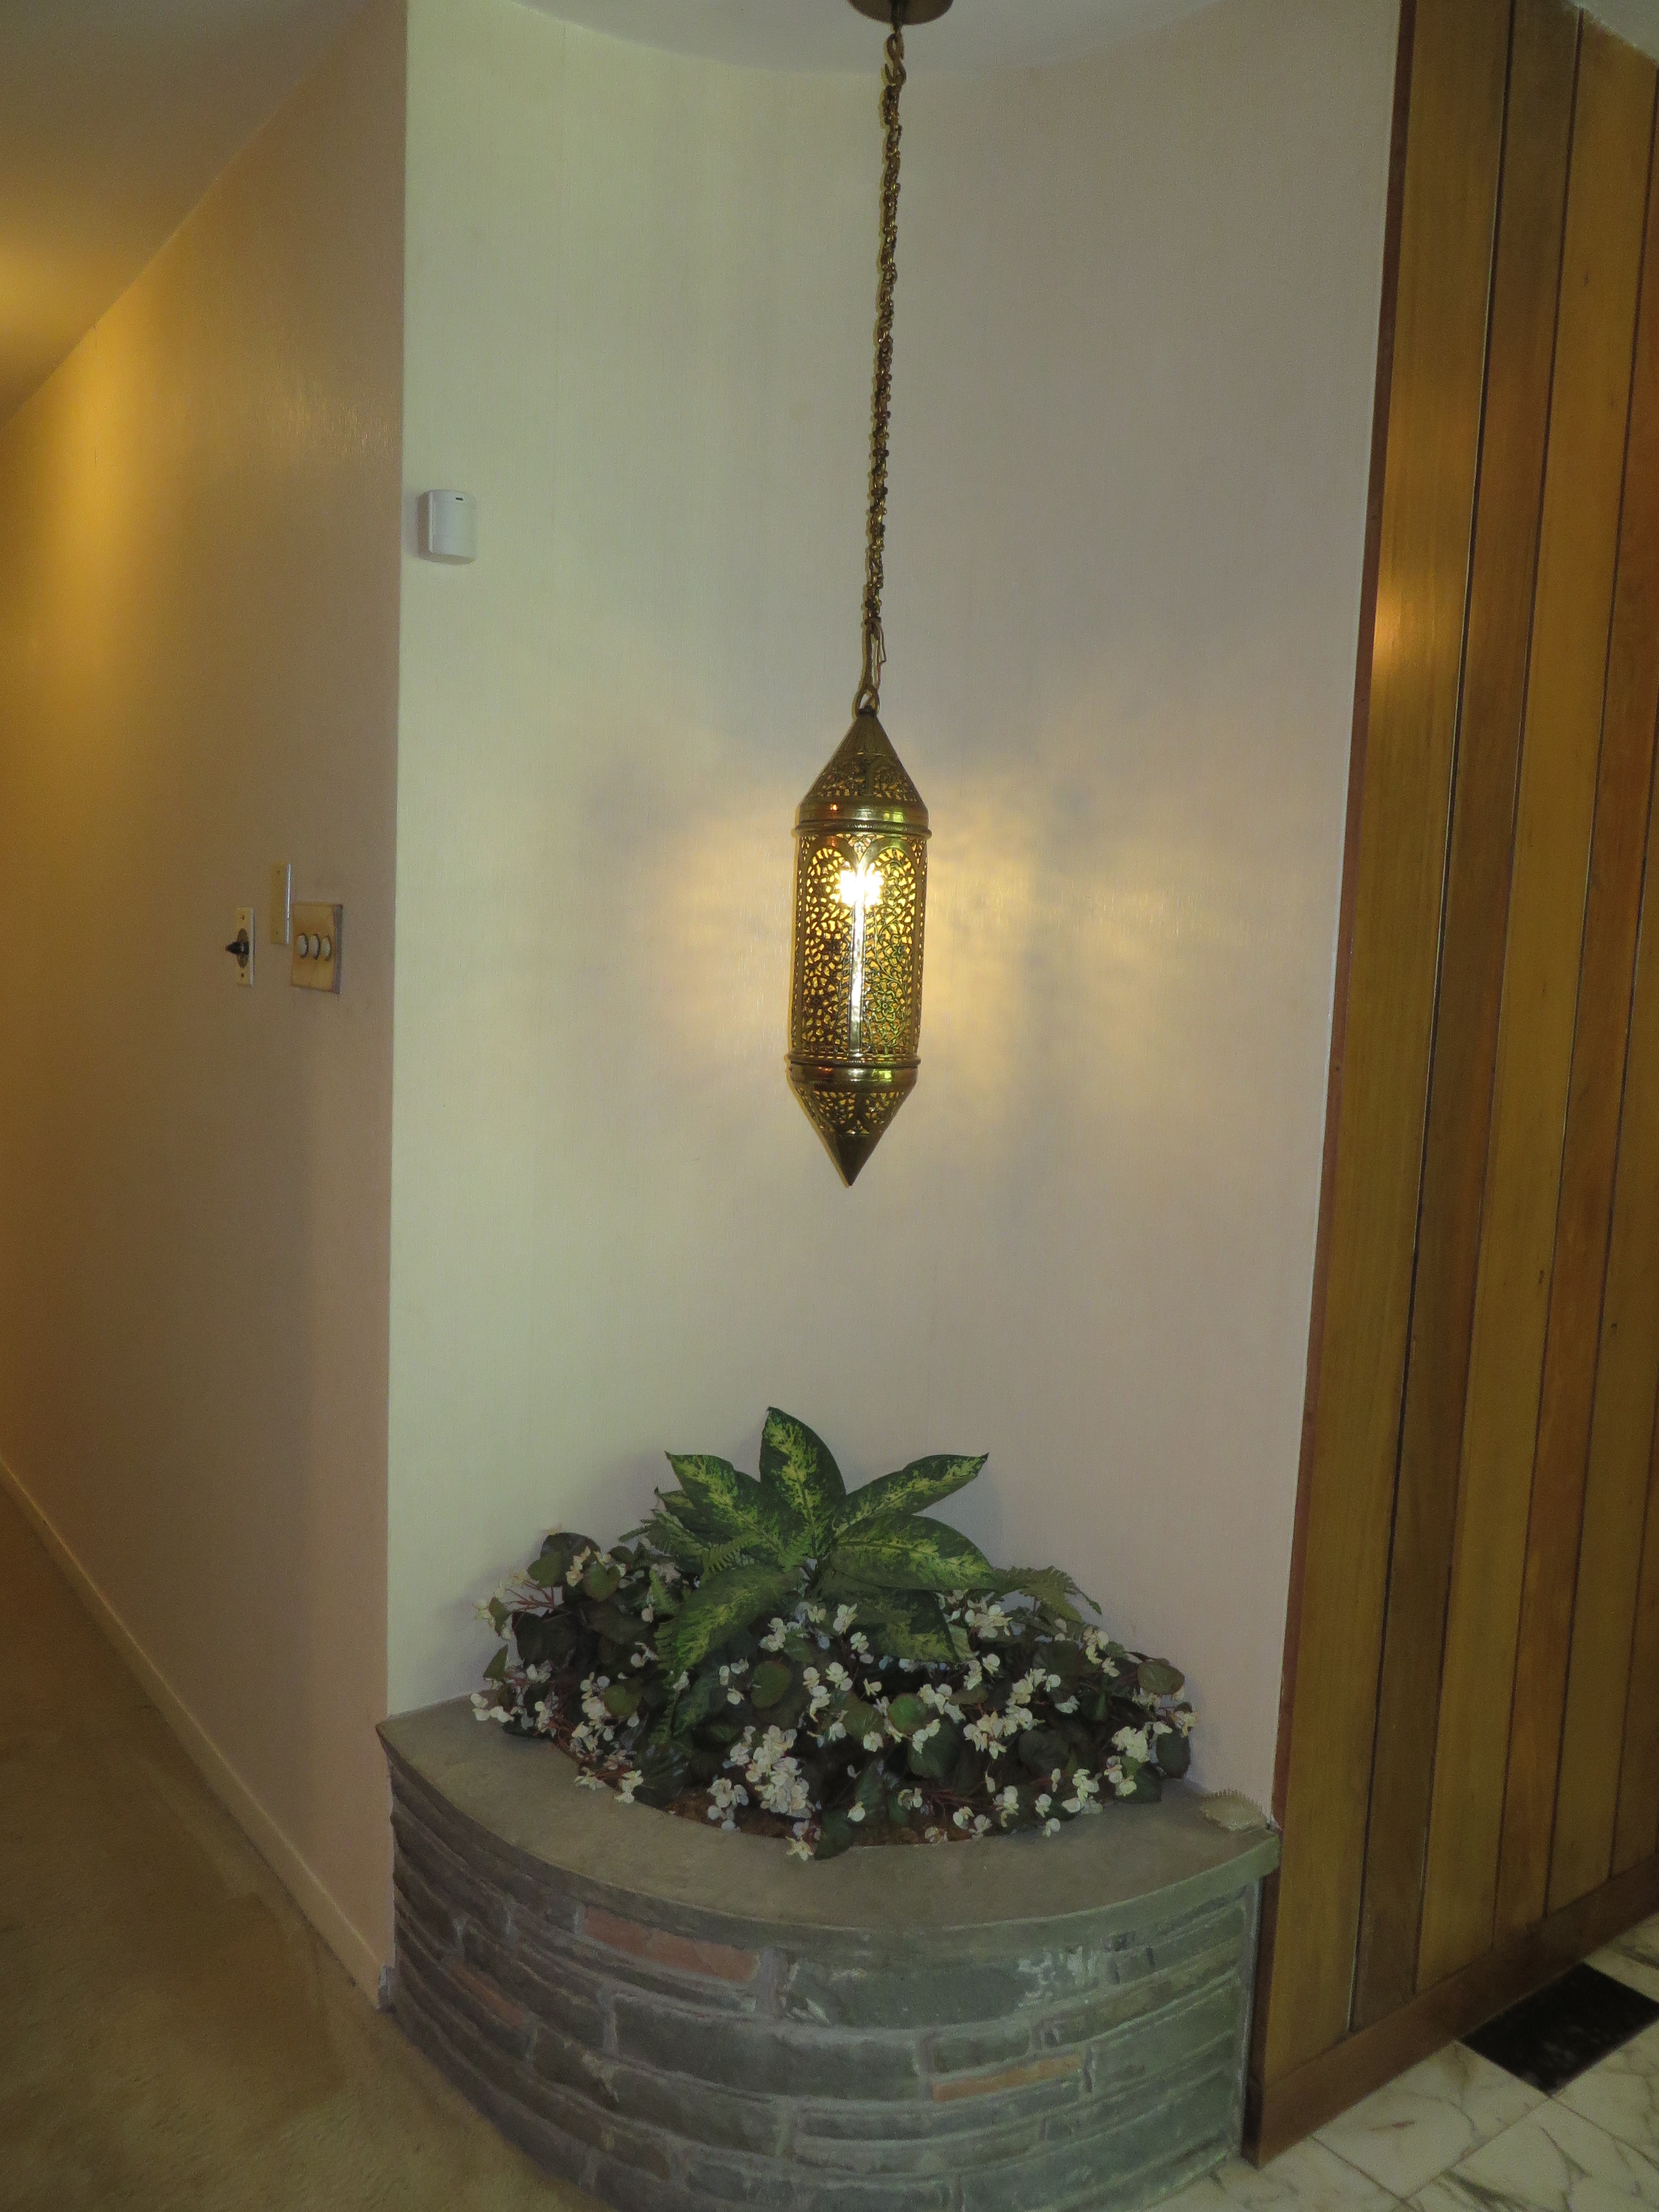
We’re so happy with how it turned out so far.  There are still some things we need to do to the room eventually, like remake the pinch-pleat drapes (had to throw them out due to the cigarette smoke damage) and eventually replace the light fixture…  but for now, it’s exactly what we wanted and makes it feel much more like home.  🙂

We have had a wallpaper cat-astrophe.

Can’t believe it’s been almost 2 weeks since our last post!  Although in some ways there hasn’t been much to report — the past 3 weeks have been pretty much 100% focused on wallpaper and paint.  With no exaggeration, almost every room has looked like this:

IMG_1604

Floors covered in dropcloths and protective plastic, stacks of paint cans and buckets of wallpaper paste, papering tables, boxes of wallpaper.  It’s made most of our space practically unusable.  Jack and I have wanted nothing more than to have our house all to ourselves FINALLY, without tripping over all this stuff and having our painting, paper-ing friend working here every day.  We were so close last weekend, until our friend discovered that he had underestimated the amount of wallpaper needed for the kitchen…  by one strip of paper.  No lie — every wall of the house was finished, except for one little strip of blank wall next to the kitchen door.  *headdesk*  So after a few more days’ wait, he was going to come back for a few hours with an extra roll of paper, and finally complete the job.

And then… Saturday morning, uncaffeinated, I stumbled towards the kitchen to make my morning coffee and my eye caught something odd by the planter.  We have a recessed area in our entryway, where a stone planter holds fake plants under a really cool pendant light:

IMG_0820

But something about the newly-papered wall didn’t look right.  Upon closer inspection, I found this:

IMG_1610

What the…?   In my sleepy, freaked-out state, my brain scrolled through everything that could have caused those tears in the paper.  I was out of my mind.  Did we nick it moving something down the hall?  No, we didn’t move anything with sharp edges.  Did our paper-er friend accidentally ding it with his exacto knife?  No, too many marks.  The process of deduction left just 2 culprits: the feline contingent of the household.

image-1

image-1 copy

Jack and I asked them to ‘fess up, but they seem to be protecting each other and are both claiming innocence.  Based on prior transgressions, we think Duck is the perpetrator.  He does love to sharpen his claws while reaching up, and his tall cat tree was still in our storage unit so he was lacking a scratching post.  So a freshly wallpapered corner, with a nice planter ledge to stand on, would be the perfect substitute in a pinch.  But since we didn’t catch him in the act, we can’t pin it on him.  Sneaky, sneaky Duck.

When our paperer friend came back to finish the job (finally!), we sheepishly told him that a corner had already been ruined and asked what could be done.  We fully expected that it was going to be another day’s worth of peeling off the paper, sanding down the wall, prepping it, and re-papering.  Instead, he grabbed some of his wallpaper paste, put a little blurt of it over the marks, and used his fingernail to work the shredded paper back into the grooves:

IMG_1640

Voila!  You can’t even tell there was a problem there unless you look for it.  (And yes, we immediately got the cat tree out of storage to avoid future claw run-ins.)

Cat-astrophe fixing aside, our wallpaper friend showed us a really cool trick for another paper issue we ran into last week.  You’ll recall from our last post that we had picked out some really cool silver patterned paper for our dining room…  problem was, we wanted only the dining room area to have that paper, and with the open floor plan of our main living space, it meant that two different wallpapers were going to have to meet at a sticking-out corner.  If you don’t do it right, you’re left with a seam going down a corner that can peel over time if you rub against it or moisture gets in there.  BUT — if you’re planning on doing this yourself — there is a solution!

Here’s what you do.  You leave extra paper and actually run it around the corner so it’s on the perpendicular wall…  then you putty and sand the seam, so it blends into the wall.

IMG_1601

Then you start the new wallpaper right along that corner.

IMG_1663

It keeps the lines so clean, and will last for a long time with no fraying or anything.  Yay!

Now that the wallpaper is FINALLY done (trust me, even our wallpapering friend, who got paid for his work, was eager to be finished and out), we can focus on the next phase of transformation — fixtures and furniture!  w00t!  We should have much more to post in the coming weeks now that we have usable walls!