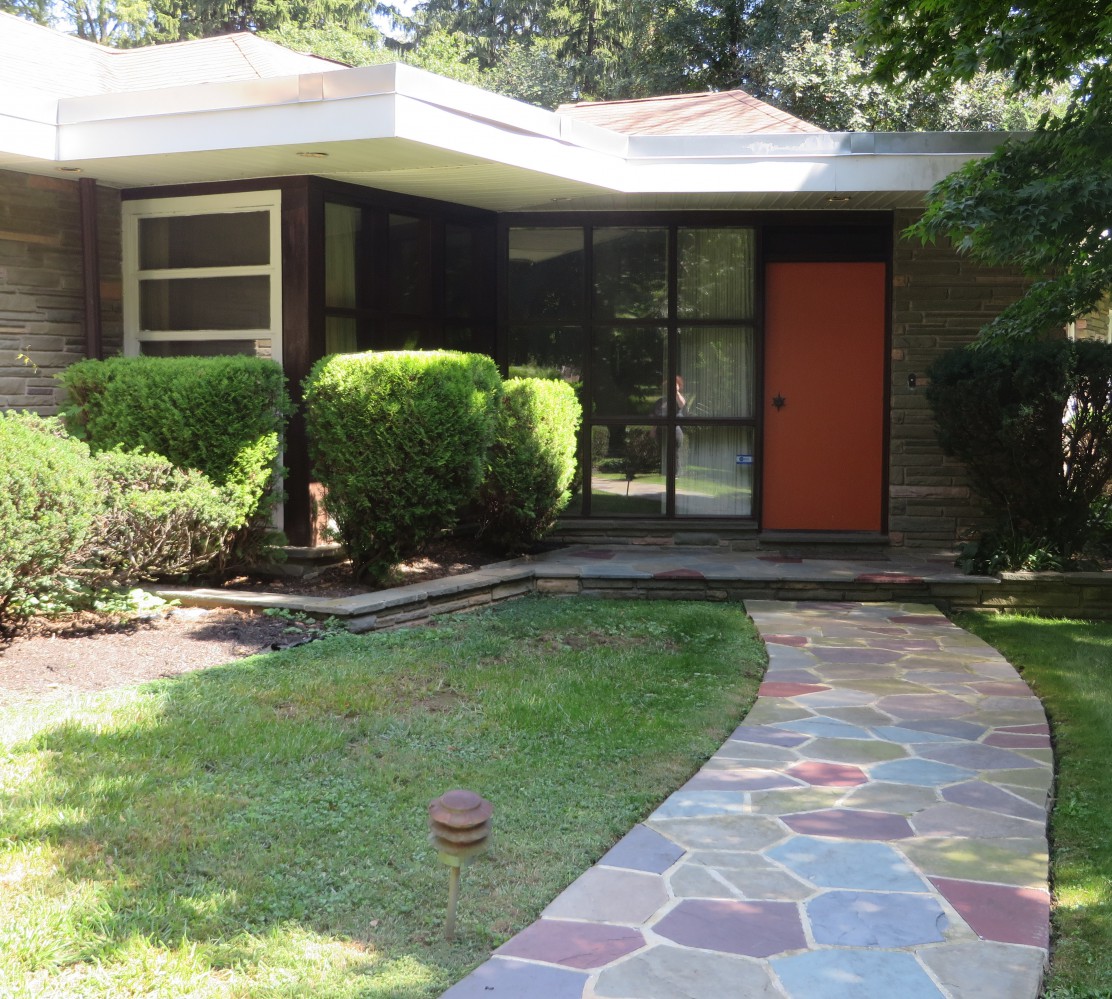

This post is SO long overdue! Since we started this blog, a lot of you have been asking about our kitchen and we’ve been meaning to give you the lowdown. We were hoping to have had everything finished in there by now so we could just do the whole thing as a massive “before and after” post, but life has gotten in the way and we’re only about halfway there. So we’ll make this the “before”, and the “after” will hopefully be ready in the next couple of months!
The kitchen is Jack’s favorite room in our house. It’s one of the reasons we wanted a new place to begin with — our last house had a teeny galley kitchen, and with Jack’s passion for cooking, the lack of room for storage or food prep or just being in there was a major frustration. We promised ourselves that our next home would have a bigger kitchen, but this one is way beyond anything we’d hoped for!
So, let’s get the tour going! Here’s our kitchen in its just-moved-in state:
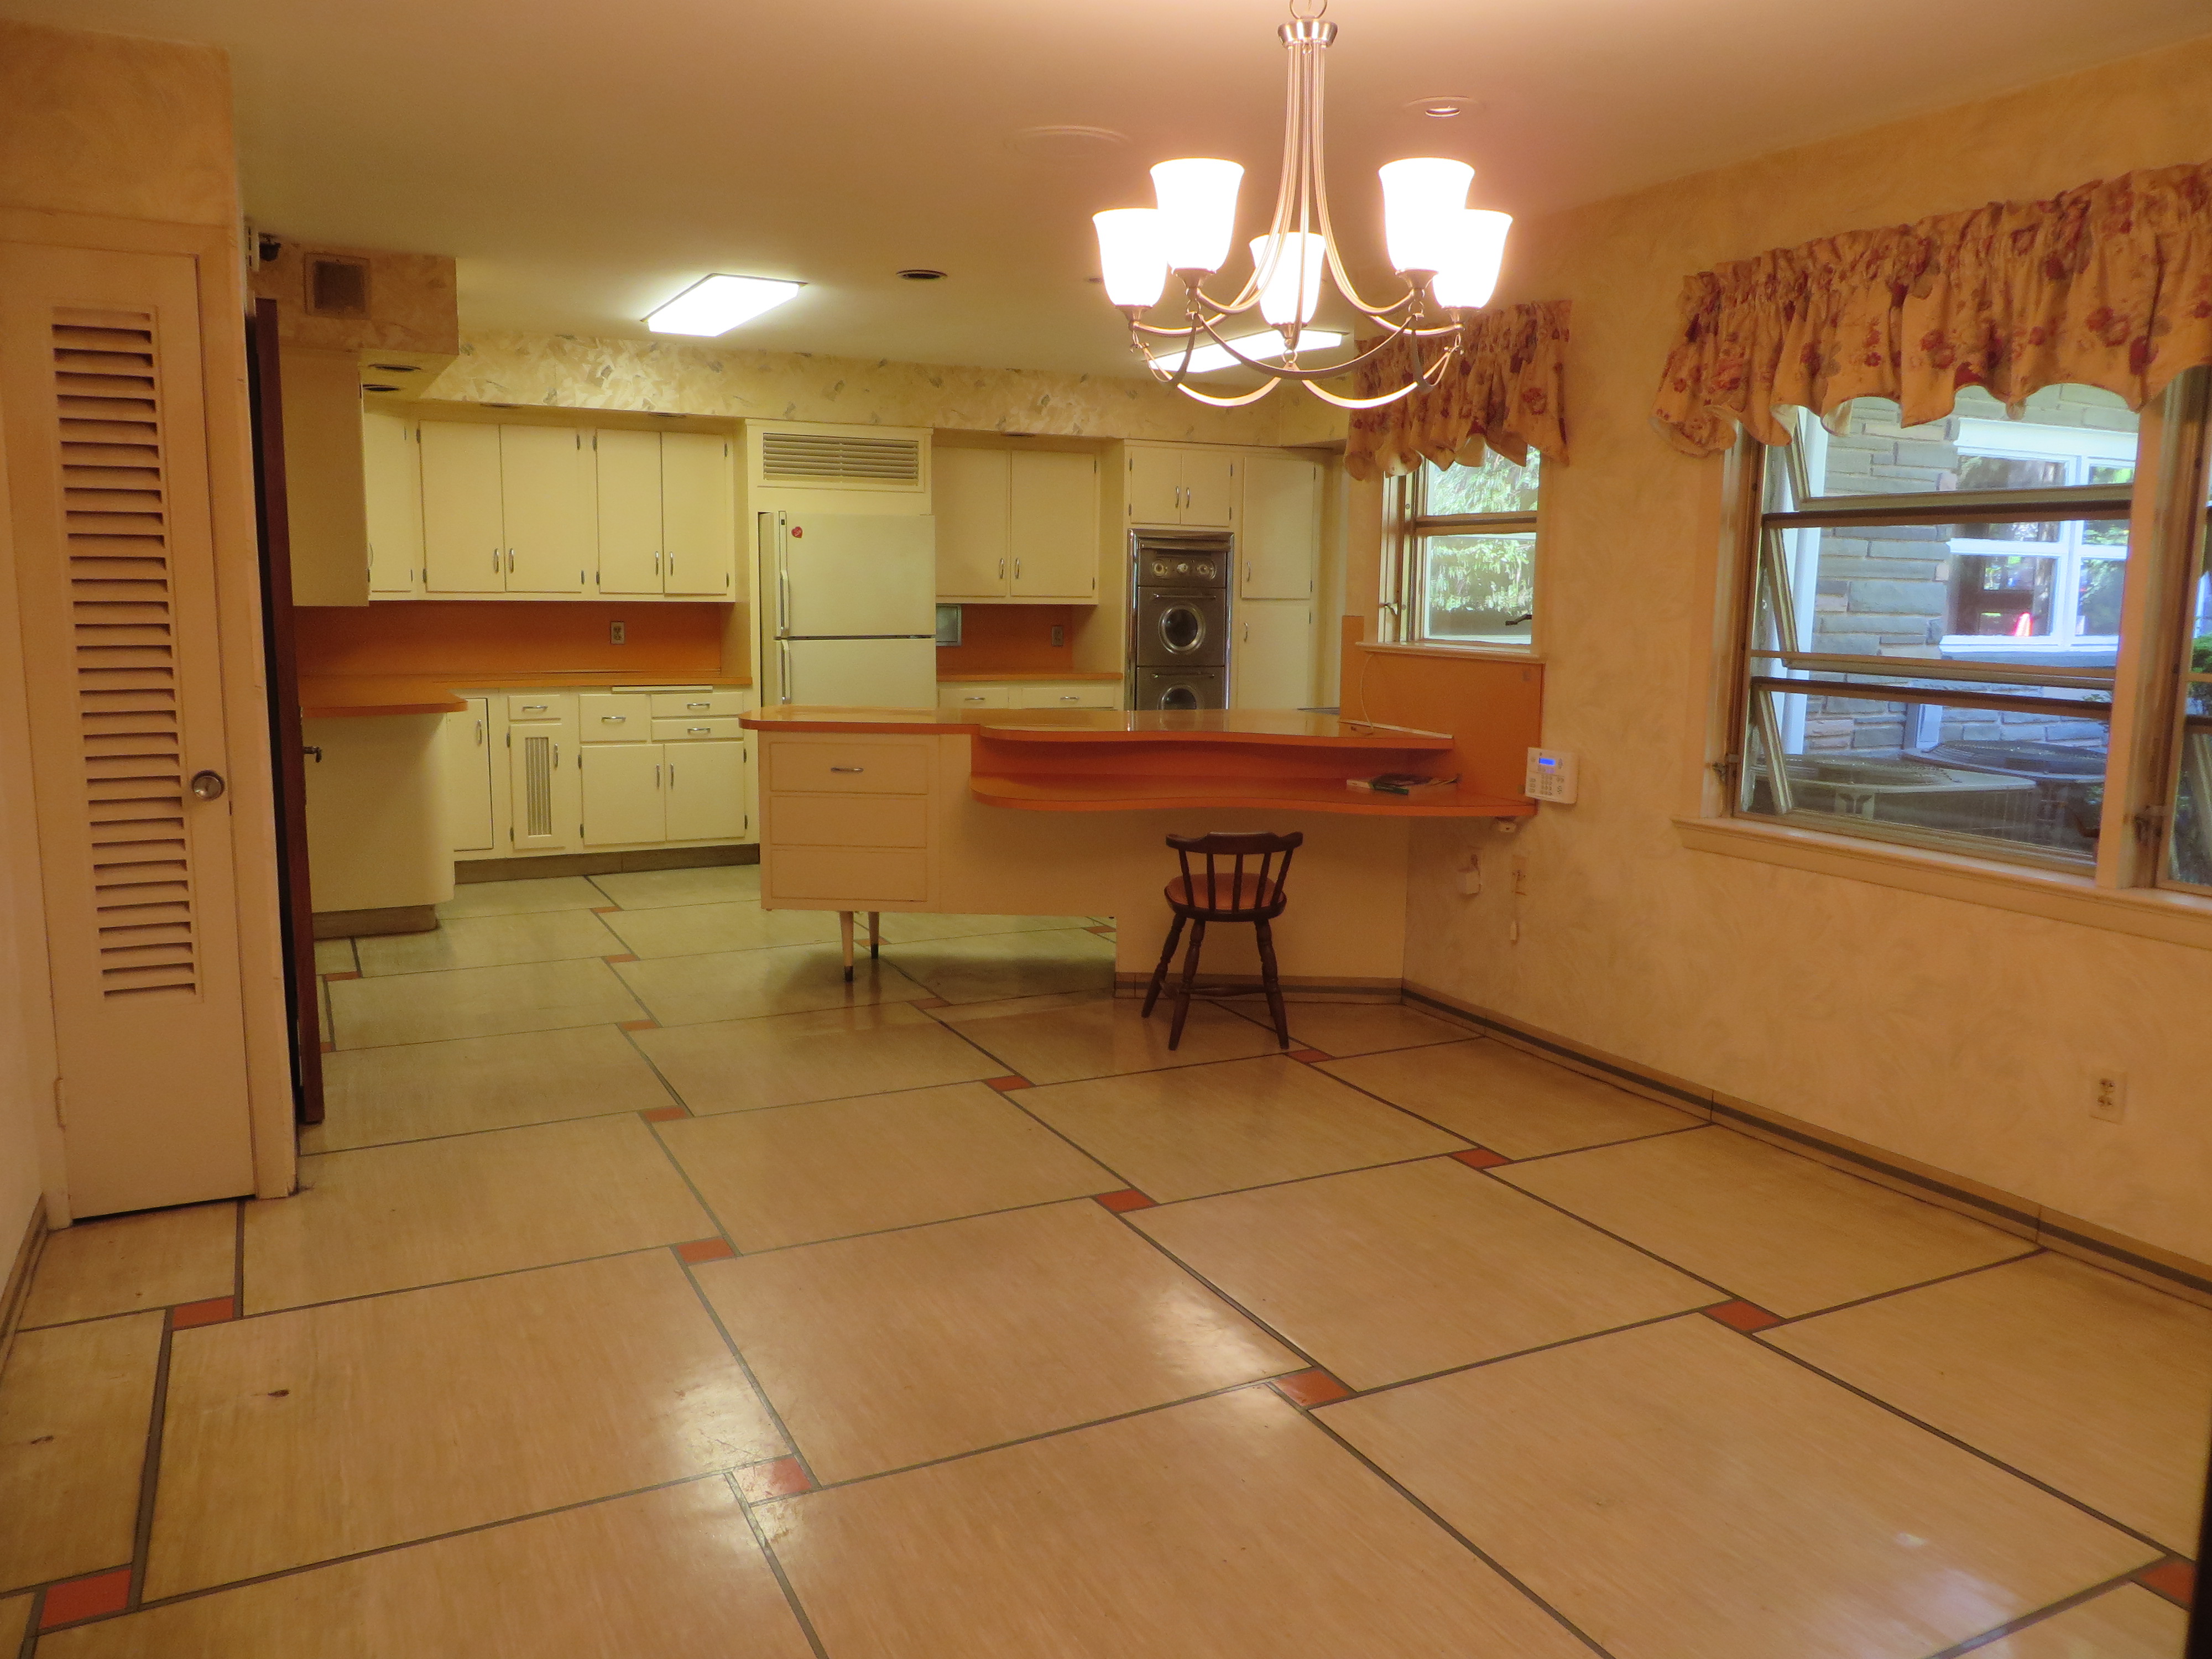
As you can see, this is a massive step up for us from a galley kitchen! We weren’t fans of the curtains, wallpaper, and light fixture, but those are easily changed. What really got us were all of the cool original features in here.

A close-up of one corner of the room. In this shot you can see the (going to be swapped) 80s-style wallpaper… and if you look under the glass-front cabinet you can see…
A house intercom system!
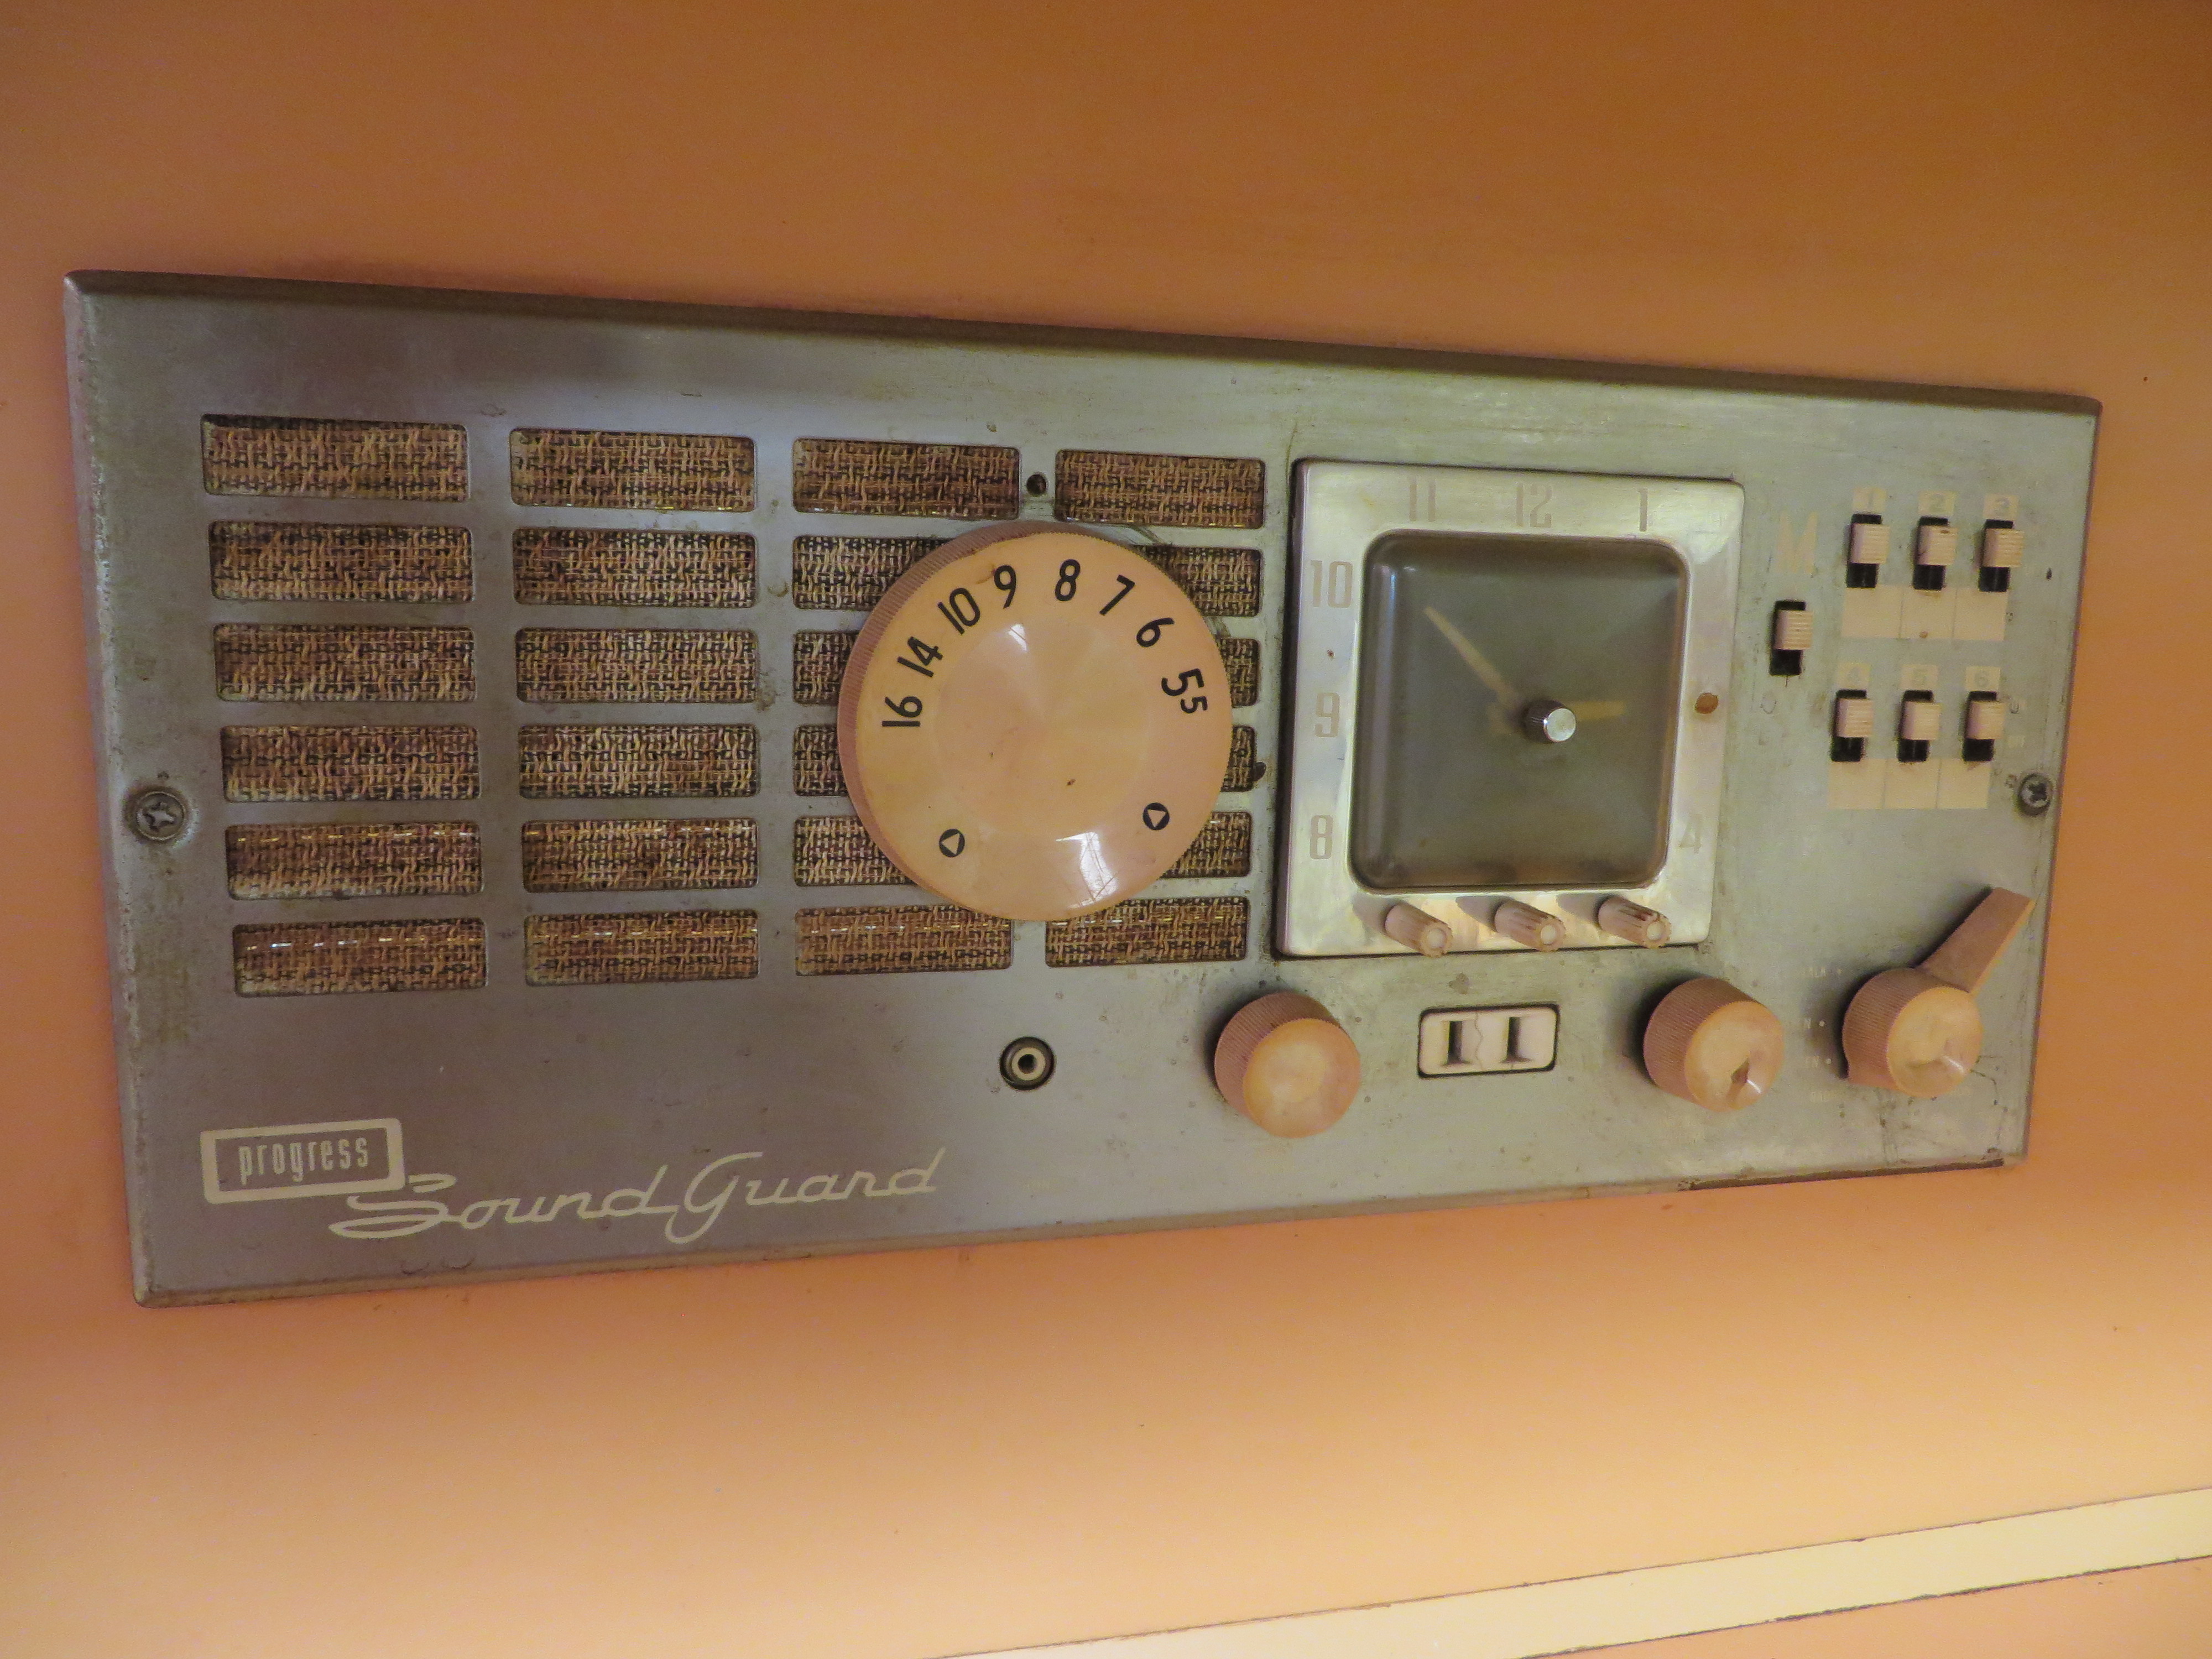
It doesn’t work at the moment, but Jack has been scouring the internet for parts to bring it back to life. There is a speaker in each room in the house (currently the hi-fi can broadcast through them), and with this nifty little guy you can call everyone to dinner. 😛 We can’t wait to play with it!
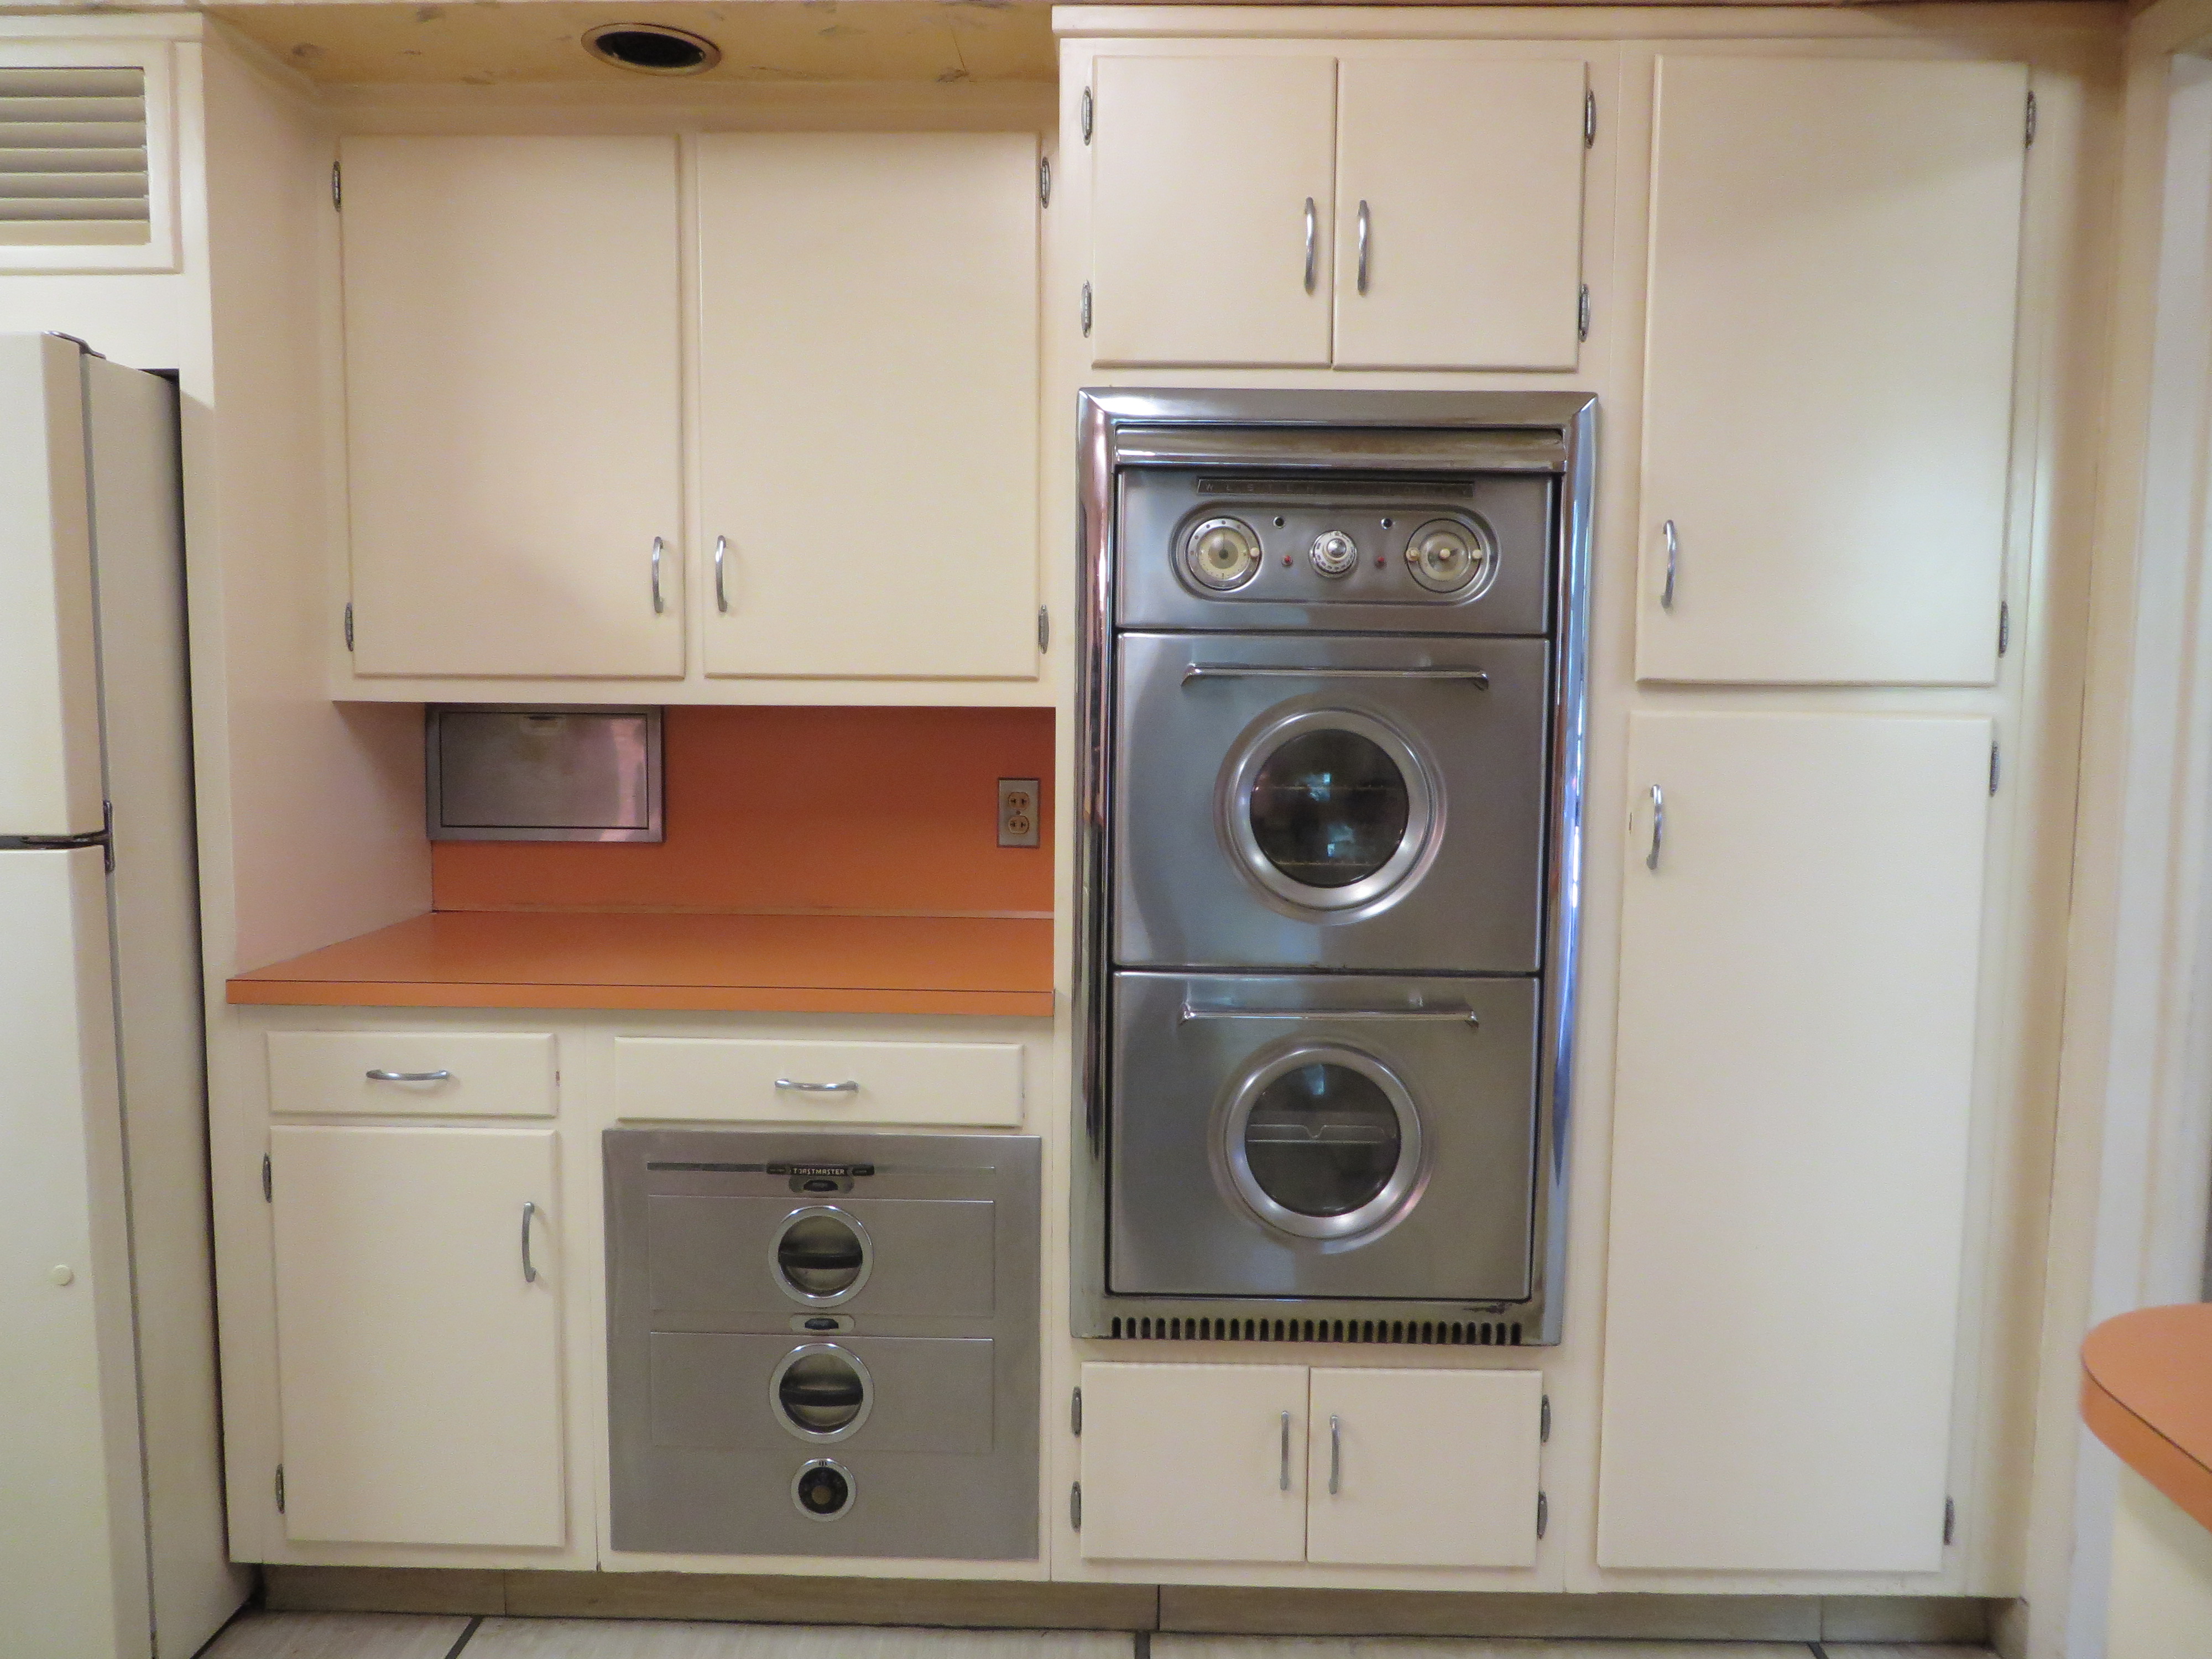
The ovens and warming drawers just melted us when we first saw them. Those porthole windows in the ovens — *squeee*!!! And they still work beautifully. Once we moved in and started opening all the cabinets, Jack found the first of many little awesome discoveries — rotisserie skewers that fit in the lower oven!

We haven’t tried them yet, but they do turn… we just need to find some sort of instructions so we know how to use them without setting a chicken on fire. 😛 But this adds to our theory that the first owner designed this house as a showpiece for entertaining; you might remember from one of our first posts that he owned a restaurant supply company, so it stands to reason that he would make his kitchen a shining representation of the best in kitchen features for 1957.
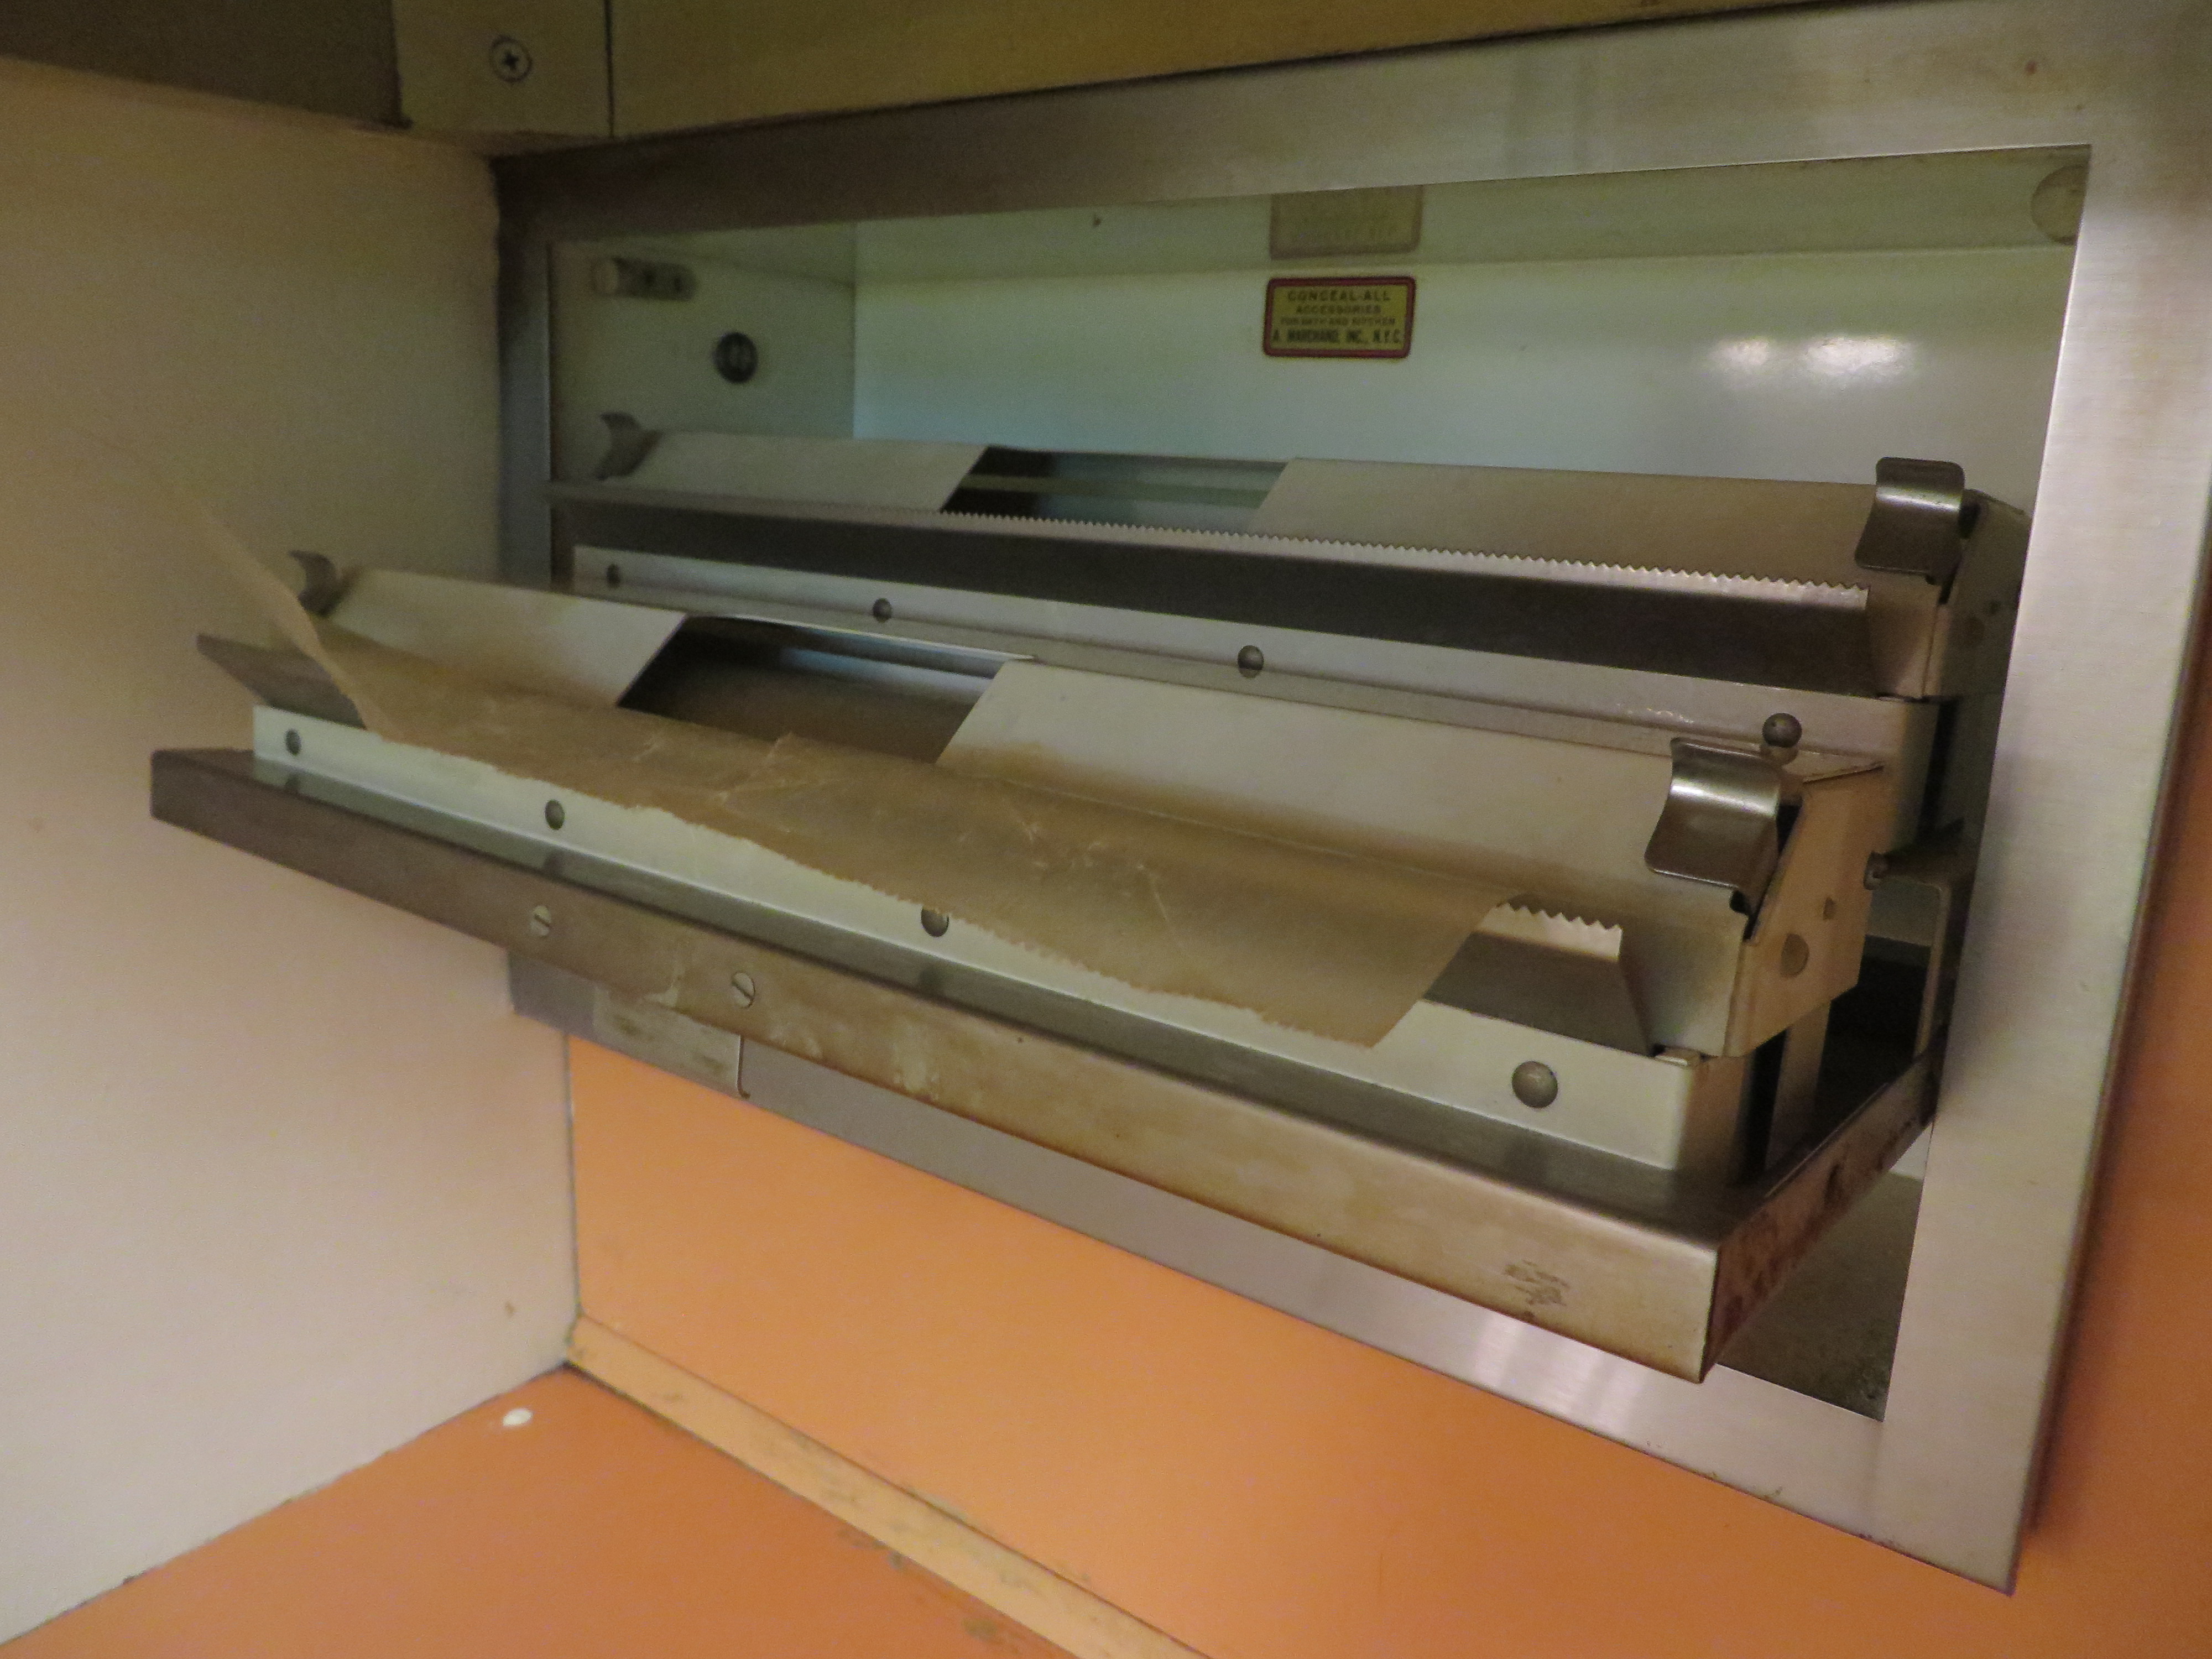
Also, if you look to the left of the ovens, you can see a little stainless steel door set into the wall. That’s one of several hidden gems they built in! Here’s the door:
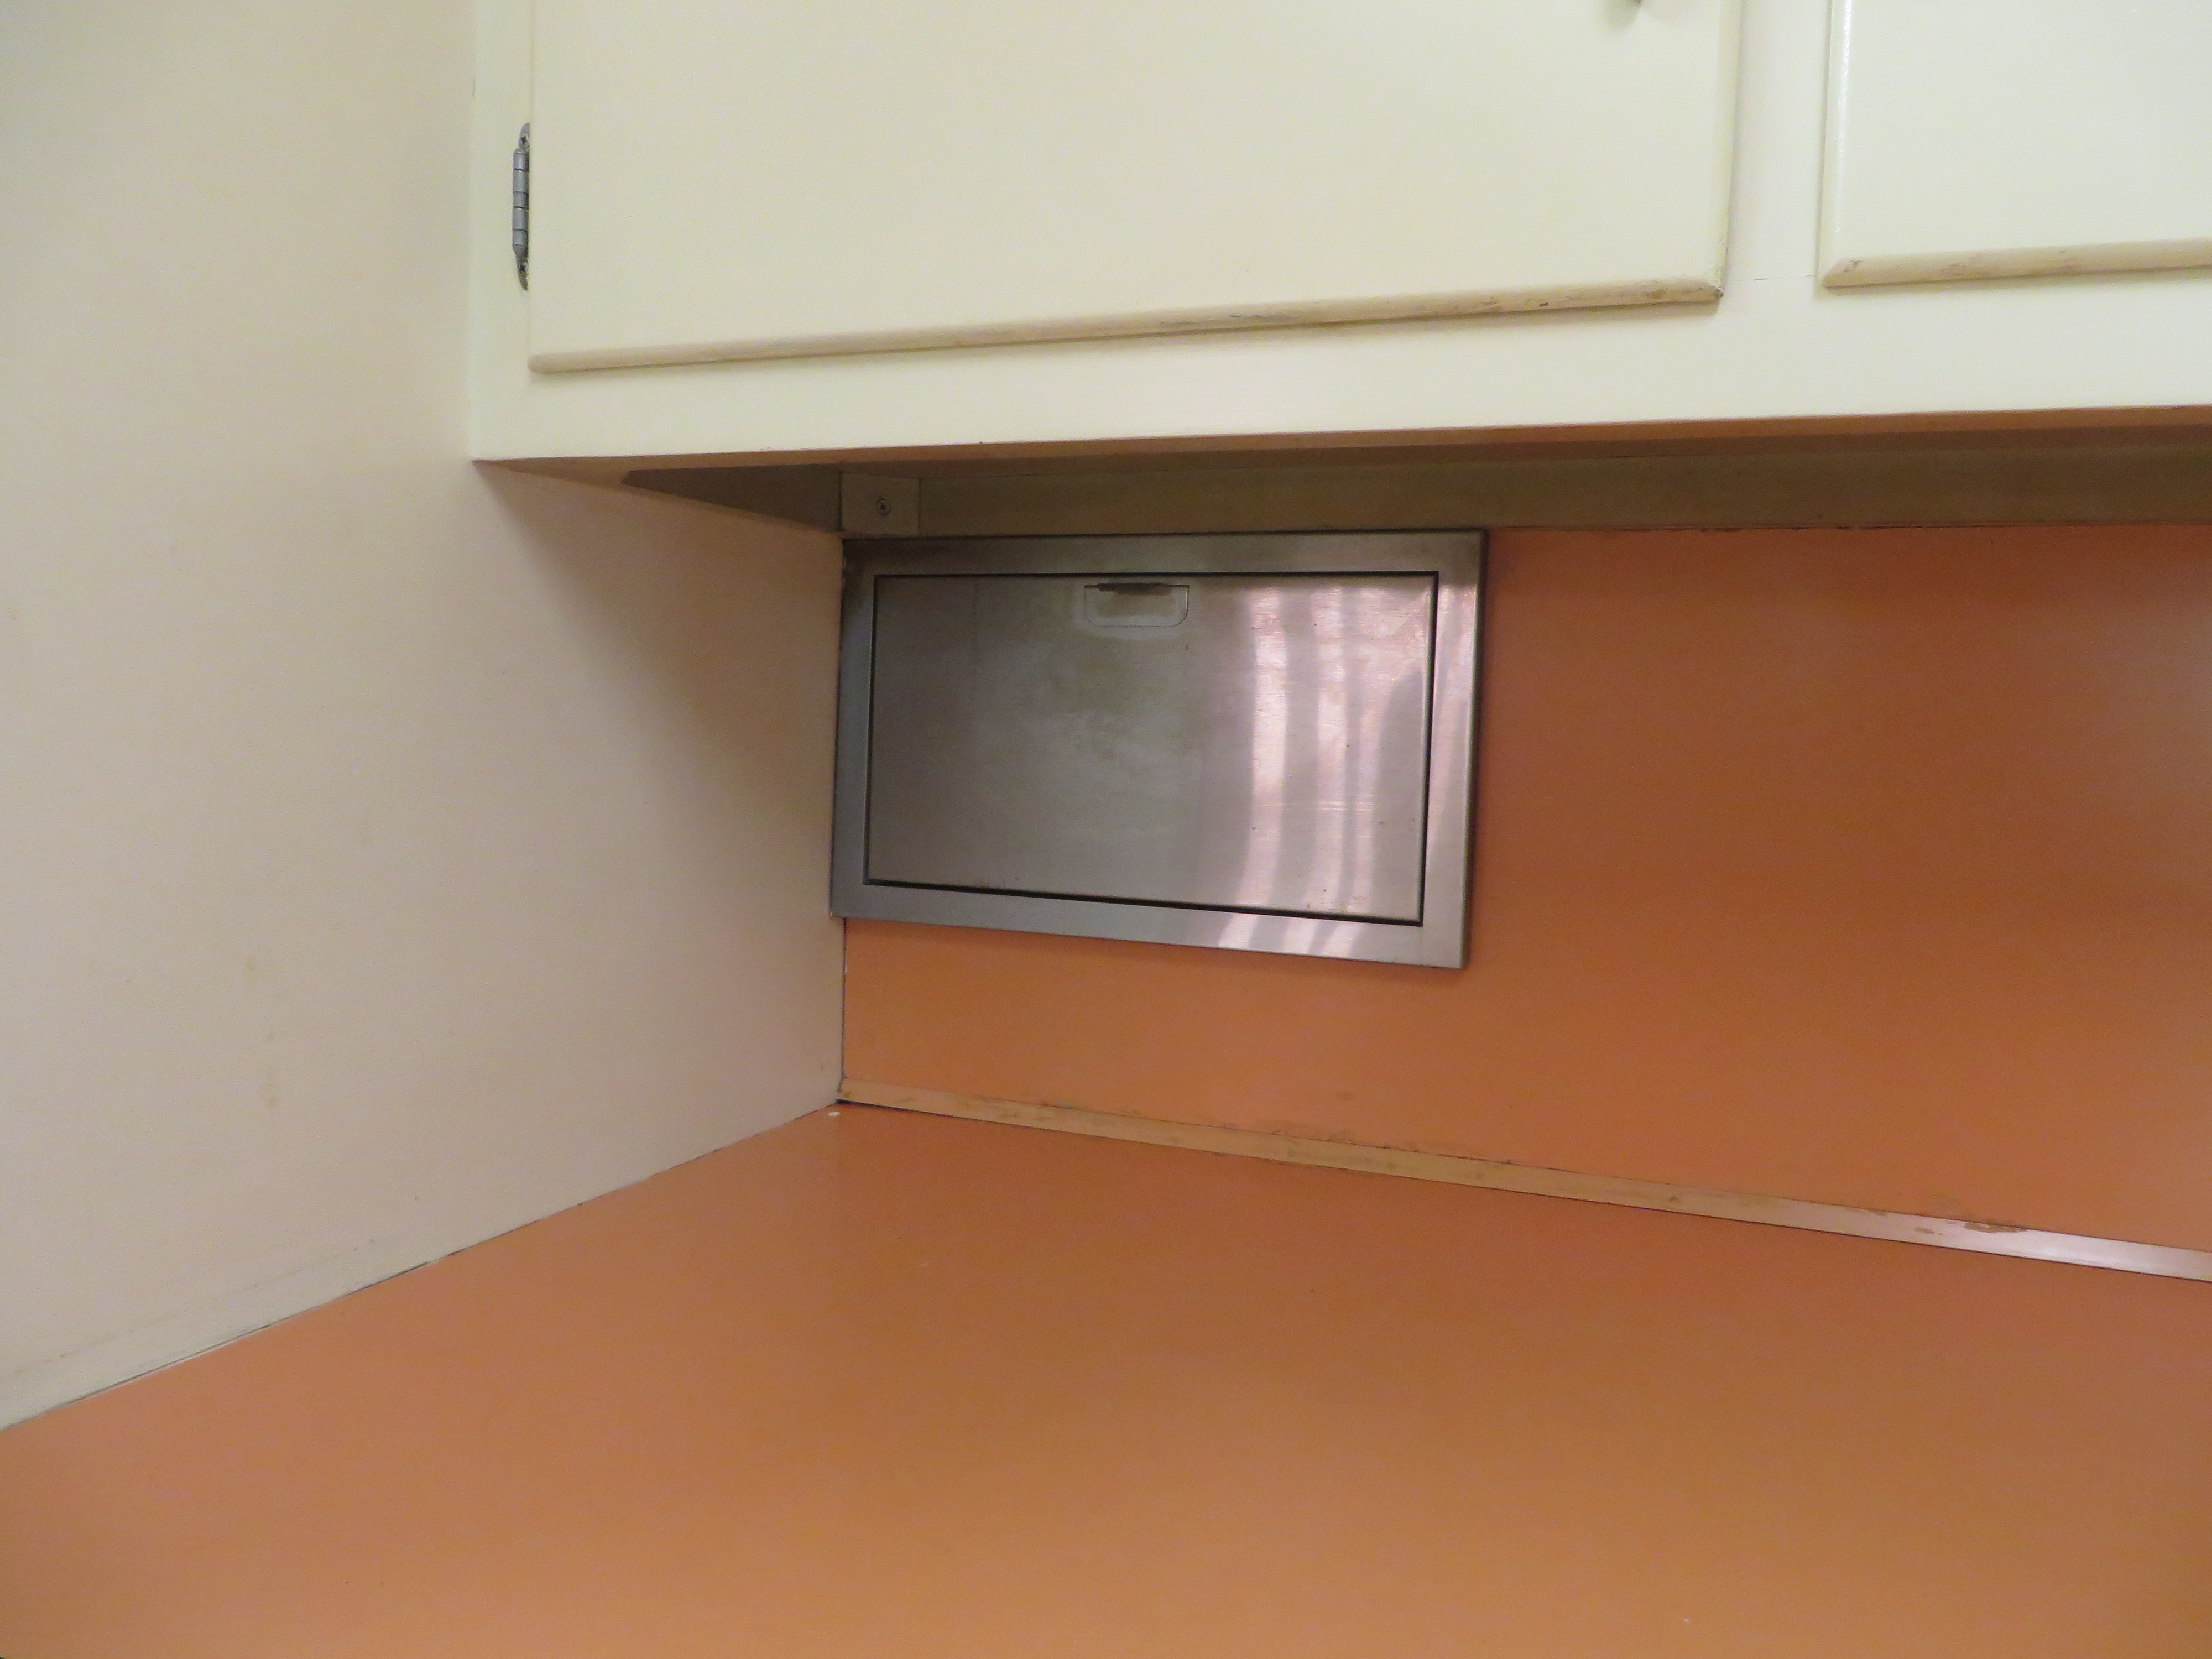
What’s inside there, you ask? A holder for aluminum foil and plastic wrap!
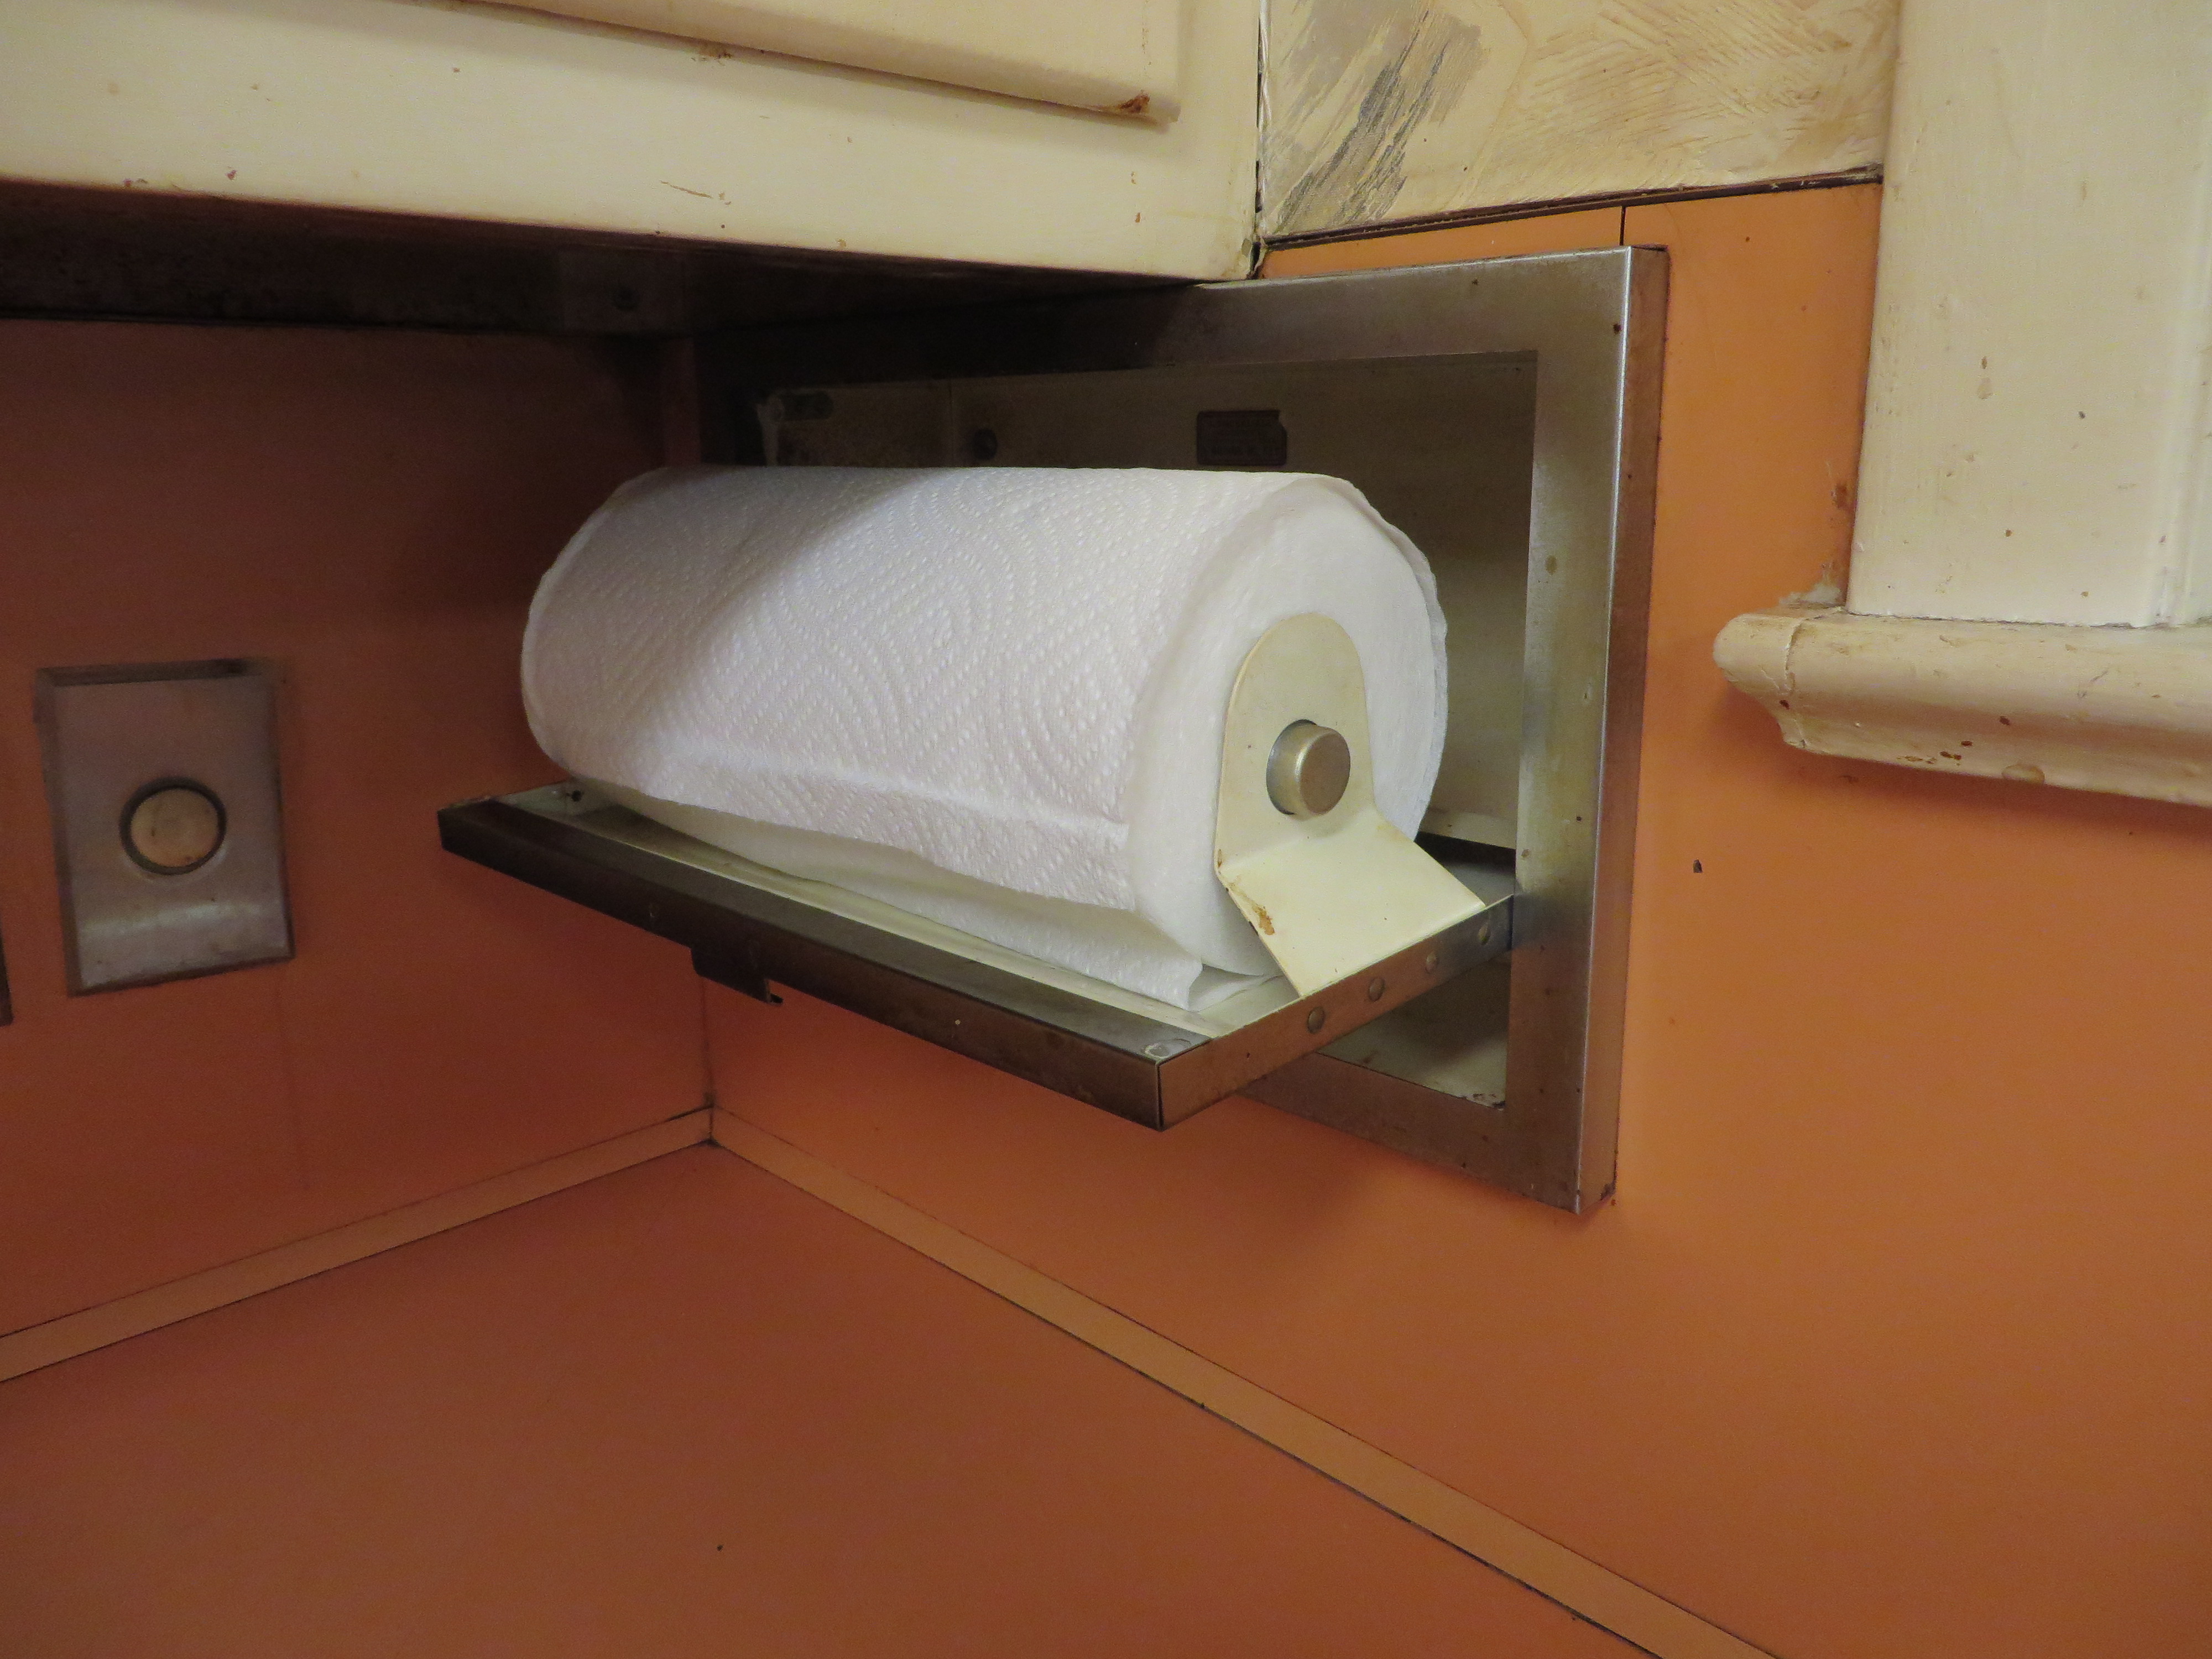
There’s another little door across the kitchen near the sink…
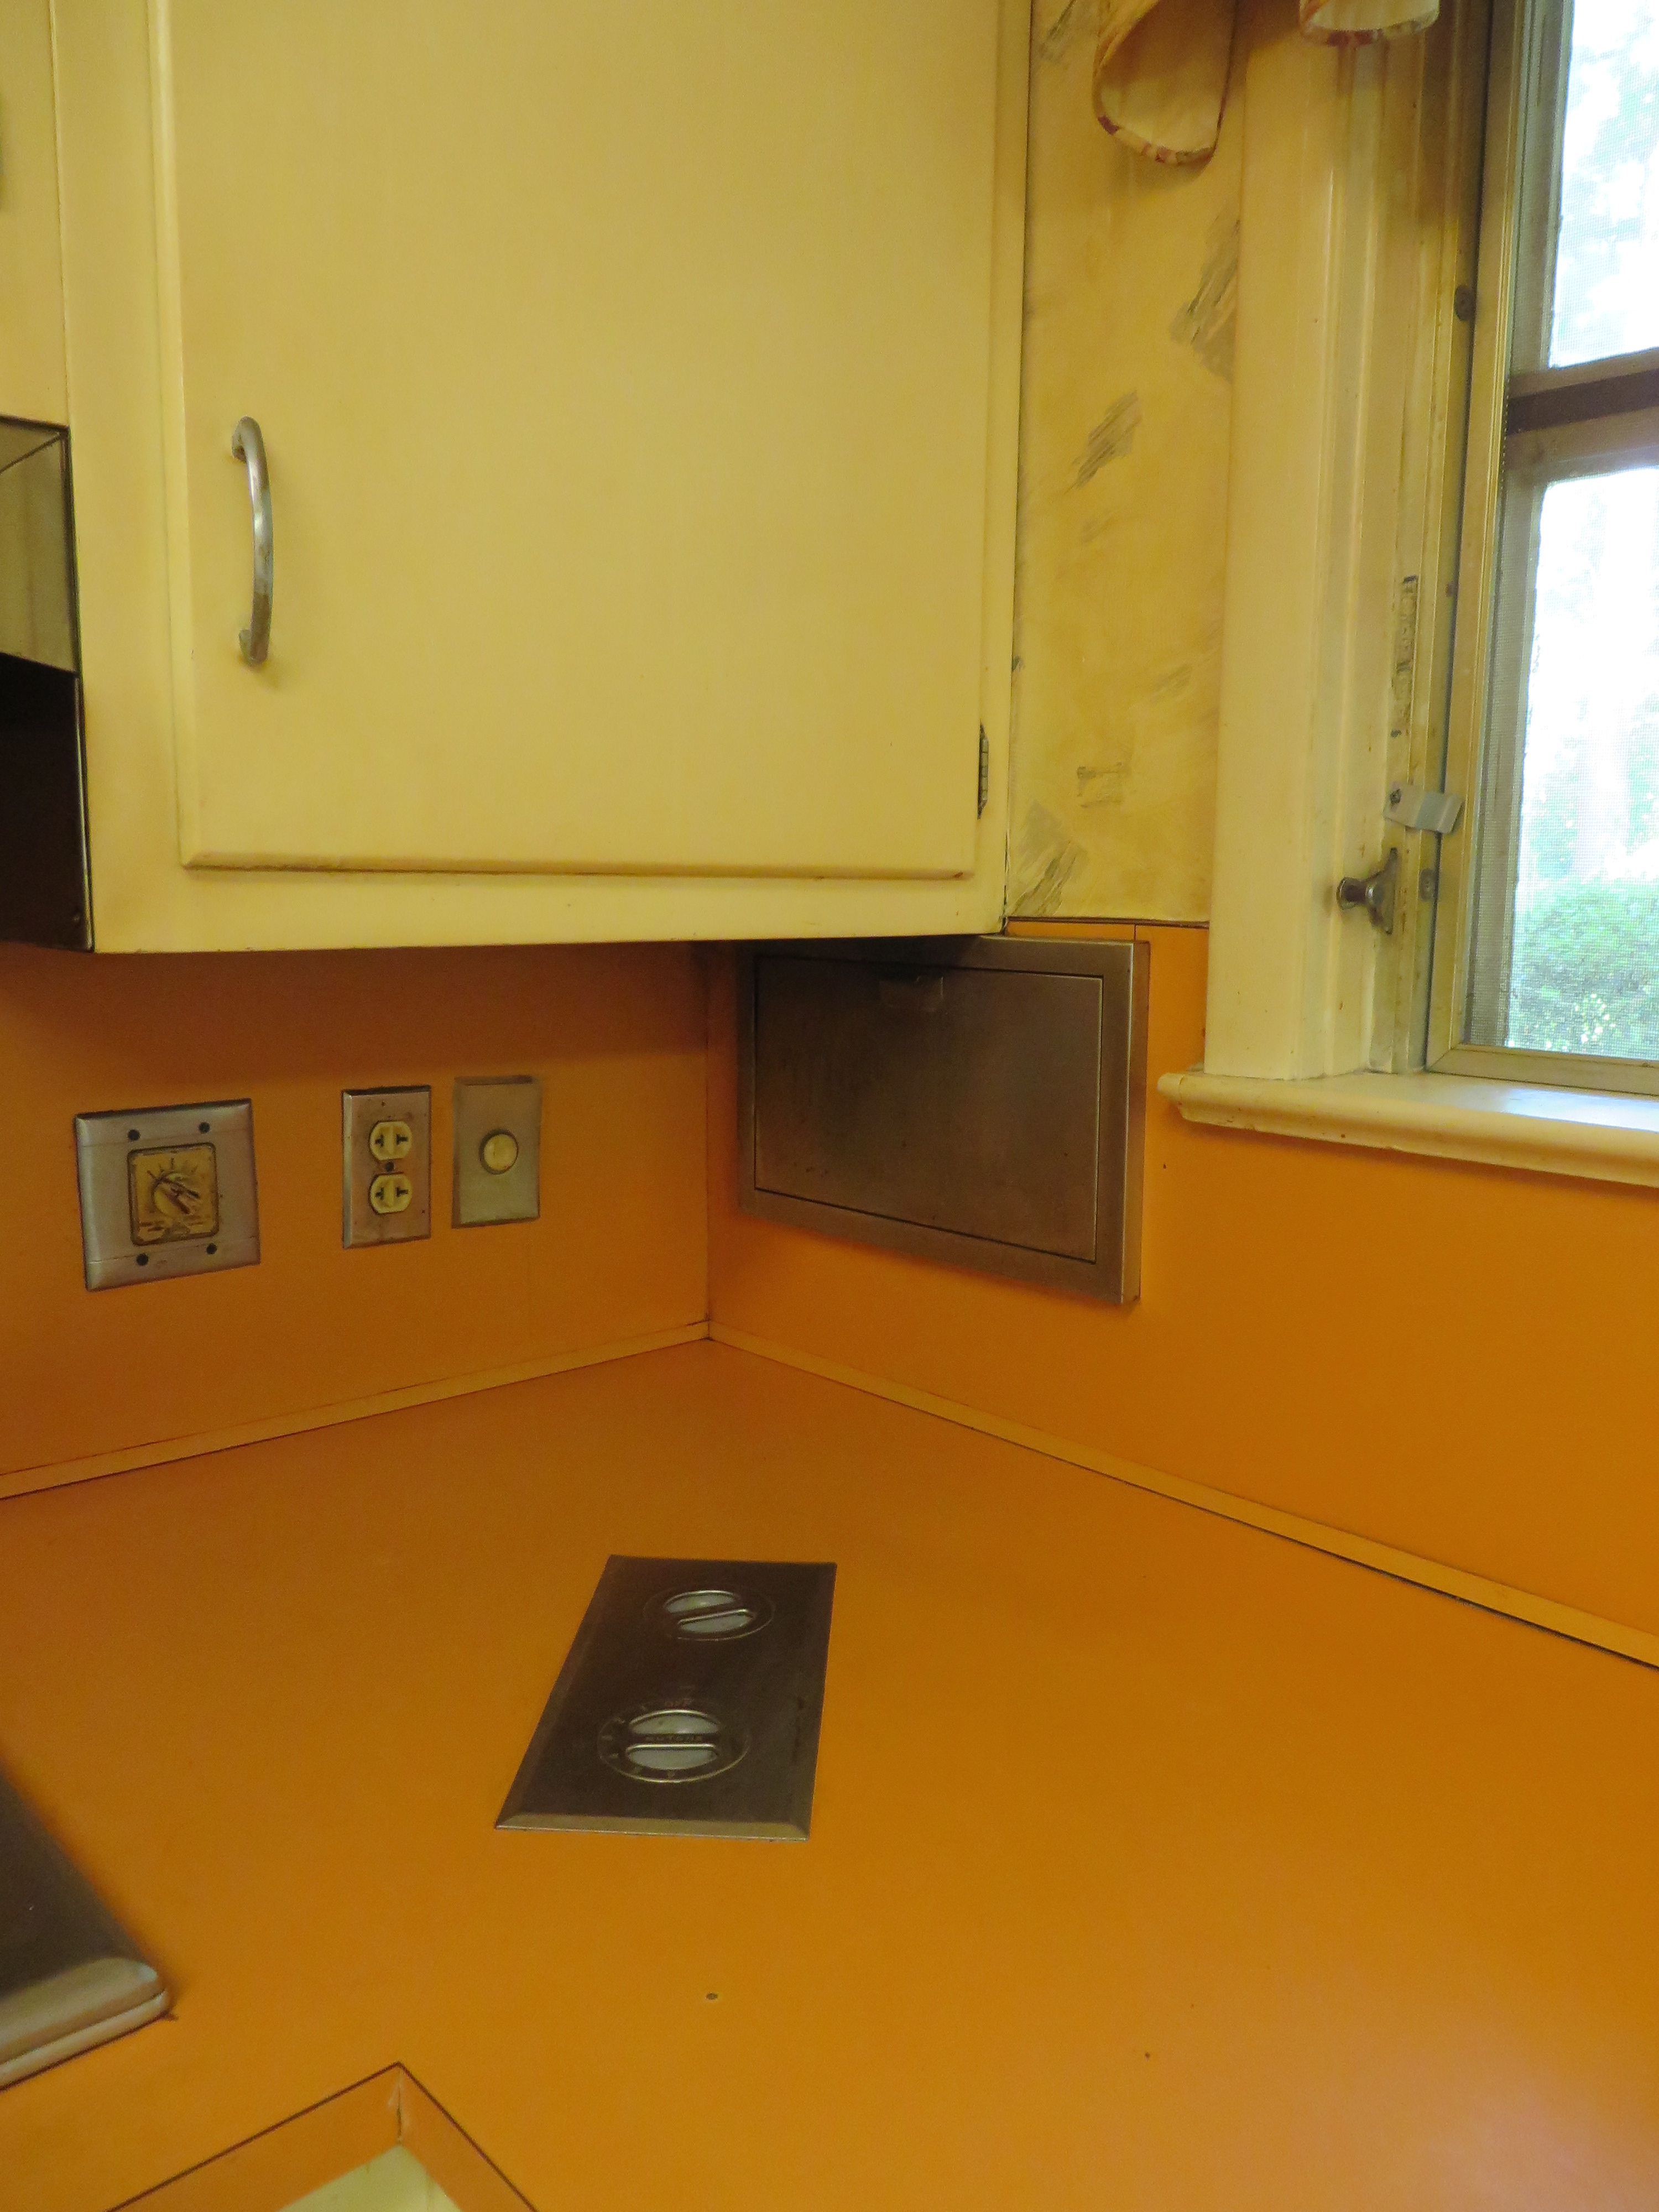
For paper towels!
Right in front of the paper towel holder is an interesting stainless panel built into the counter.
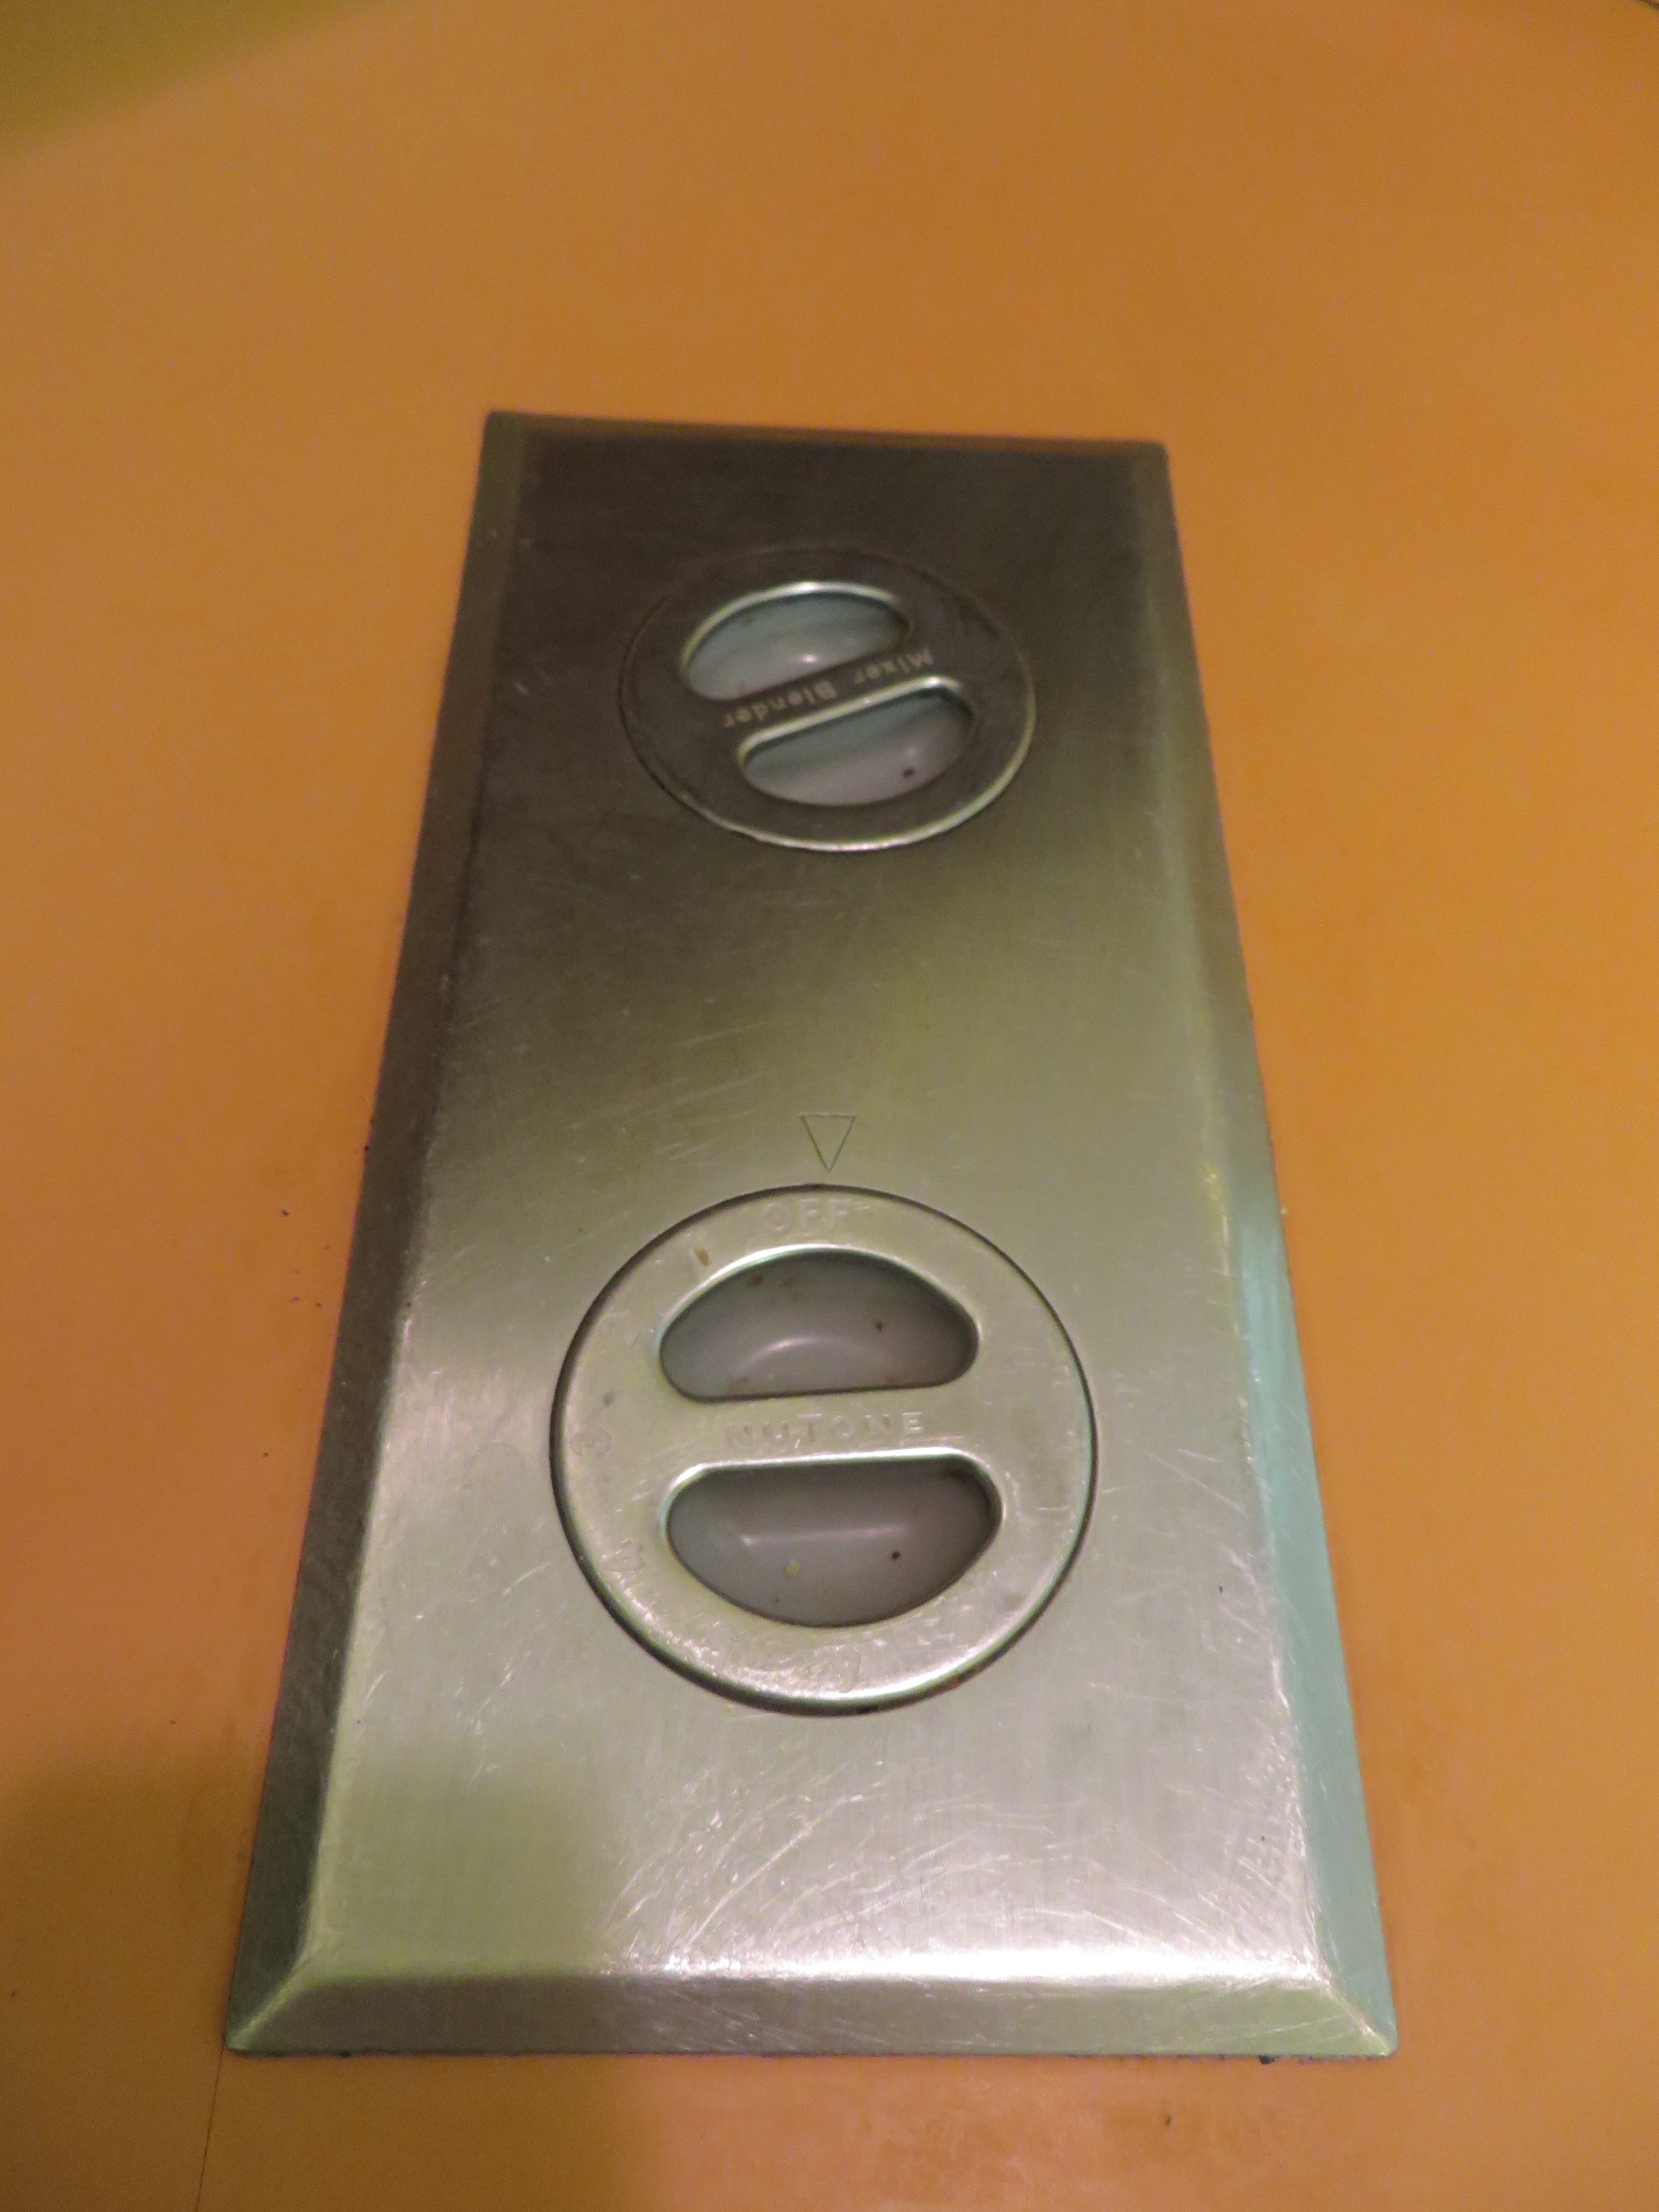
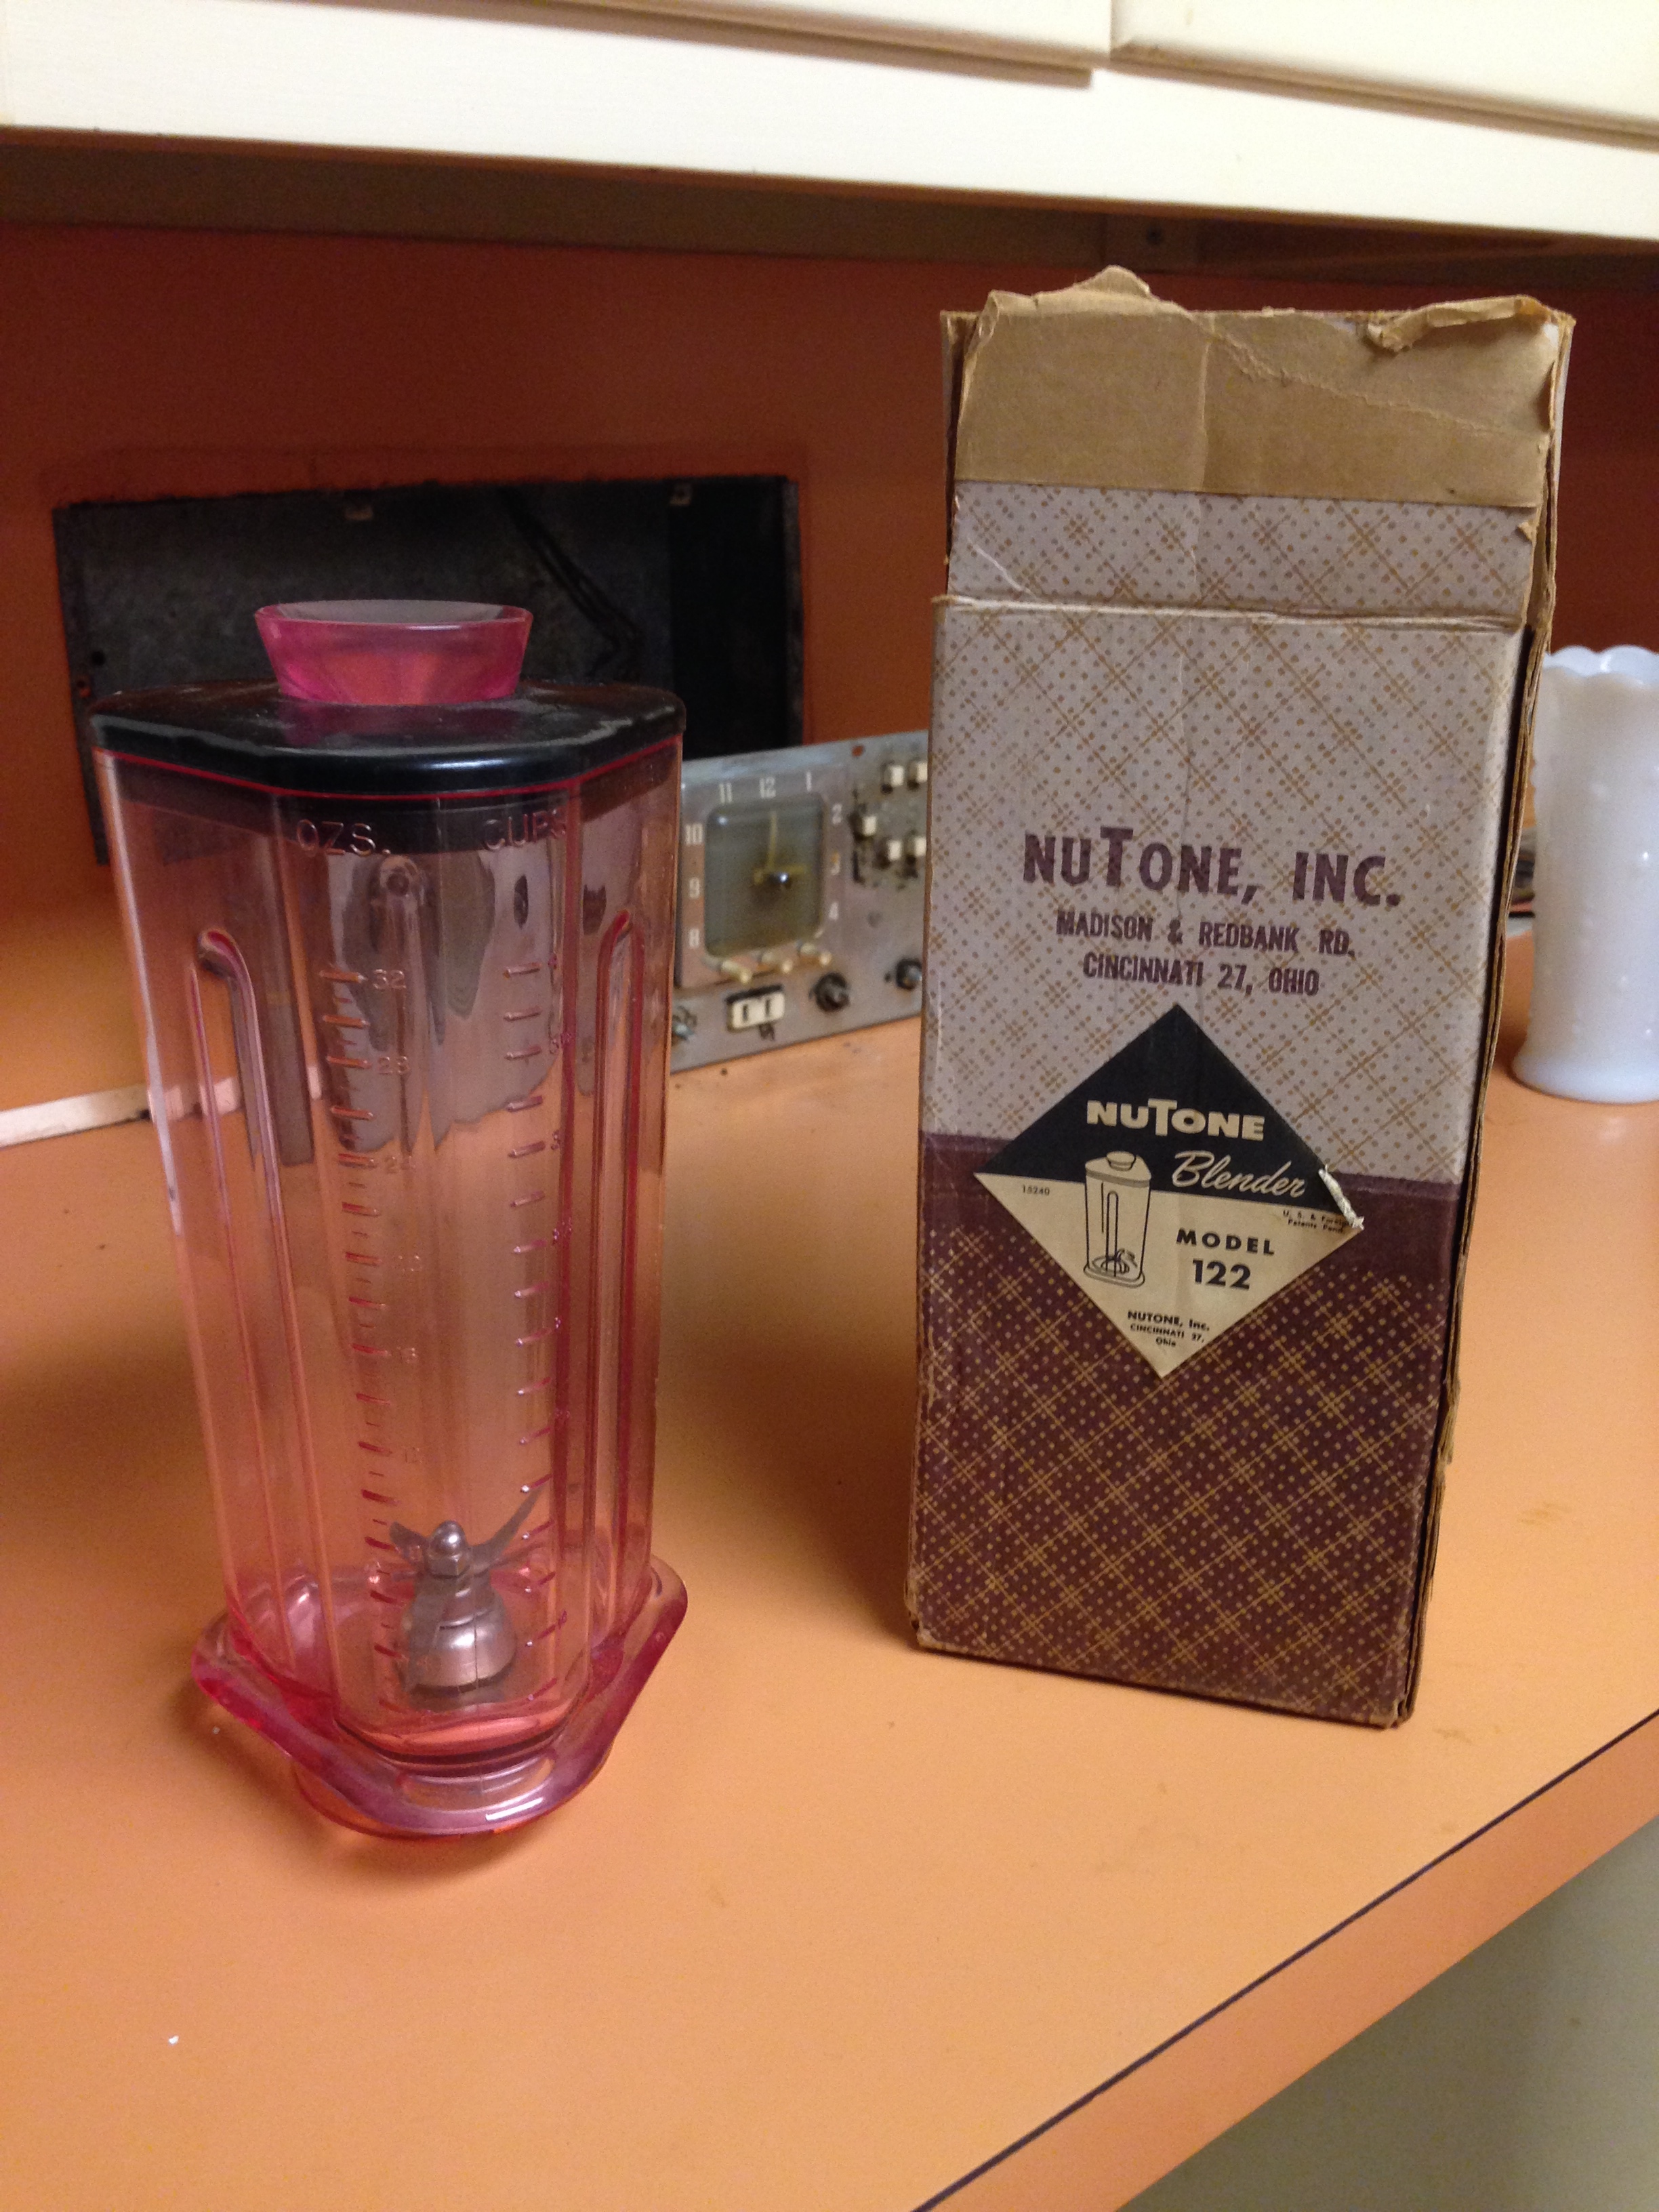
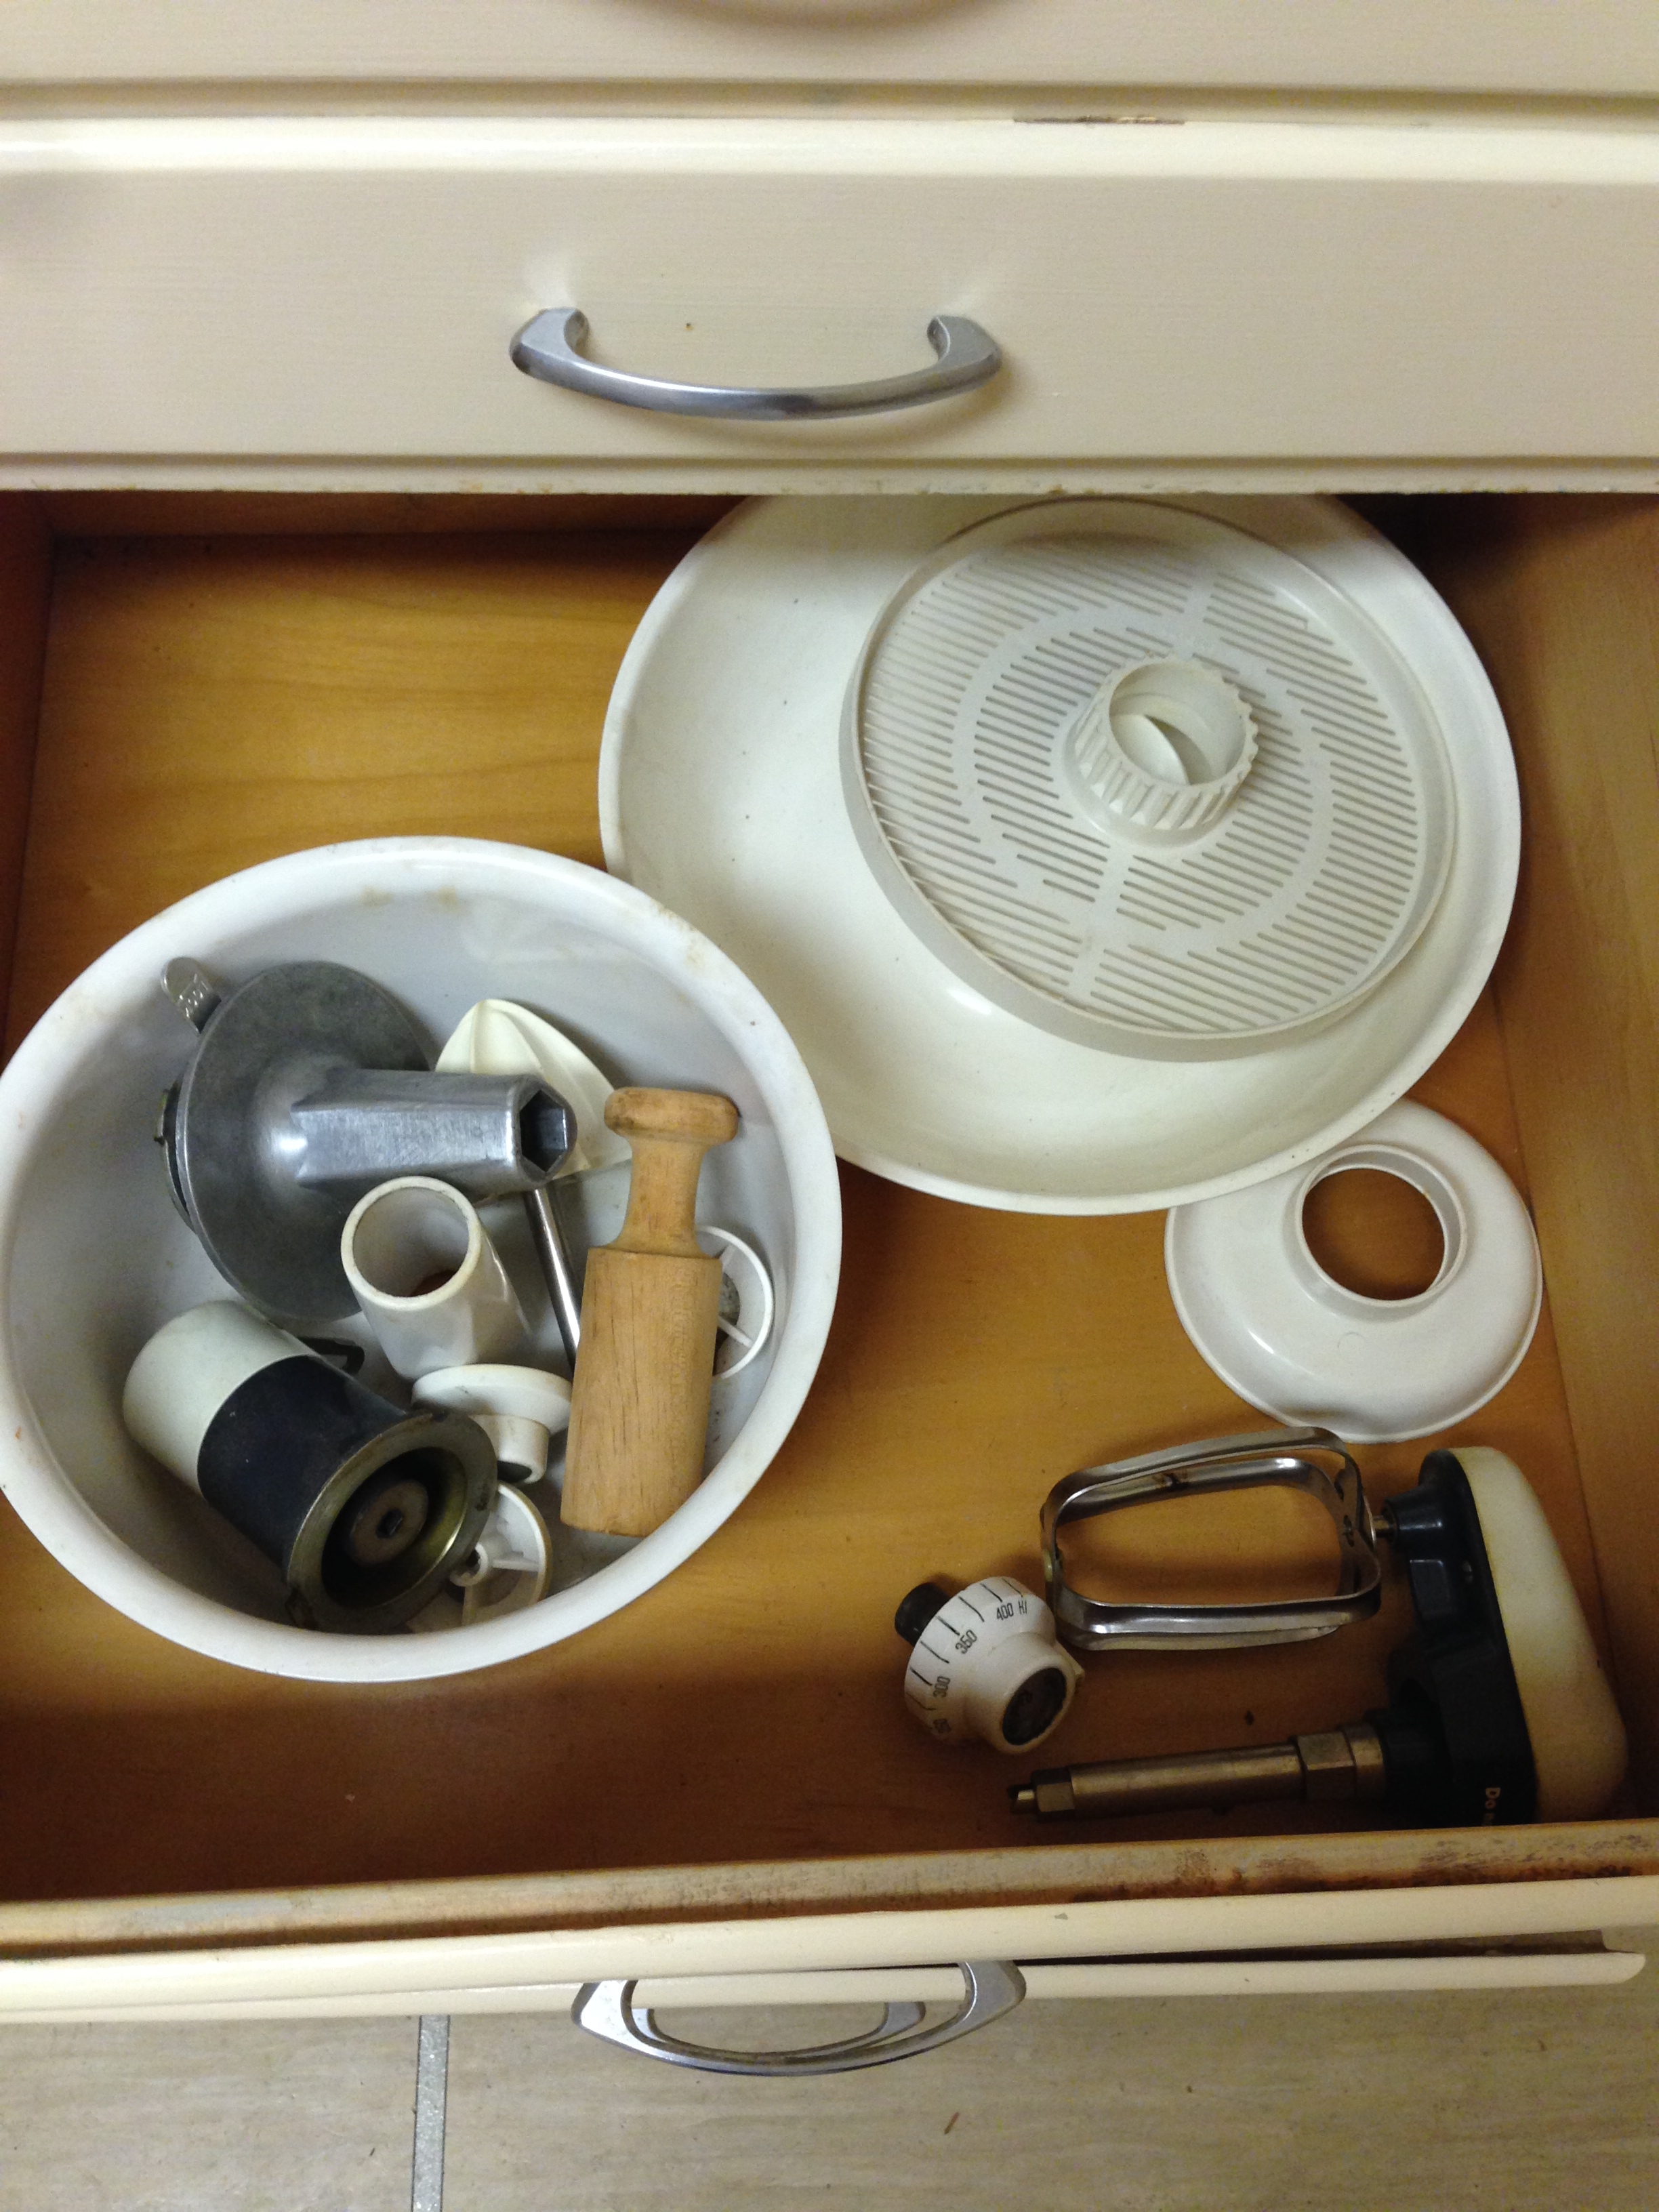
This one is amazing — the top circle is a port for appliances, and the bottom one is the speed control! You pull the top ring off and pop your blender or whatever in there, then turn the lower circle to turn it on. But even more amazing is — the original appliances are still with the house! We just about fainted when Jack discovered them in a drawer. We have a blender, a mixer, a juicer, a meat grinder, and even a knife sharpener!
Here’s the blender:
And the other pieces:
And even the instruction manuals are still here! Like we’ve said before — the past 2 owners never threw anything away!

Sadly, the cool appliance port isn’t working right now. And it’s on our fix-it list, but it’s going to be a while before we tackle it because the entire motor needs to be replaced which is $$$. But one day it will work, oh yes it will!
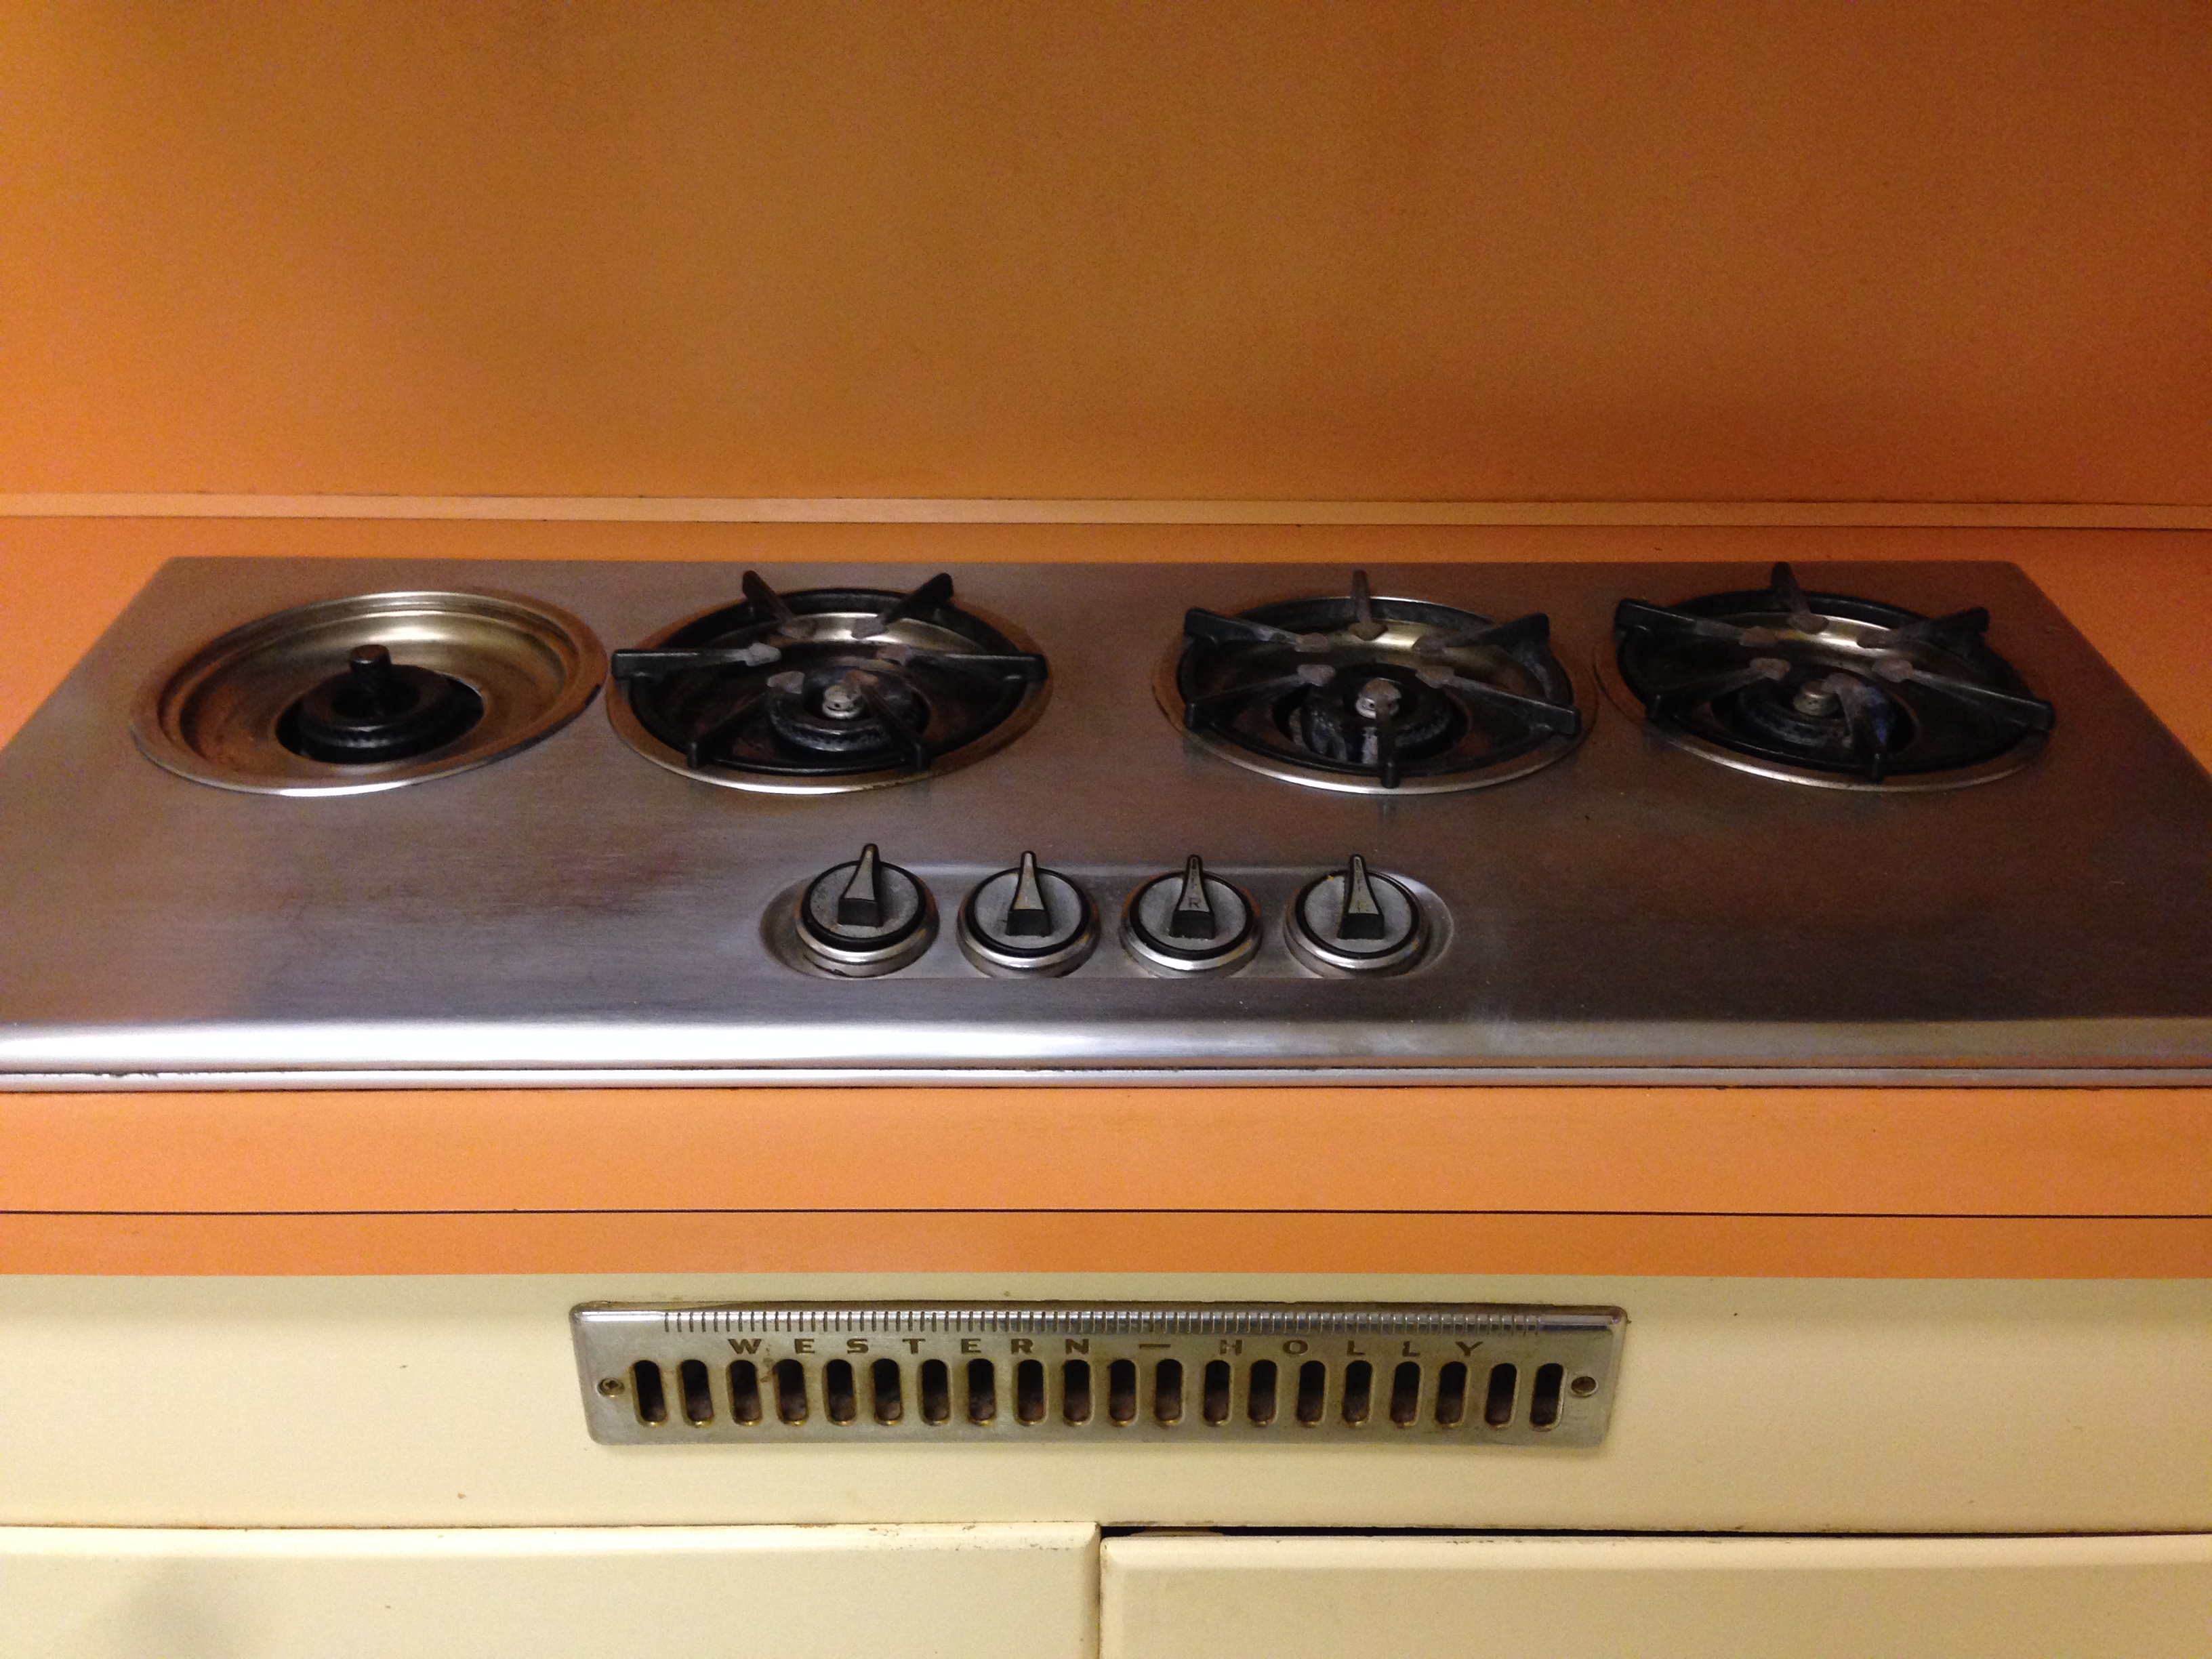
Now on to the stove. The stove was one of the first things we had to tackle, because the pilot lights were out of control on this thing. The gas was so strong that the stovetop was constantly hot — like, burn-yourself-if-you-touch-it hot. Not only was it dangerous, but it was a huge waste of gas (and money). So we had an expert friend install a valve on the gas line underneath, so we can completely turn off the gas when the stove isn’t in use.
Last but certainly not least: the gorgeous floors. They’ve seen 60 years of use, and have plenty of scratches and dents, but man are they cool.

The pattern you see in the floor isn’t stamped into a sheet of vinyl — this is 3 different kinds of linoleum, custom cut and put together to create those shapes. Here’s a closeup so you can see it better; it’s a combination of cream squares with matte orange smaller squares, and then silver metallic stripes to pull them together.
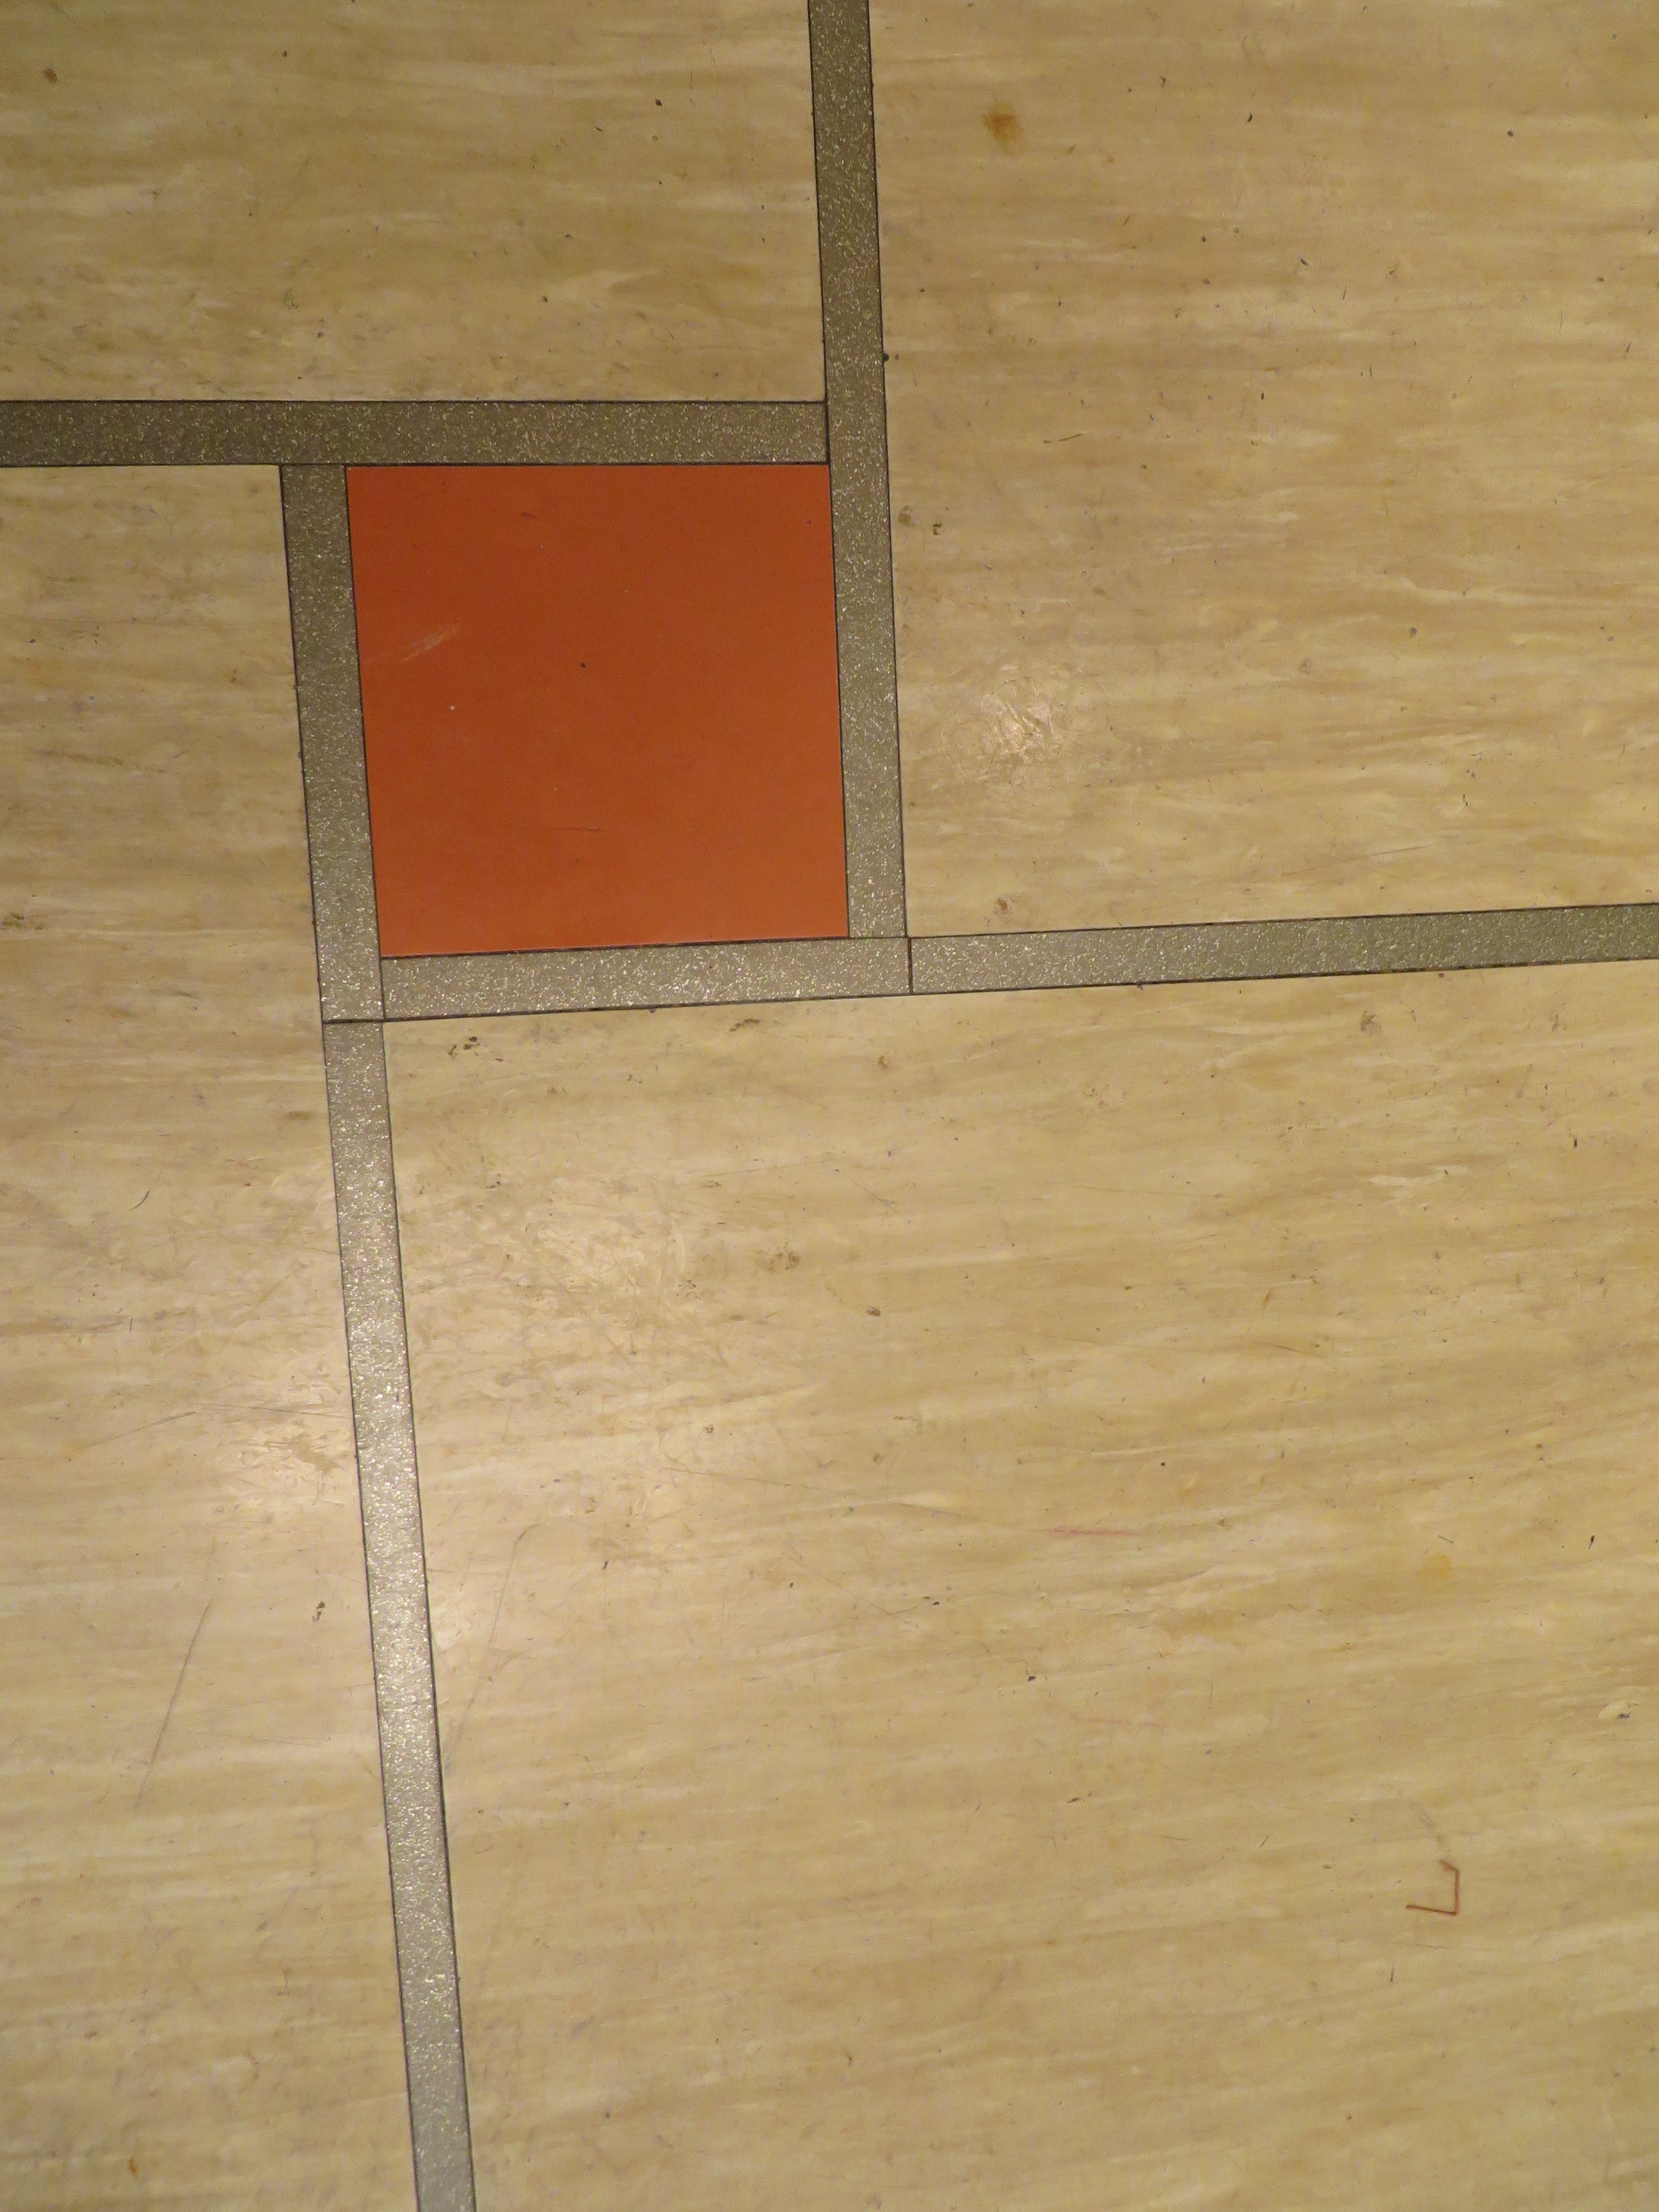
(Yes, the floor is really grody. Again, it’s super old! We need to find an expert who can come in and clean and seal it for us, real linoleum is too delicate for us to mess with ourselves.)
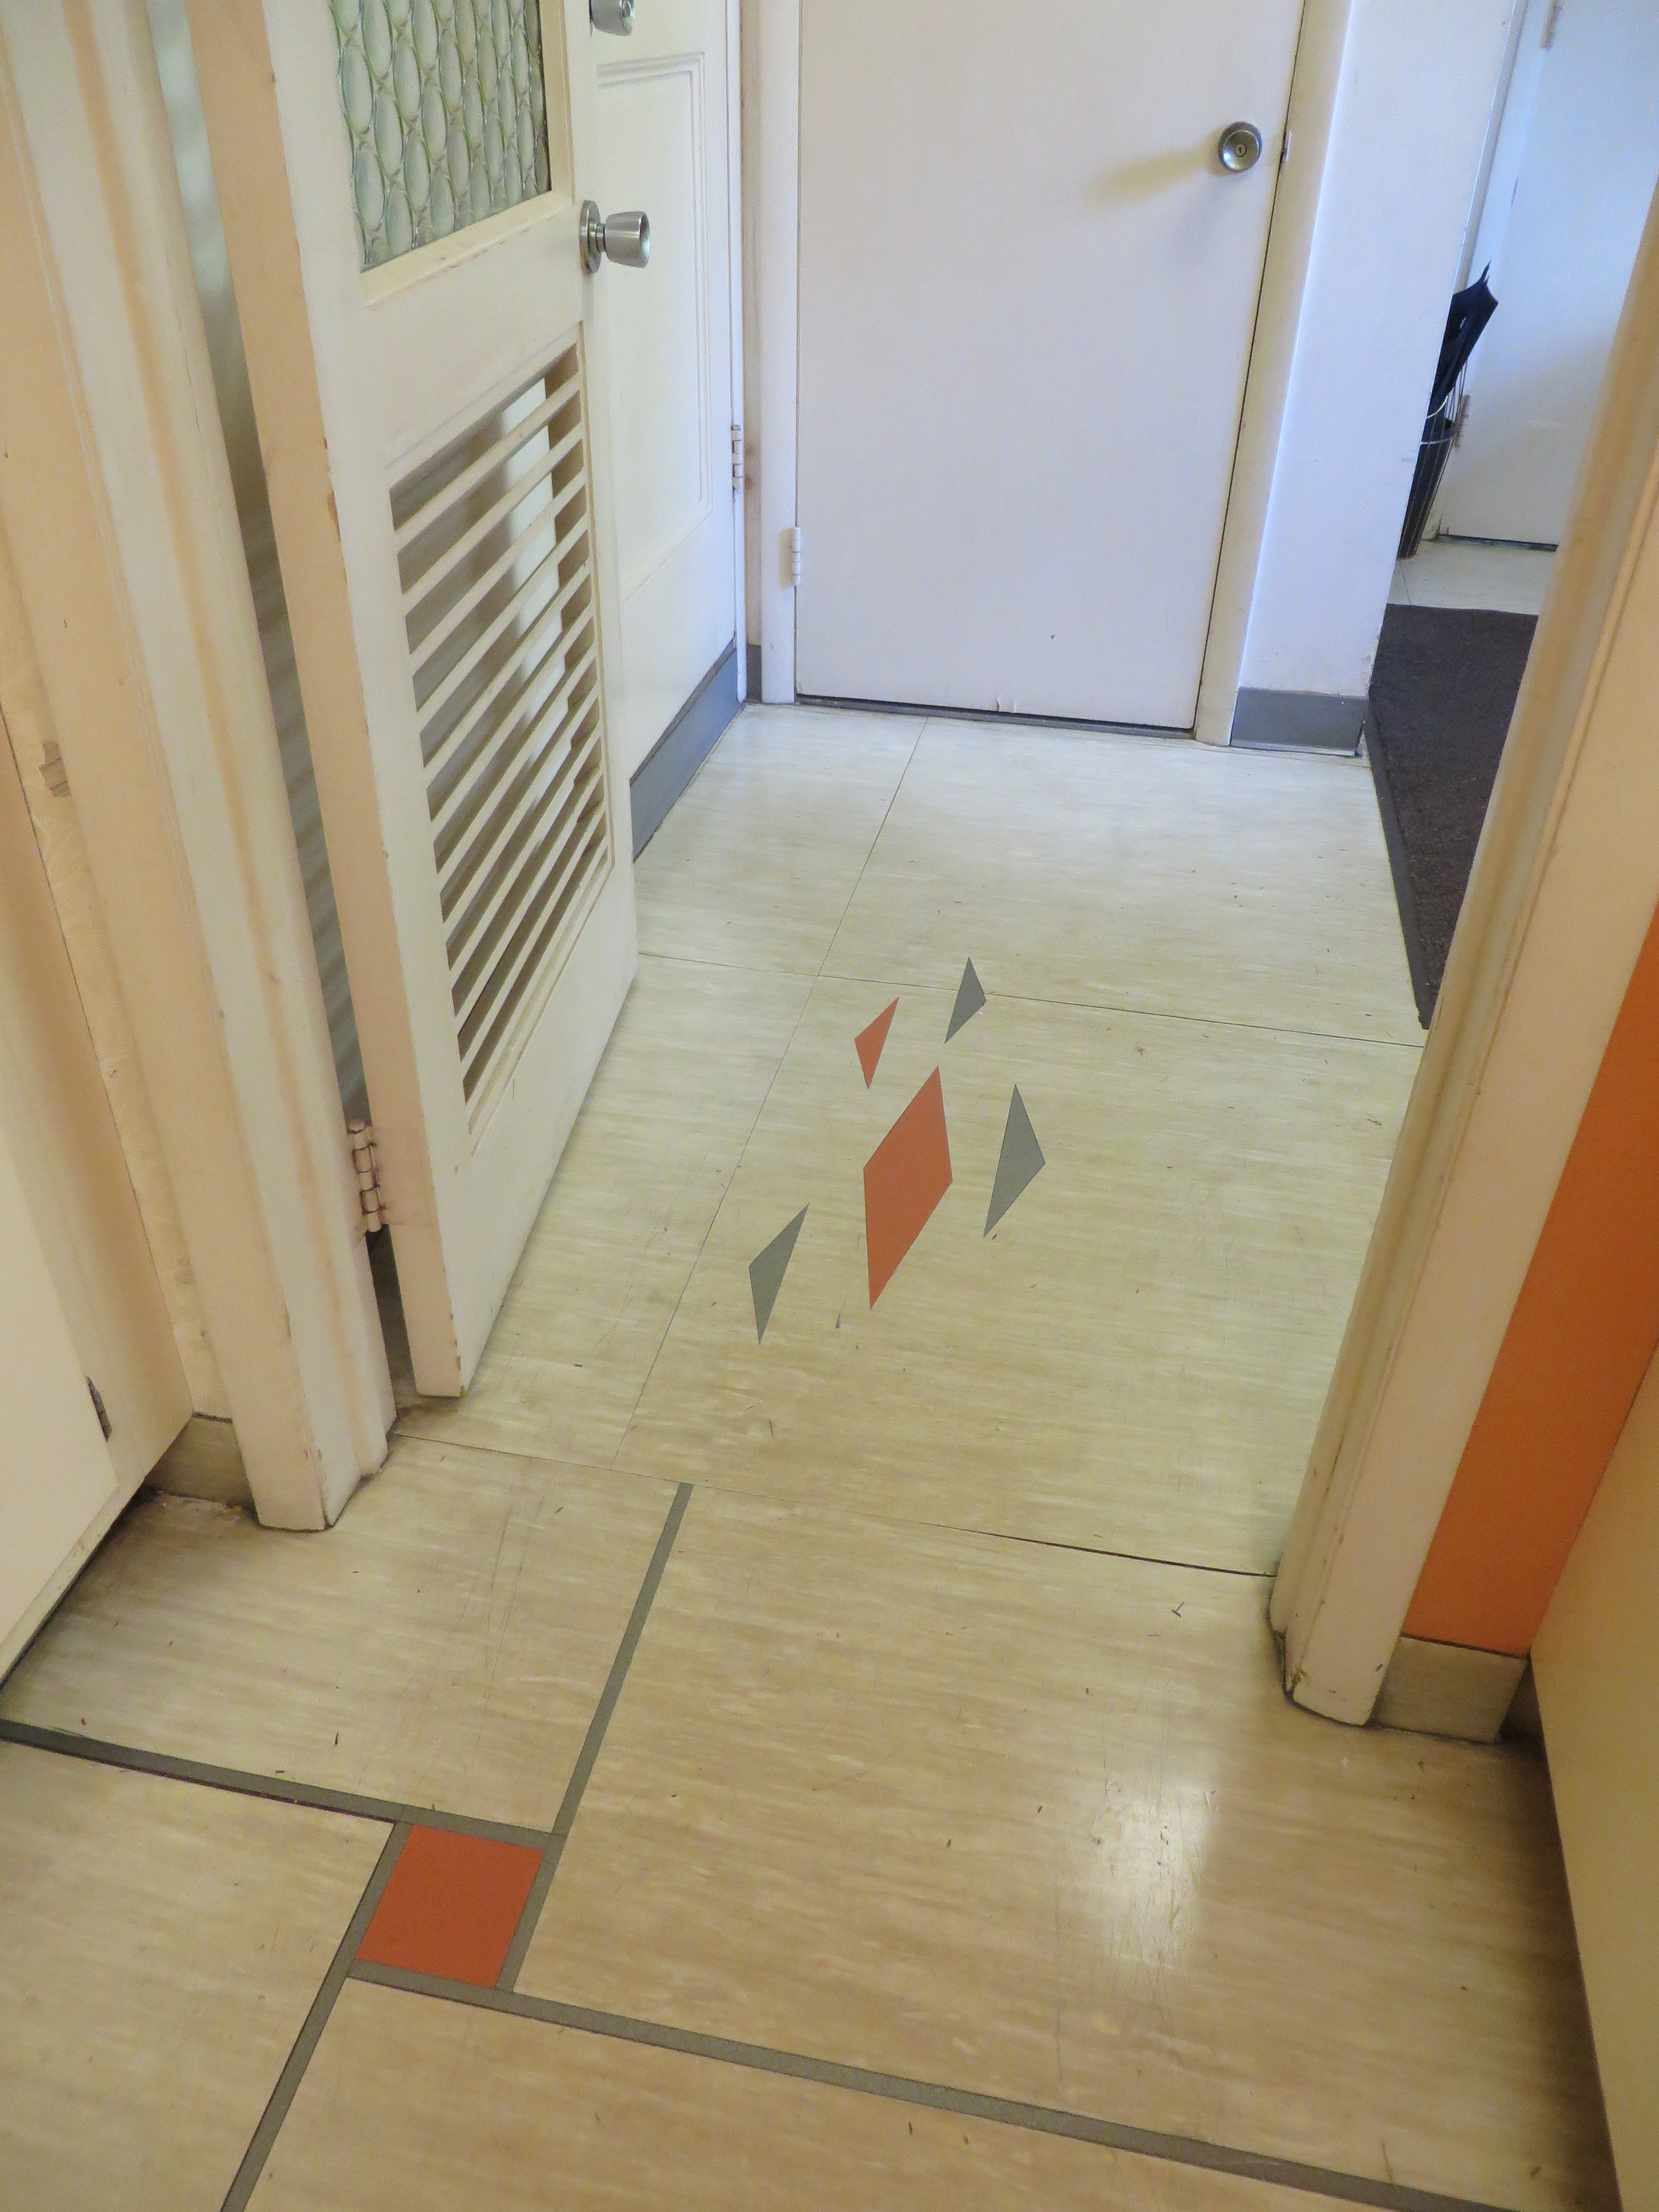
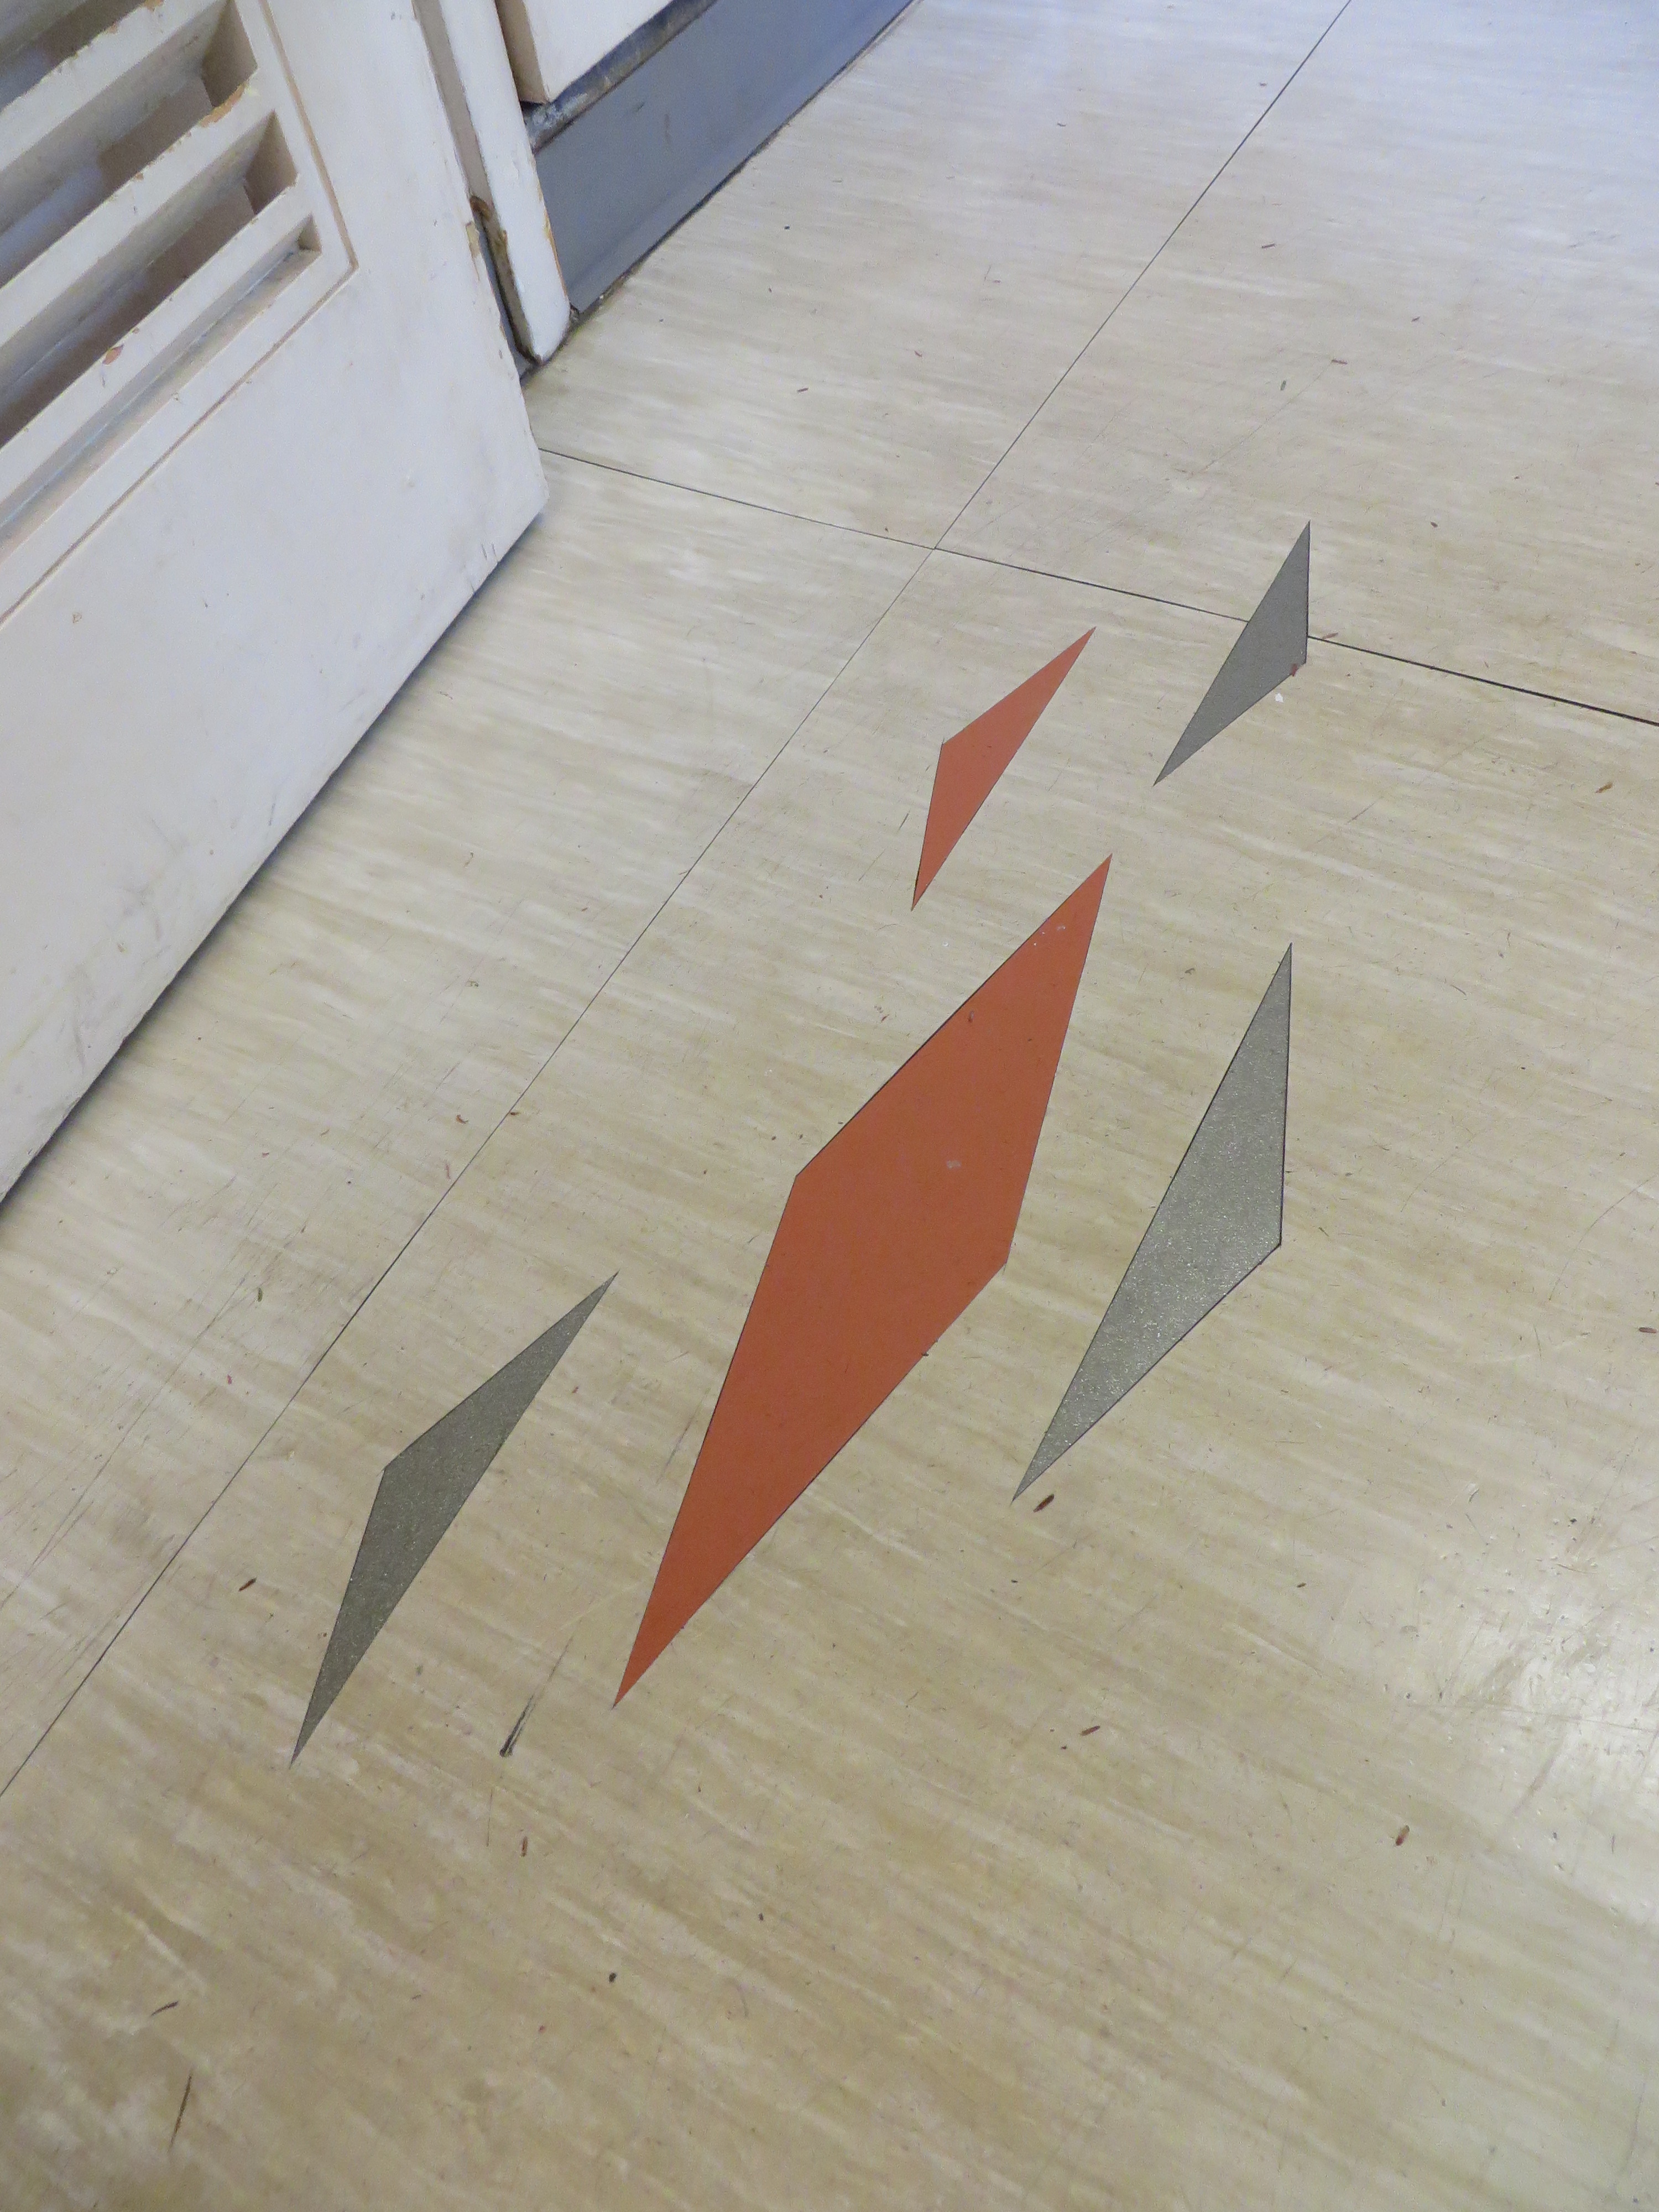
As you walk out towards the laundry room, the pattern in the floor changes to this cool spray of diamonds:
So, there you have it! Our creamsicle kitchen! We’ve started making a few changes since these pix were taken, but we’ll save the reveal of those until we’re pretty much done. 🙂
