

The Spring weather this week has been absolutely glorious. Seriously, can someone just hit the Pause button so it can be in the 70s all the time? This is always my favorite time of the year — the birds are chirping, the smell of grass on the breeze is divine, and everything in our yard is blooming. (And pollinating. I’ve already consumed my weight in Claritin this month.) It’s heaven to work in my home office with the windows open, and see all that beauty out the window every time I look up from my monitor.
For everything I can see outside though, I actually experience very little of it close-up. Given that I work from home most of the time, I’m in my office all day… then I’m in the kitchen with my husband in the evening… and when I do leave the house for something, I just walk out to my car and go. So, pathetically, I can probably count on one hand the number of times I’ve actually walked all the way around our yard since we moved in. (The hubs, however, knows every inch of the yard like the back of his hand. He’s good like that.)
I’m trying to change that, though — I’m starting to plan out the flowers and grasses for our front beds, and hope to get everything I need to plant ’em this weekend. And early the other morning, I went outside to take photos of the space so I could plan how much of everything to get… and while I was out there, I saw a flash of color in the grass out of the corner of my eye.
Violets!
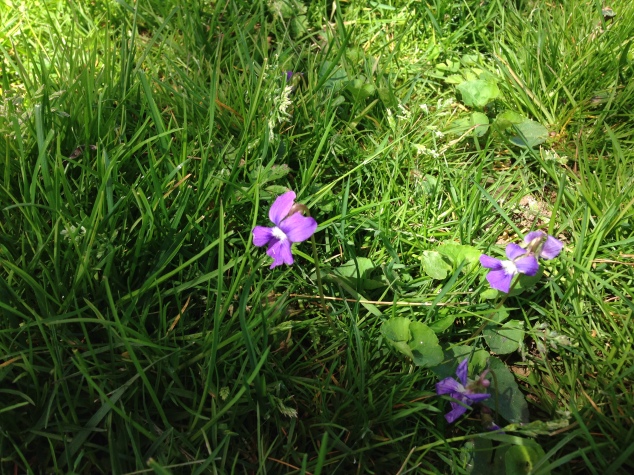
Well, whaddaya know… we have violets! I’m so out of touch with everything outside the walls of the house, I had no idea. Turns out, we had hundreds of them scattered all over our property! How fun! So I decided to try out a little culinary project that my lovely friend Sarah does every Spring: I made violet syrup!
If you’ve never tried violet syrup before, it’s basically a simple syrup that’s infused with the violet petals. The flowers give the syrup a slightly herbal/floral flavor, and the color is spectacular. I used this recipe from food.com as a start, and made some very tiny tweaks for my own equipment and the amount of violets I had.
So here’s how it went:
- First, you have to pick a TON of violets. And make sure that a) they’re not African violets (like the houseplant), because they’re poisonous, and b) that they’re not sprayed with lawn chemicals. Because, you know, you’re going to be ingesting the stuff.
Here’s one thing I learned about violets (besides the fact that we actually have them… shut up): they are sneaky little buggers. The backs of the flowers are green, so if they’re facing away from you, you have no idea they’re even there. When I started harvesting them, I thought I had gotten all of them in an area and moved on… but then when I walked away and looked back, there were dozens that I’d missed! I quickly caught on to their wily ways and looked from every direction… A-HA you little violets, whether you like it or not, I will cook you and make you delicious!
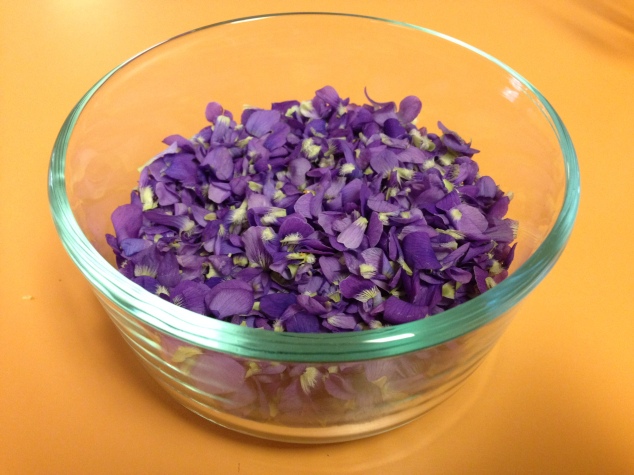
After plucking flowers for about 1/2 hour, I had a small Pyrex dish filled about halfway. Aren’t they purty?

Seriously, I could have just buried my face in those soft petals!

2. Okay. Once you have your ton of flowers, bring them inside and get comfy. Because you have a loooong Step 2 ahead of you — you have to pluck the stems and little green sepal parts off and discard them. Yes, off of every flower. If you don’t, the syrup won’t look and taste as pure as you want it to. So either get a loved one to help you (give them some of the syrup as a thank-you gift later), or put on some music and plan on spending at least an hour doing this. Good news is, if you’re like me and picked all those flowers on your lunch break, you can leave the intact flowers in the fridge for a few hours before you tackle the task.

After all that work, I was left with about 1 and 1/2 cups of petals:
3. Next, you put the petals in a “non-reactive dish” (meaning glass, ceramic, or stainless steel… aluminum and other materials can alter the taste of the syrup), and pour boiling water over them. For my amount of petals, I used 1 and 1/4 cups of boiling water.
Then you put a lid on your dish, and leave it on the counter for at least 12 (and up to 24) hours. I left them overnight, so it was around 14 hours. If you haven’t figured it out yet — this is a very time-intensive process! This is not something you decide to make 3 hours before a party. 🙂
Here are the petals, steeping away.

4. Okay, so it’s now 12-24 hours later. Time to take the beautiful “petal tea” you made, and turn it into syrup! This is where you add a ton of granulated sugar — about double the amount of boiling water that you added to the petals the day before. So for this, since I used about 1 and 1/4 c of water, I added just under 2 cups of sugar. (Ignore the measuring cup level in the photo — I added more sugar as I was stirring it in.)

5. Next, you heat the mixture to make sure the sugar completely dissolves. The recipe I used called for a “bain-marie”, or hot water bath… We have a double boiler, but the pan part is aluminum (which is reactive, a no-no) so I had to improvise my own with a stainless steel pan.
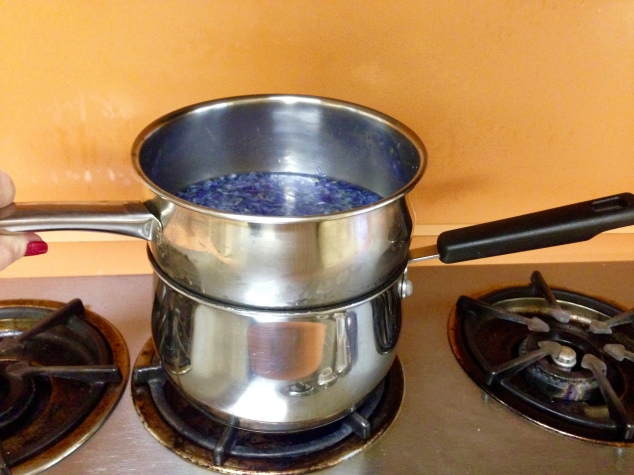
(The darn thing didn’t fit, so I had to hold it the entire time.)
You heat the “petal tea”/sugar mixture over lightly boiling water until the sugar is completely dissolved.

I timed about 5 minutes of heating and stirring, which might have been a bit too long, as you’ll see in a sec. As a note: although this is called a syrup, you shouldn’t try to reduce it down to the consistency of something thick like maple syrup. Simple syrup is thinner.
6. Last step is straining all the petals out of the syrup. How crazy is this — all those petals, once they were strained out, were reduced to a little lump that fit on the back of a tablespoon.

I didn’t take a photo of the syrup right after I strained it, so I’ll have to describe its appearance… it was a sort of grayish-blue hue, not the bright purple I had expected. A quick Google showed that the grayish tone might have been because I heated the syrup for too long… note to self, it should only take a couple of minutes to dissolve the sugar, cooking it longer doesn’t actually help!
7. So, I had to add a step 7 — adding a squeeze of lemon juice. Another Google search showed that lemon juice can make the syrup a little more pink, so I figured “well, can’t hurt at this point”, and stirred about 1/4 teaspoon of lemon juice in. And that was it — the final touch that made the syrup look like I’d hoped!

No filter on this photo… and the pic doesn’t even do it justice. This stuff is absolutely gorgeous. And it’s delicious — the taste is subtle, but the hint of an earthy floral flavor is really lovely.
You can use the syrup on so many things — I’m mostly going to use it to sweeten lemonade and herbal tea. This weekend we’re in for more gorgeous weather… so I’m thinking a glass of violet lemonade out on the patio, enjoying the beautiful yard that lifted us with those violets, will be just the thing. 🙂


That is so neat! I never knew there was such a thing as violet syrup. It looks so pretty!
LikeLike
I remember reading an article in Victoria magazine (back in the ’90s) about making violet syrup. It struck me as such a beautiful and charming thing to try to do. And they are beautiful and charming little flowers in a woodland setting, but oh such a nuisance in the yard and garden! Years ago I found one in my yard and had the naivete to transplant it into my flower garden. Since then they’ve become like weeds and we are in constant battle to see who will rule the gardens. Do not be fooled by their innocent looks; they aren’t as shy and charming as they seem. LOL
LikeLike